
Are you tired of the same old fonts on your WordPress site? Want to add a little flair to your blog or business website? Well, you’re in the right place! Changing the font in WordPress can seem daunting, especially if you’re not a tech whiz, but trust me—it’s easier than you might think. Whether you want to create a unique brand identity, improve readability, or simply give your site a fresh look, customizing your fonts is a game-changer. In this article, I’ll walk you through the process of changing fonts in WordPress, no matter what theme you’re using. So grab a cup of coffee, and let’s dive in to make your website not just functional, but beautifully styled too!
Understanding the Importance of Font Choices in Your Website Design
Choosing the right font for your website is not just a matter of aesthetics; it profoundly impacts user experience and brand perception. A well-selected font can enhance readability, evoke emotions, and guide visitors through your content seamlessly. It’s crucial to understand that every font tells a story, and as a website owner, you want your story to be engaging and inviting.
When designing your site, consider the following elements:
- Readability: Ensure your font is easy to read across all devices. Avoid overly decorative fonts for body text.
- Brand Identity: Choose a font that reflects your brand’s personality. A tech company might opt for sleek, modern fonts, while a boutique might choose something more whimsical and playful.
- Hierarchy: Use different font sizes and weights to create a visual hierarchy, guiding your visitors to important information.
WordPress offers a robust way to customize fonts, making it accessible even for users with minimal technical skills. Here’s a simple breakdown of how you can change fonts across all themes:
| Step | Description |
|---|---|
| 1 | Navigate to your WordPress Dashboard. |
| 2 | Go to Appearance, then Customize. |
| 3 | Select Fonts or Typography settings. |
| 4 | Choose your desired font from the dropdown menus. |
| 5 | Save and publish your changes. |
Additionally, many WordPress themes support Google Fonts, which offers a vast library to choose from. You can easily integrate these fonts, adding unique flair to headings, paragraphs, and even buttons. Remember, consistency is key; select a pair of complementary fonts to maintain harmony across your site.
your font choices are a powerful tool in crafting an engaging and effective website. By carefully selecting your typography, you can not only improve aesthetics but also enhance user experience, driving greater interaction and conversions. So take the time to explore your options and let your text do the talking!
Exploring the Built-in Font Options in WordPress
When it comes to personalizing your WordPress site, one of the most effective changes you can make is adjusting the fonts used throughout your content. WordPress provides a range of built-in font options that make it easy to enhance the visual appeal of your website without the need for extensive coding knowledge.
To access the font options, navigate to your WordPress dashboard and head to the Customizer. Here, you’ll find a dedicated section for typography settings, which might vary slightly depending on your theme. However, most modern themes offer some level of customization, including:
- Font Family: Choose from a selection of Google Fonts or system fonts that best fit your brand’s identity.
- Font Size: Adjust the size of your text to improve readability and aesthetics.
- Font Weight: Play with different weights to create emphasis where needed.
- Line Height: A critical element for readability, this setting can affect how your text flows visually.
Many themes also allow you to customize fonts for specific elements such as headings, paragraphs, and buttons. This means you can maintain a hierarchy in your text, guiding visitors through your content effortlessly. If your theme supports it, you can use a live preview feature to see changes in real-time before finalizing them, ensuring you’re happy with the look.
For those who want to dive deeper, consider utilizing a plugin like Easy Google Fonts or Typography. These plugins expand your options and can give you access to even more customization features, allowing you to implement unique font combinations that truly reflect your site’s personality.
| Font Feature | Description |
|---|---|
| Font Style | Options to choose italic, oblique, or normal. |
| Text Transform | Change text to uppercase, lowercase, or capitalize. |
| Letter Spacing | Adjust the spacing between characters for a unique look. |
making use of the built-in font options in WordPress allows you to cultivate a visually appealing and cohesive website. By experimenting with various styles, sizes, and weights, you can tailor your content to resonate with your audience and enhance their overall experience.
Using Custom Fonts to Enhance Your Brand Identity
Choosing the right font for your website is akin to selecting the perfect outfit for a big event; it reflects your personality and can leave a lasting impression. Custom fonts can significantly enhance your brand’s identity by conveying the right tone and evoking the desired emotions from your visitors. Whether you’re aiming for a sleek, modern look or a warm, friendly vibe, the font you choose plays a crucial role in how your brand is perceived.
When it comes to integrating custom fonts into your WordPress site, the process is surprisingly straightforward and works seamlessly with all themes. Here are a few key benefits of using custom fonts:
- Unique Branding: Stand out from the competition by using distinctive typography that aligns with your brand’s personality.
- Improved Readability: Select fonts that enhance readability, ensuring your content is easy to digest and engaging.
- Emotional Connection: Different fonts can evoke different emotions; choose wisely to connect with your audience on a deeper level.
To implement custom fonts, you can use plugins or directly add CSS styles. Many plugins, like Google Fonts and Typekit, provide an extensive library to choose from. For a more hands-on approach, you can embed font links in your website’s section, followed by CSS rules to apply the fonts to specific elements. Here’s a simple example:
body {
    font-family: 'Open Sans', sans-serif;
}
h1, h2, h3 {
    font-family: 'Montserrat', sans-serif;
}
It’s important to ensure that the fonts you choose also maintain performance. A well-optimized website with carefully selected fonts not only enhances aesthetics but also improves loading times. To make this easier, consider using a table to compare different font options:
| Font Name | Style | Use Case |
|---|---|---|
| Open Sans | Sans-serif | Body Text |
| Montserrat | Sans-serif | Headings |
| Roboto | Sans-serif | General Content |
Incorporating custom fonts is more than just a design choice; it’s a strategic move to enhance your brand identity. By ensuring your typography aligns with your brand values, you create a cohesive and memorable experience for your visitors that resonates long after they leave your site.
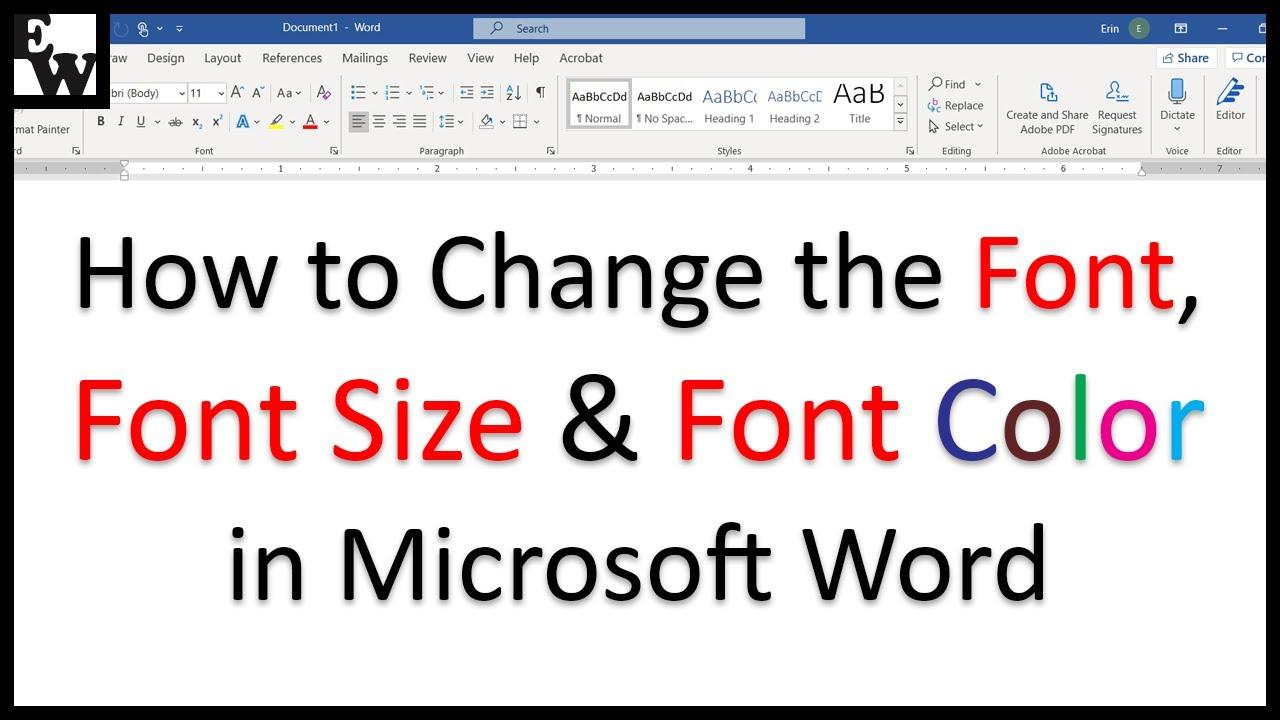
Step-by-Step Guide to Changing Fonts Using the WordPress Customizer
Changing fonts in WordPress using the Customizer can be a breeze, allowing you to personalize your site’s look and feel effortlessly. Here’s how to navigate through the process and make your text stand out.
To get started, follow these simple steps:
- Access the Customizer: Log into your WordPress dashboard and navigate to Appearance > Customize. This opens the WordPress Customizer where you can make adjustments in real-time.
- Find Typography Settings: Look for a section labeled Typography, Fonts, or something similar. Depending on your theme, this may be directly accessible or found under a sub-menu.
- Select Your Font: Within the Typography settings, you should see options to change your font for various elements like headings, body text, and buttons. Click on the dropdown menu to explore available font choices.
- Customize Font Style: After selecting a font, adjust the size, weight, and style to match your vision. This can enhance readability and give your site a unique touch.
- Preview Changes: Before finalizing, use the preview pane to see how your new fonts look across different devices. Ensure they complement your overall design.
For more customization, consider the hierarchical structure of your text. Here’s a quick reference table to help you decide which fonts work best for which elements:
| Element | Recommended Font Styles |
|---|---|
| Headings (H1, H2, H3) | Bold Sans-serif (e.g., Roboto, Montserrat) |
| Body Text | Easy-to-read Serif or Sans-serif (e.g., Open Sans, Georgia) |
| Buttons | Bold and Clear Sans-serif (e.g., Lato, Poppins) |
| Quotes | Stylish Serif (e.g., Playfair Display) |
Once satisfied, don’t forget to click Publish to apply your changes site-wide. With just a few clicks, you’ve transformed your site’s typography, making it more engaging and visually appealing to your audience.

Utilizing Plugins for More Font Flexibility and Options
When it comes to customizing fonts on your WordPress site, using plugins can unlock a world of options. These tools not only simplify the process but also provide a range of font choices that can elevate your website’s aesthetic appeal. Whether you’re looking to match your branding or create a unique look, the right plugins can help you achieve that effortlessly.
Here are some popular plugins to consider for enhancing your font flexibility:
- Google Fonts Typography: This plugin allows you to easily integrate Google Fonts into your WordPress theme, providing access to hundreds of typefaces.
- Easy Google Fonts: With this user-friendly option, you can customize your font settings directly from the WordPress Customizer without any coding knowledge.
- WP Google Fonts: Similar to the previous plugins, this one allows you to add custom Google Fonts to your theme’s stylesheet, giving you full control over font styles.
In addition to these, many premium themes come bundled with built-in font options, but plugins can fill in the gaps. They allow you to override theme defaults or add fonts that are not included by default. A great way to see how different fonts will look in your design is to use the live preview feature offered by many of these plugins. This lets you make adjustments in real-time.
When selecting a plugin, consider the following factors:
| Plugin Name | Features | Best For |
|---|---|---|
| Google Fonts Typography | Easy integration, vast font library | Users seeking simplicity |
| Easy Google Fonts | Customizable via WordPress Customizer | Non-coders |
| WP Google Fonts | Style control via stylesheet | Developers |
Choosing the right plugin can significantly enhance your site’s typography without the need for complex coding. With just a few clicks, you can transform your website’s look and ensure that your fonts are not only beautiful but also contribute to a better user experience. Remember, the key is to find a balance between aesthetics and readability, ensuring your content is engaging and easy to consume.
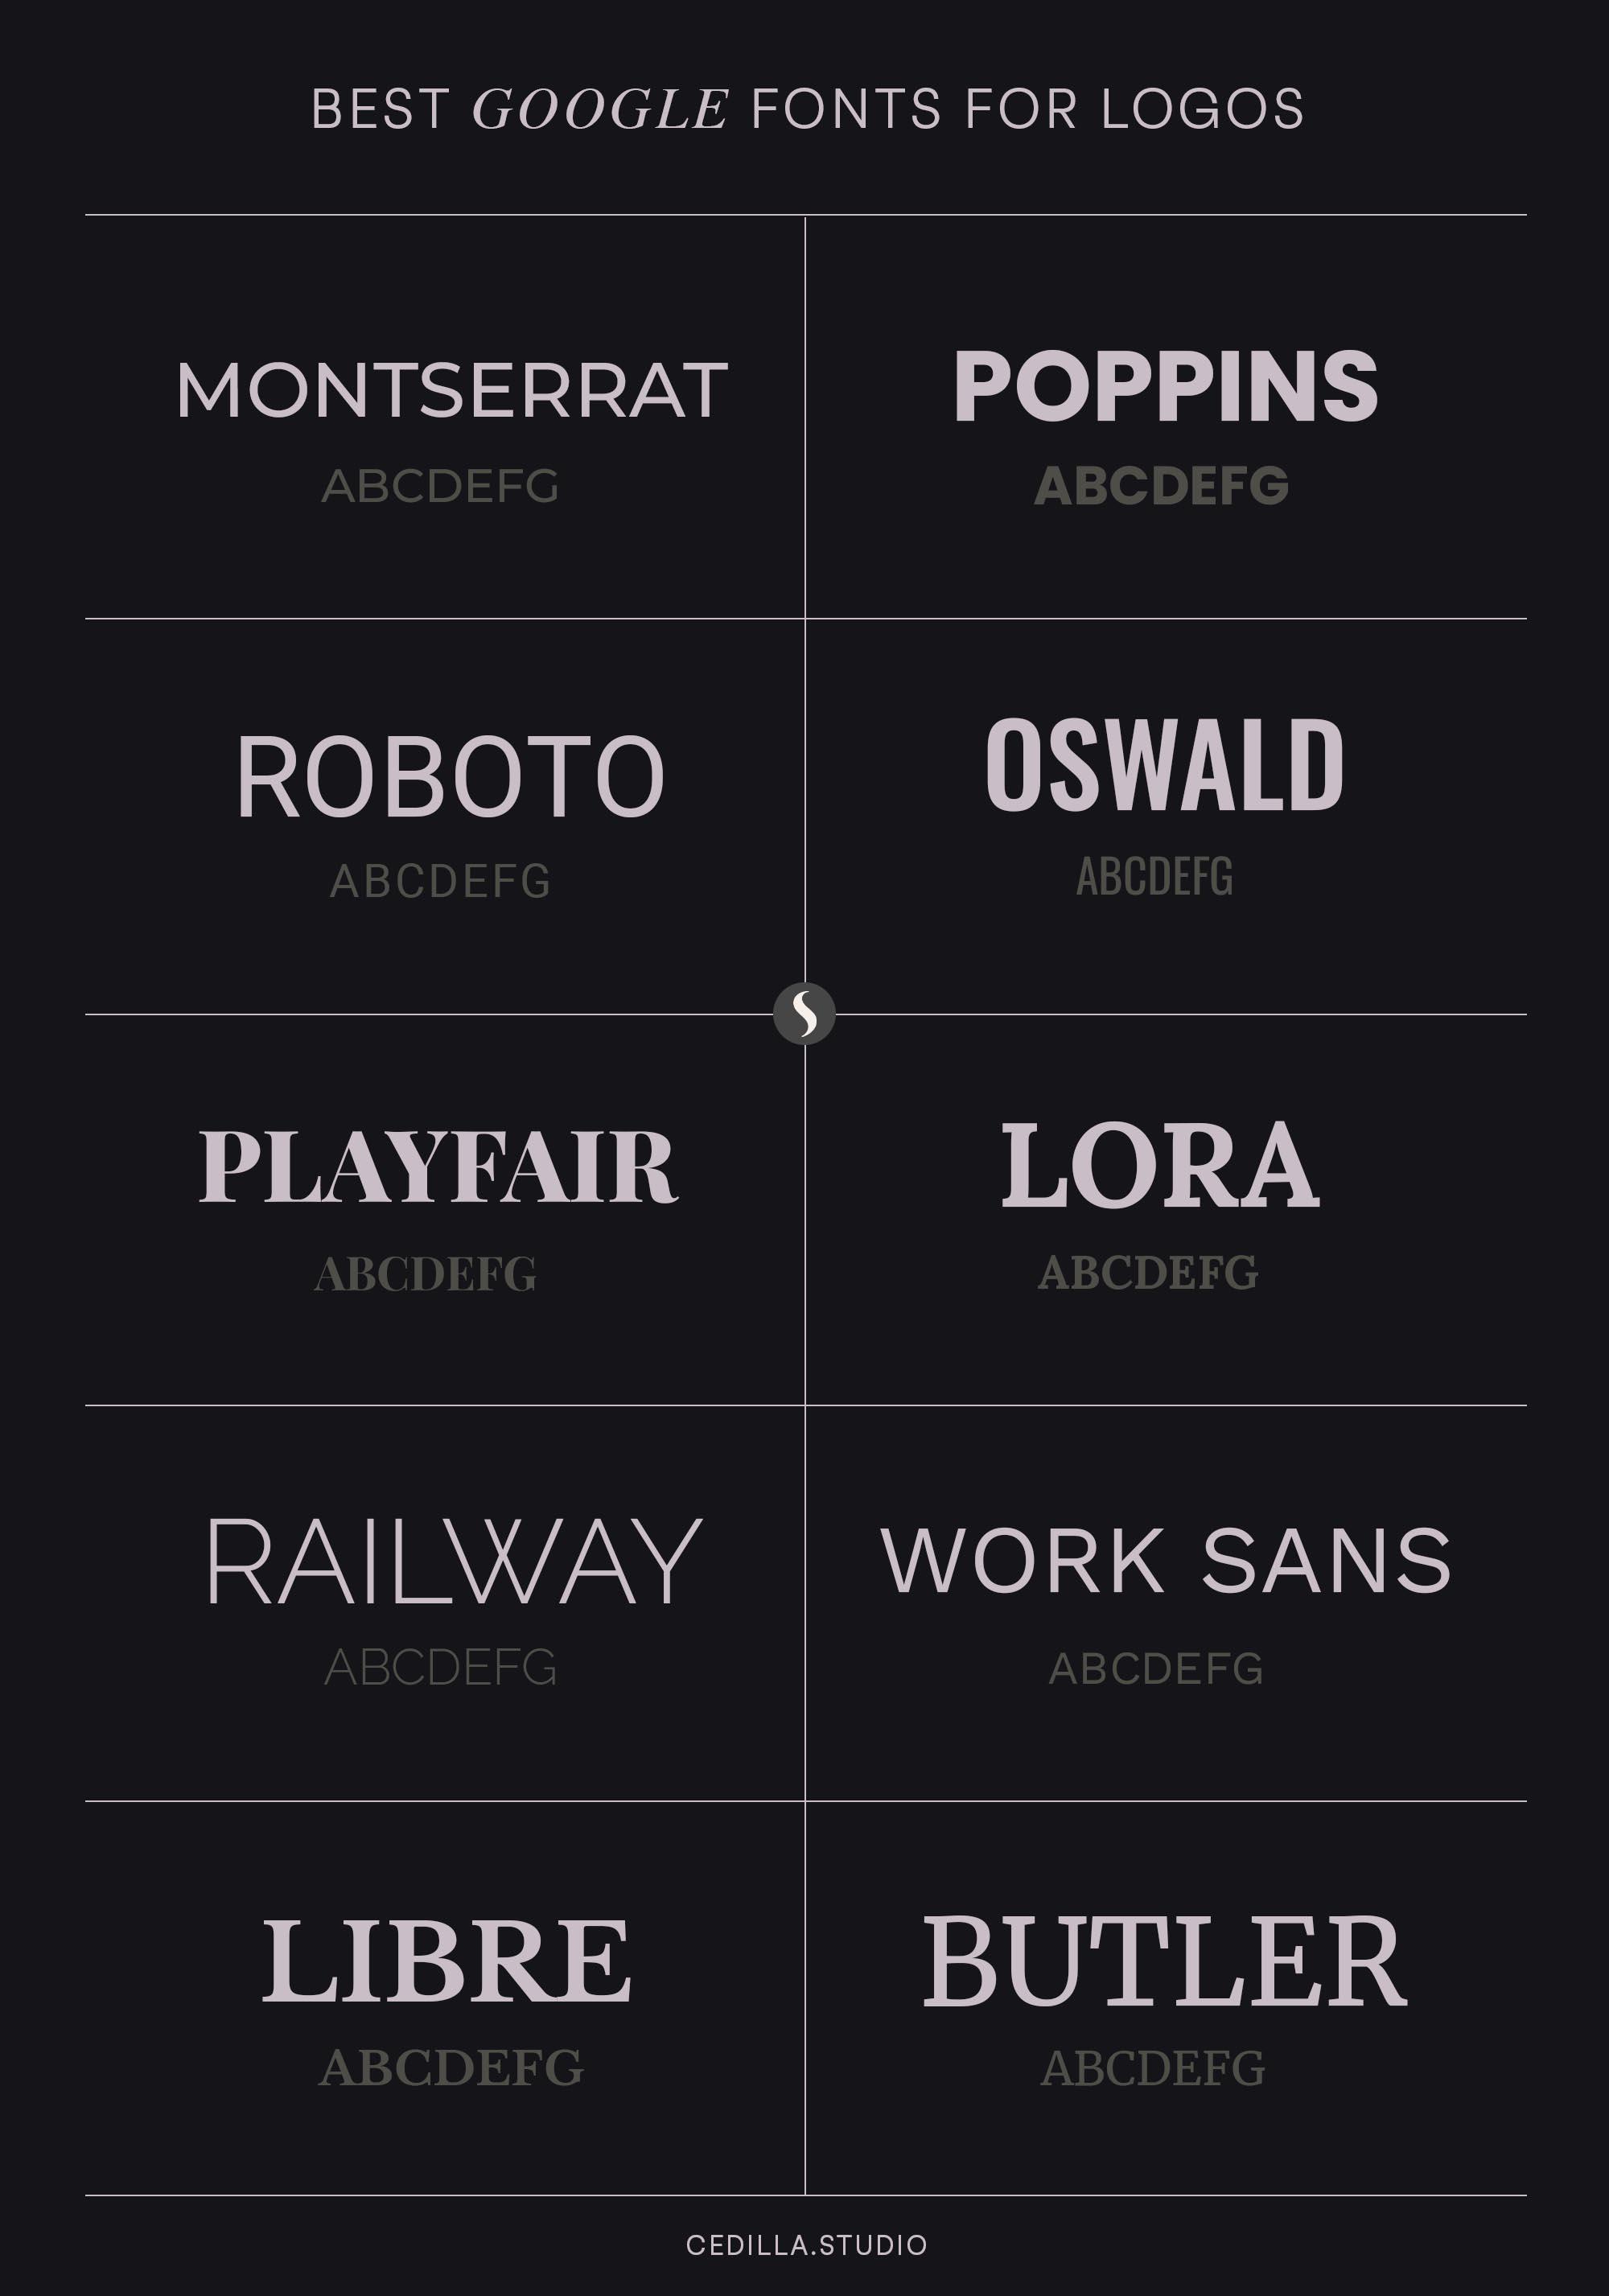
Incorporating Google Fonts into Your WordPress Site
Integrating Google Fonts into your WordPress site can be a game-changer for your overall aesthetics and readability. With thousands of font options available, you can easily find the perfect style that resonates with your brand. Here’s how to seamlessly incorporate Google Fonts into your existing setup.
First, head over to the Google Fonts website and browse through their extensive library. You can filter fonts by categories such as serif, sans-serif, and display, allowing you to find exactly what you need. Once you’ve chosen your desired font, click on it, and you’ll see an option to customize styles. Select the weights and styles you want to include in your WordPress site.
Next, Google Fonts will provide you with a link that you can embed in your WordPress theme. To do this, log in to your WordPress dashboard and navigate to Appearance > Theme Editor. Find your header.php file and paste the link inside the section. For example:
Once the link is in place, the next step is to apply your new font styles. This is where some CSS magic comes into play! You can add custom styles to your theme’s style.css file or through the WordPress Customizer under Appearance > Customize > Additional CSS. Here’s a simple example:
body {
    font-family: 'Roboto', sans-serif;
}
h1, h2, h3 {
    font-family: 'Roboto', sans-serif;
    font-weight: 700;
}
If you’re not comfortable modifying CSS directly, there are also plugins available that make adding Google Fonts a breeze. Some popular options include:
- Easy Google Fonts – Offers a user-friendly interface to add fonts without touching code.
- WP Google Fonts – Allows you to integrate Google Fonts and customize CSS from the plugin settings.
- Custom Fonts – Provides a simple way to manage and add fonts to your theme.
With these steps, you can elevate the typography of your WordPress site in just a few minutes. Remember, selecting the right font not only enhances readability but also strengthens your brand identity. Why settle for standard fonts when you can bring your site to life with unique typography?
Styling Fonts with CSS: A Simple Approach for Beginners
Changing fonts in WordPress can be a fun and creative way to enhance the look and feel of your website. With just a few simple CSS tweaks, you can give your text a fresh and modern appearance that aligns with your brand’s identity. Let’s dive into how you can easily change fonts across your site, ensuring your content is not only readable but visually appealing.
To begin, you’ll want to access the Custom CSS section of your WordPress theme. This is usually found under Appearance > Customize > Additional CSS. Here, you can input the CSS rules that will modify your font styles. Here are a few basic rules to get you started:
- Change Font Family: You can specify the font you want your text to use. For example:
p {
    font-family: 'Arial', sans-serif;
}- Adjust Font Size: Make your text larger or smaller to improve readability:
h1 {
    font-size: 2.5em;
}- Style with Font Weight: Bold your headings or specific text to draw attention:
h2 {
    font-weight: bold;
}
In addition to these simple styles, you can also use Google Fonts to further enhance your typography. To do this, visit the Google Fonts website, select a font, and copy the provided link to your theme’s header. After that, simply use the CSS rules to apply the font, just like in the examples above.
For those who want a quick reference, here’s a simple table summarizing different CSS properties you might find useful:
| CSS Property | Description | Example |
|---|---|---|
| font-family | Sets the font type | font-family: 'Helvetica', sans-serif; |
| font-size | Sets the text size | font-size: 16px; |
| font-weight | Sets the thickness of the font | font-weight: 700; |
| line-height | Sets the space between lines | line-height: 1.5; |
By mastering these basic CSS techniques, you can take full control of your WordPress site’s typography. Remember, the right font can significantly impact how your message is conveyed, so take your time to experiment with different styles until you find the perfect fit!
Testing and Previewing Your Font Changes Before Publishing
Once you’ve made font changes in your WordPress site, it’s crucial to test and preview those adjustments before hitting the publish button. This step ensures that your text not only looks great but also maintains readability across different devices and screen sizes. Here are some tips to effectively preview your font changes:
- Use the WordPress Customizer: Navigate to Appearance > Customize. Here, you can see a real-time view of your site with the new font settings in place.
- Check Responsiveness: Resize your browser window or use the device preview options in the Customizer to see how your fonts appear on mobile, tablet, and desktop screens.
- Adjust Line Height and Letter Spacing: Ensure your text is legible by experimenting with these settings. Too tight can look cluttered; too loose can feel disjointed.
Another effective method is to create a staging site. Many hosting providers offer this feature, allowing you to make changes without affecting the live site. You can experiment freely here, ensuring that everything works flawlessly before making it public.
For a more hands-on approach, consider using the Preview Changes button in the WordPress editor. This will let you see how your font changes will look within the context of your recent posts and pages:
| Font Style | Readability Score | Device Compatibility |
|---|---|---|
| Serif | 75/100 | All Devices |
| Sans-serif | 85/100 | All Devices |
| Monospace | 70/100 | Desktop Only |
don’t hesitate to gather feedback from your peers or audience. A fresh set of eyes can provide valuable insights that you might have overlooked. By taking these steps, you can ensure that your font changes not only enhance the aesthetic appeal of your site but also contribute positively to the user experience.
Ensuring Font Accessibility for All Users
When it comes to web design, ensuring that your font choices cater to all users is crucial. A well-chosen font not only enhances your site’s aesthetic appeal but also significantly impacts readability, accessibility, and user experience. Here are some guidelines to consider when selecting fonts for your WordPress site:
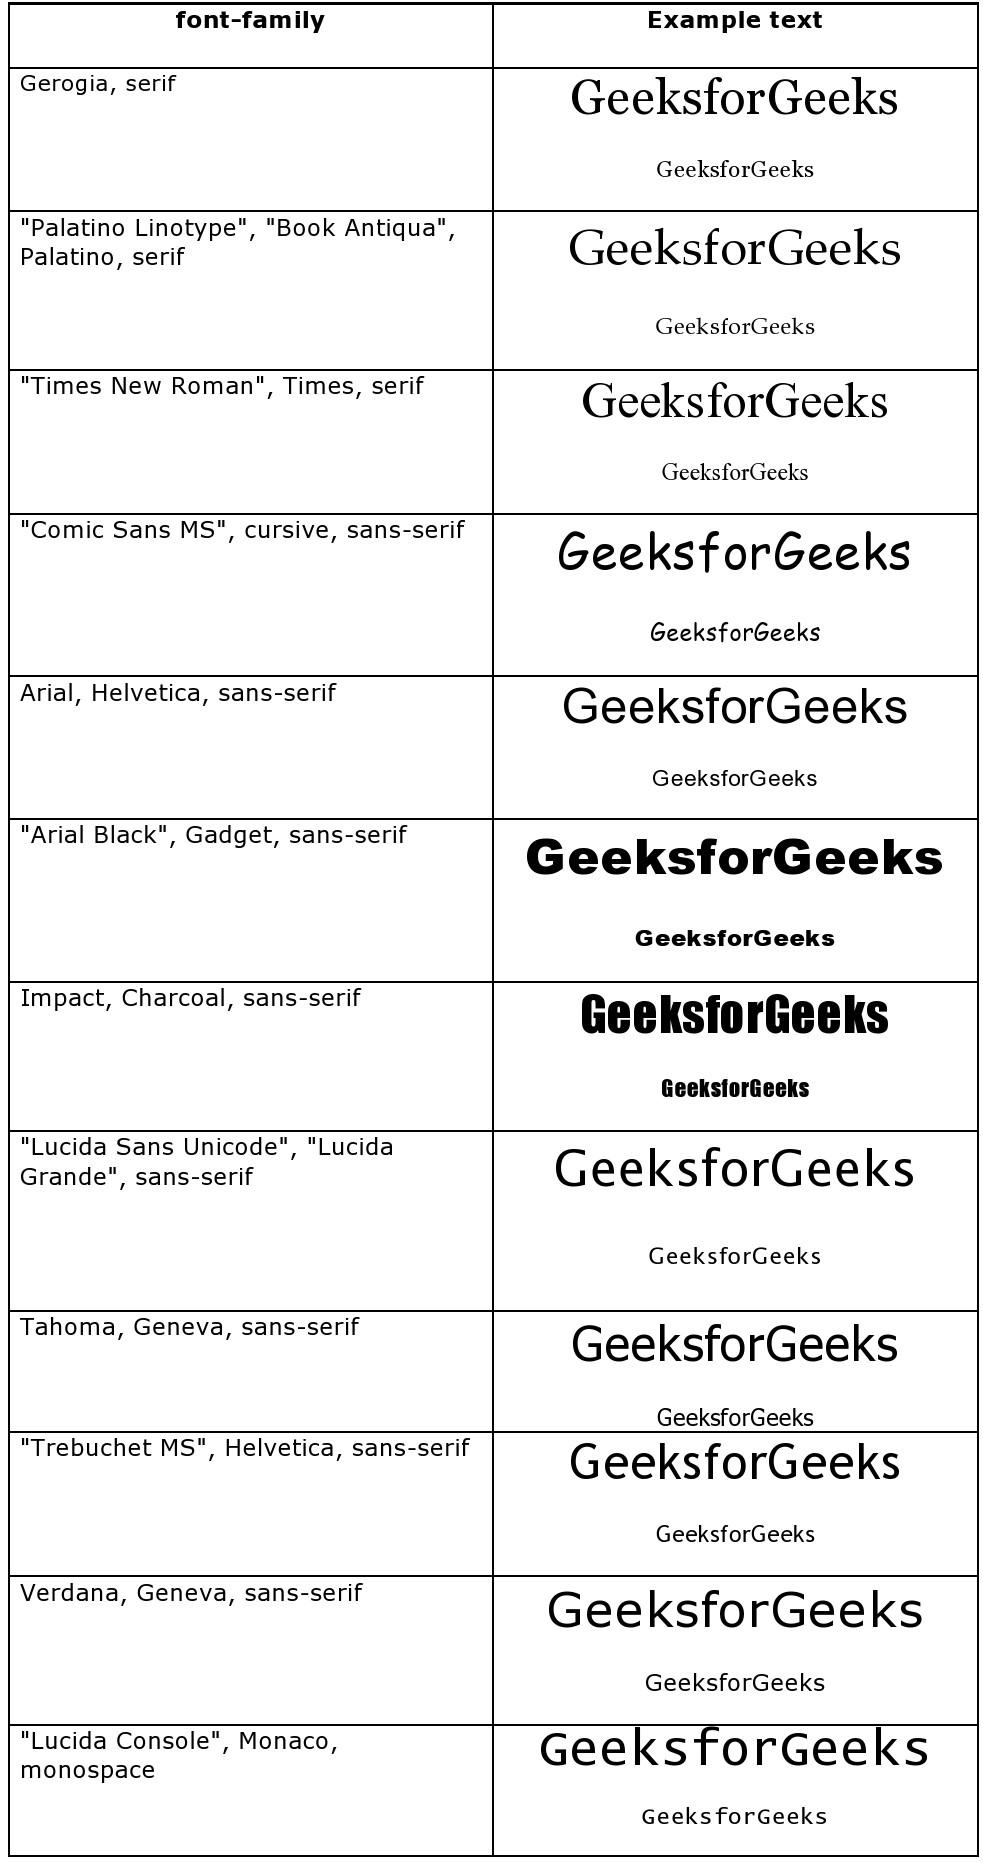
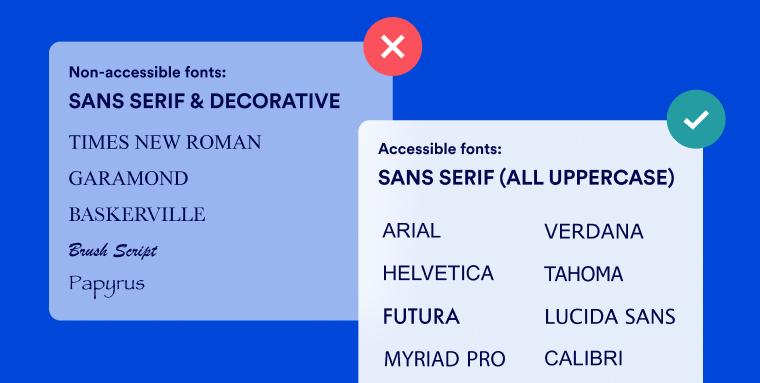
- Use Legible Fonts: Opt for fonts that are easy to read across various devices. Sans-serif fonts like Arial, Helvetica, and Open Sans are often preferred for online content due to their clarity.
- Consider Font Size: A minimum font size of 16px is generally recommended to ensure readability. Remember, you can adjust this in your WordPress theme’s customizer.
- Color Contrast: Ensure that there is sufficient contrast between the font color and the background. A good rule of thumb is to use a contrast ratio of at least 4.5:1 for regular text.
- Line Spacing: Adjust line height to improve readability. A line height of 1.5 times the font size can help create a pleasant reading experience.
Another important aspect is to support various user preferences and needs. Incorporating options for users to adjust font sizes or styles can greatly enhance accessibility. Consider implementing the following features:
- Text Resizing Options: Adding a simple CSS class that allows users to increase or decrease font size can make your site more user-friendly.
- Customizable Fonts: Using plugins that let users select different fonts based on their preferences can also promote inclusivity.
- Alternative Text: For decorative fonts, ensure that they’re used in conjunction with proper alt text for images, helping visually impaired users understand your content better.
To visualize how different font choices can affect readability, consider the following table showcasing popular fonts along with their ideal uses:
| Font | Best Used For |
|---|---|
| Arial | General Content |
| Georgia | Blog Posts |
| Roboto | Modern Websites |
| Times New Roman | Formal Documents |
Ultimately, the goal is to create a welcoming environment for all visitors. By prioritizing font accessibility, you not only comply with web accessibility standards but also broaden your audience and enhance user satisfaction. Take the time to evaluate your font choices, and don’t hesitate to make adjustments to ensure that everyone, regardless of their abilities, can engage with your content easily.

Final Tips to Maintain a Cohesive Look Across Your Site
Maintaining a cohesive look across your website is essential for creating a professional and user-friendly experience. Here are some effective strategies to ensure your font choices and overall design harmonize seamlessly:
- Stick to a Limited Font Palette: Choose two to three fonts that complement each other—one for headings and another for body text. This simplicity helps in maintaining a clean look.
- Consistent Sizing: Use a consistent hierarchy for font sizes. For example, if you set your H1 to 32px, ensure your H2 is always 24px and your body text is 16px. This creates a visual rhythm that guides the reader’s eye.
- Pair Fonts Wisely: When pairing fonts, consider using a serif font for headings and a sans-serif for body text, or vice versa. This contrast can enhance readability while still providing a modern feel.
- Color Consistency: Ensure your font colors align with your overall color scheme. For instance, if your primary color is blue, consider using shades of blue for headings and black for body text to maintain a cohesive look.
Implementing these strategies doesn’t have to be complicated. Here’s an example of how you might structure your typography choices using a simple table:
| Element | Font Family | Font Size | Font Color |
|---|---|---|---|
| Heading 1 | Montserrat | 32px | #003366 |
| Heading 2 | Roboto | 24px | #003366 |
| Body Text | Arial | 16px | #333333 |
Lastly, always test your site’s readability across different devices. What looks great on a desktop may not translate well on a mobile screen. Responsive design is key, and ensuring your typography adapts to various screen sizes will contribute to a more unified experience across your site. Remember, the goal is to create an inviting atmosphere that keeps visitors engaged and makes navigation effortless.
Frequently Asked Questions (FAQ)
Sure! Here’s a Q&A section for an article titled “How to Change Font in WordPress (Works in All Themes)” that maintains a conversational and persuasive tone.
Q&A: Changing Fonts in WordPress
Q: Why should I change the font on my WordPress site?
A: Great question! Your site’s font plays a crucial role in its overall look and feel. A well-chosen font can enhance readability, convey your brand’s personality, and make your content more engaging. If you want visitors to stay longer and connect with your message, a stylish font is a game-changer!
Q: Is it really possible to change the font in any WordPress theme?
A: Absolutely! One of the best things about WordPress is its flexibility. Whether you’re using a free theme or a premium one, there are simple ways to change fonts that work consistently across all themes. You don’t need to be a coding wizard—trust me!
Q: What if I don’t know anything about CSS? Can I still change my font?
A: Yes, you can! While knowing CSS can give you more control, it’s not a requirement for changing fonts. Many WordPress themes come with built-in options in the Customizer or theme settings that let you choose fonts easily. Plus, there are fantastic plugins that make it a breeze!
Q: What tools or plugins do you recommend for changing fonts?
A: I love using plugins like “Easy Google Fonts” or “Fontsy.” These tools allow you to browse and apply a wide range of Google Fonts directly from your WordPress dashboard—no coding required! You can preview changes in real time, which is super helpful.
Q: Can changing my font impact my website’s performance?
A: That’s a valid concern! However, if you choose fonts wisely and optimize them, you won’t notice a significant impact. Stick with web-safe fonts or well-optimized web fonts, and your site should run smoothly while looking fantastic.
Q: What font styles should I consider for my website?
A: Aim for fonts that reflect your brand’s identity. For example, if you have a professional site, consider clean, sans-serif fonts like Arial or Helvetica. If your site is more creative, you might explore unique script fonts. Just remember to keep readability in mind!
Q: How do I make sure my new font looks good on mobile devices?
A: Mobile-friendliness is key! Most modern WordPress themes are responsive, meaning they’ll adjust to different screen sizes. When selecting your font, check if it’s legible at smaller sizes. You can also use tools like Google’s Mobile-Friendly Test to ensure everything looks great.
Q: I want to change my font, but I’m afraid I’ll mess something up. What should I do?
A: No worries—WordPress has your back! Before you make changes, just back up your site. If you’re using a theme customizer or a plugin, you can always revert back if you don’t like the outcome. Experimenting is part of the fun, so dive in!
Q: Where can I find additional resources for learning about font choices in WordPress?
A: There are plenty of resources out there! Check out the WordPress Codex, blog tutorials, or even YouTube videos for step-by-step guides. Communities like WordPress forums and Facebook groups are also great for getting advice and inspiration.
Feel free to adapt or expand upon this Q&A section to best fit your article’s style and target audience!
In Conclusion
And there you have it! Changing the font in WordPress is not just a technical task; it’s an opportunity to express your brand’s personality and improve user experience. Whether you want to make your headlines pop or ensure your body text is easily readable, customizing your font is a simple yet impactful way to elevate your site.
Remember, having the right font can make your content more engaging and help you connect with your audience on a deeper level. So, don’t hesitate to experiment with different styles until you find the perfect match for your site.
If you ever find yourself stuck or have questions along the way, the WordPress community is filled with helpful resources and friendly folks ready to lend a hand. Now that you know how to change fonts across any theme, it’s time to unleash your creativity and give your website that unique flair it deserves!
Happy customizing! And don’t forget to share your stunning results with us!