Are you looking to enhance your WordPress website’s user experience without overwhelming your visitors? If so, you’ve come to the right place! Tooltips are a fantastic way to provide additional information without cluttering your content. Imagine being able to offer your readers extra context or helpful tips just by hovering over a word or phrase. Sounds great, right? In this article, we’ll explore three effective methods to add tooltips to your WordPress site—whether you prefer using a free plugin or diving into some custom CSS. No matter your skill level, we’ve got you covered! So, let’s transform your website into a more informative and engaging space for your audience. Ready to get started? Let’s dive in!
Understanding WordPress Tooltips and Their Benefits
Tooltips are an incredibly effective way to enhance user experience on your WordPress site. They provide valuable information without cluttering the interface, allowing visitors to access additional content when they hover over or click on specific elements. This neat feature not only helps clarify complex topics but also keeps your website tidy and organized.
One of the primary benefits of using tooltips is their ability to improve user engagement. By offering definitions, explanations, or tips directly within the content, you can reduce bounce rates as users find the information they need without having to leave the page. This encourages them to explore more of your site, ultimately driving up the time spent on it.
Another advantage is the potential for increased conversions. Imagine a visitor hovering over a product image and receiving a tooltip with a special offer or important product details. This could effectively nudge them towards making a purchase. By strategically placing tooltips throughout your site, you can highlight key features, promotional content, or even call-to-action prompts that lead to higher conversion rates.
Moreover, tooltips are excellent for enhancing accessibility. They can provide additional context for visitors who might need extra help understanding specific jargon or concepts. When implemented correctly, tooltips can make your content more inclusive, catering to a broader audience. Consider the following benefits of tooltips:
- Clutter-free Design: Maintain a clean layout while delivering extra information.
- Boosted SEO: Engaging content with tooltips can improve dwell time and lower bounce rates.
- Mobile-Friendly: Tooltips can be adapted for touch devices, allowing easy access to information.
To visualize how tooltips can integrate seamlessly into your content, consider a simple table showcasing potential uses:
| Element | Tooltip Content |
|---|---|
| Product Image | Click for Discount Information! |
| Definition Term | What is SEO? Click for details. |
| Button Label | Join our Newsletter for Updates! |
tooltips are more than just a trendy addition; they are powerful tools that enhance usability, engagement, and accessibility on your WordPress site. By leveraging tooltips effectively, you can provide users with a rich, informative experience that keeps them coming back for more.
Exploring Free Plugins for Effortless Tooltip Creation
Creating tooltips on your WordPress site can significantly enhance user experience, providing additional context without cluttering your content. Thankfully, there are several free plugins available that simplify the process, allowing you to add these helpful hints with ease. Let’s dive into some of the best options to help you get started.
- WP Tooltips: This intuitive plugin lets you create tooltips through a simple shortcode system. Just highlight the text you want to have a tooltip and wrap it in shortcode tags. It’s perfect for those who prefer minimal setup and immediate results.
- Easy Tooltip: With Easy Tooltip, you can not only create tooltips but also customize their appearance using a variety of themes and styles. This plugin integrates seamlessly with any WordPress theme, giving your tooltips a polished look that aligns with your site’s design.
- Tooltips Pro: This advanced plugin offers a drag-and-drop interface to help you create complex tooltip designs without writing a single line of code. You can add images, videos, and even custom HTML, making it an excellent choice for more intricate explanations.
Each of these plugins offers unique features and capabilities. To help you compare, here’s a quick overview:
| Plugin Name | Features | Customization Options |
|---|---|---|
| WP Tooltips | Simple shortcode creation | Minimal |
| Easy Tooltip | Multiple themes & styles | Moderate |
| Tooltips Pro | Drag-and-drop interface | Extensive |
Using these plugins not only saves time but also ensures that your tooltips are both functional and visually appealing. As you explore these options, consider your specific needs: Are you looking for a quick solution, or do you want something more customizable? With a little experimentation, you can find the perfect tool that enhances your content and engages your visitors.
Don’t forget to test your tooltips on various devices to ensure they display correctly across all screen sizes. This attention to detail will help maintain a professional appearance and keep your audience engaged. With the right plugin, tooltip creation can be a breeze—empowering you to provide more value through your content!
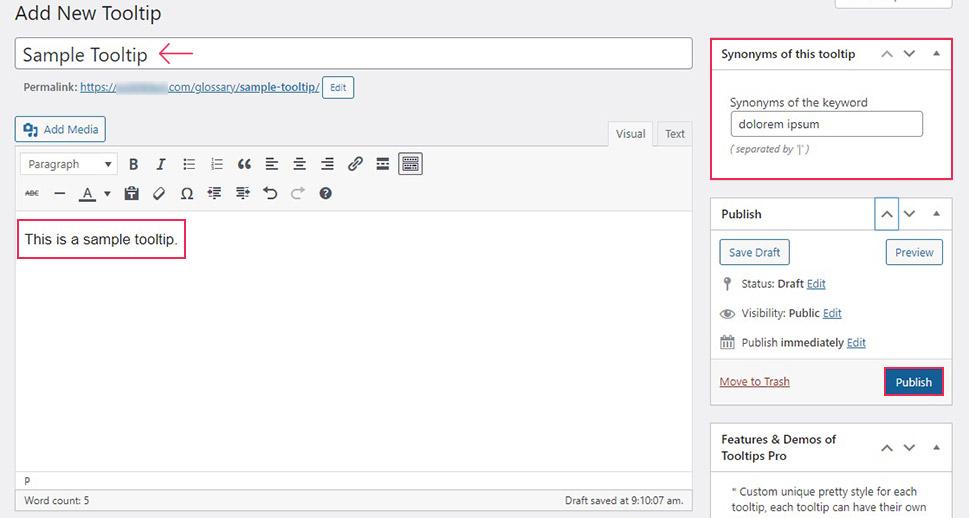
Step-by-Step Guide to Adding Tooltips with a Plugin
Adding tooltips to your WordPress site can significantly enhance user experience by providing additional information without cluttering your content. With the help of a plugin, this process becomes straightforward and efficient. Here’s a step-by-step guide to get you started.
First, choose a tooltip plugin that fits your needs. Some popular options include:
- WP Tooltips – A user-friendly option with customizable styles.
- Simple Tooltips – Lightweight and efficient, perfect for quick implementations.
- Easy Tooltip – Offers a range of display options and is highly customizable.
Once you’ve selected a plugin, follow these steps to install and configure it:
- Go to your WordPress dashboard and navigate to Plugins > Add New.
- Search for the chosen plugin by name.
- Click on Install Now and then Activate it after installation.
After activation, head to the plugin’s settings page, which is usually located under the Settings or Tools menu. Here, you can customize your tooltip’s appearance and behavior:
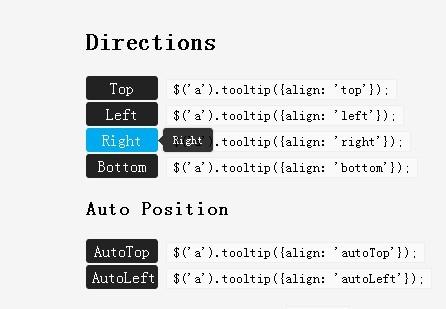
- Set the tooltip position (top, bottom, left, right).
- Choose colors and fonts to match your site’s branding.
- Adjust the delay before the tooltip appears or disappears.
Now, to add tooltips to your content, you will typically use a shortcode or a specific HTML tag. Here’s a general example:
[tooltip text="This is a tooltip!"]Hover over me![/tooltip]don’t forget to test your tooltips across different devices and browsers to ensure they work seamlessly for all users. You can make adjustments in the plugin settings as necessary.
Customizing Tooltips with CSS for a Unique Look
Customizing tooltips with CSS can transform a standard user experience into an engaging interaction. By tailoring the appearance of tooltips, you not only enhance the aesthetic appeal but also improve the usability of your WordPress site. Here are some CSS techniques you can implement to create tooltips that stand out.
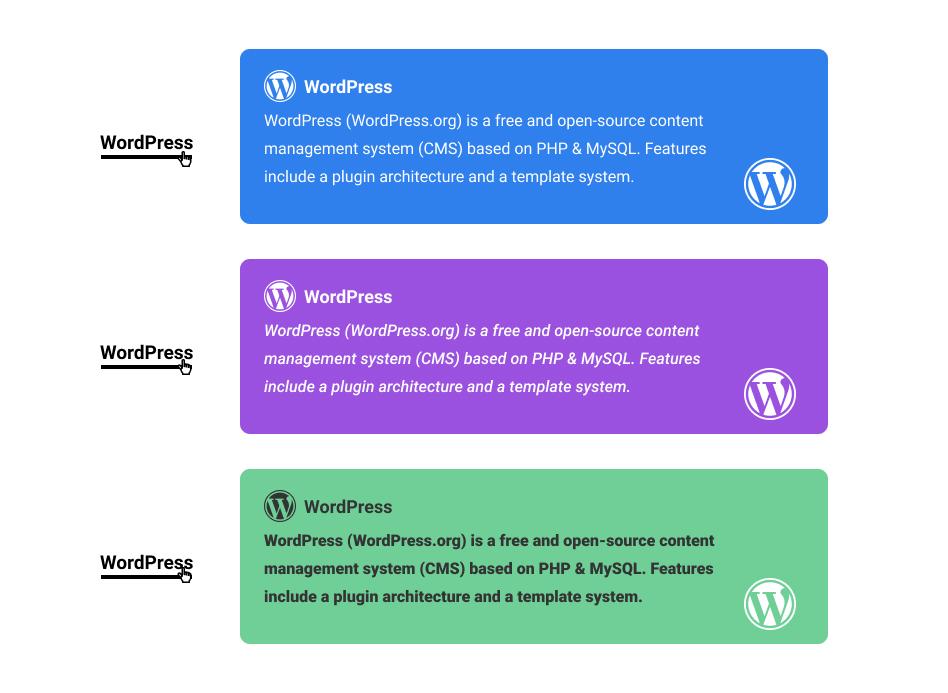
- Change Tooltip Colors: Use CSS to adjust the background color and text color of your tooltips. This can help them blend seamlessly with your site’s overall color scheme.
- Add Subtle Shadows: A soft shadow can give depth to your tooltips, making them look more three-dimensional and visually appealing.
- Modify Font Styles: Experiment with different font families and sizes to ensure that the tooltip text is legible and fits your brand’s voice.
Here’s a simple CSS snippet to get you started:
.tooltip {
    position: relative;
    display: inline-block;
    cursor: pointer;
}

.tooltip .tooltiptext {
    visibility: hidden;
    width: 120px;
    background-color: #555;
    color: #fff;
    text-align: center;
    border-radius: 5px;
    padding: 5px 0;
    position: absolute;
    z-index: 1;
    bottom: 125%; /* Position above the tooltip */
    left: 50%;
    margin-left: -60px;
    opacity: 0;
    transition: opacity 0.3s;
}

.tooltip:hover .tooltiptext {
    visibility: visible;
    opacity: 1;
}
To further enhance user experience, you may want to implement animations for your tooltips. Adding a fade-in effect can make your tooltips feel more dynamic. You can achieve this with simple CSS transitions:
| Animation | CSS Property |
|---|---|
| Fade In | transition: opacity 0.5s ease-in; |
| Slide Up | transform: translateY(-10px); transition: transform 0.3s; |
Incorporating these custom styles into your WordPress tooltips not only makes them more visually appealing but also delivers a more polished and professional look to your site. Remember, the goal is to create a tooltip that not only conveys information but does so in a way that enhances your overall design.
Comparing Plugin Options: Which is Right for You
When choosing the best method to add tooltips to your WordPress site, it’s essential to evaluate the various plugin options available and see which fits your specific needs. Let’s break it down into a few key aspects.
Ease of Use:
For those who are not tech-savvy, user-friendly plugins can save you time and frustration. Many tooltip plugins come with intuitive interfaces that allow you to create and customize tooltips with just a few clicks. A popular choice is WP Tooltips, which offers straightforward setup and plenty of customization options, making it perfect for beginners. On the other hand, if you have coding experience or want more control over the styling, using CSS could be your best bet.
Customization Flexibility:
Plugins often come with built-in themes and styles, allowing you to change the appearance of your tooltips quickly. However, if your site has a particular aesthetic, relying on CSS gives you unparalleled freedom. You can design your tooltips from scratch, ensuring they blend perfectly with your existing theme. Consider your design goals carefully. If you want something unique and tailored, CSS may be the route you want to take.
Performance Impact:
Using plugins can sometimes slow down your website, especially if there are multiple plugins installed. This is where CSS shines, as it typically has a negligible impact on site speed. To help you compare the performance of different tooltip methods, check out the following table:
| Method | Ease of Use | Customization | Performance Impact |
|---|---|---|---|
| Plugin | High | Moderate | Possible Slowdown |
| CSS | Moderate | High | Minimal |
Support and Updates:
Another factor to consider is the level of support and ongoing updates. Established plugins often have dedicated support teams and frequent updates, ensuring compatibility with the latest WordPress versions. This can be crucial for maintaining the security and functionality of your tooltips. On the other hand, using CSS means you are responsible for maintaining your code, which may require more effort if you encounter issues.
each option has its strengths and potential drawbacks. If you’re looking for simplicity and support, a plugin may be the way to go. For those who want complete creative control and minimal performance impact, CSS is the clear winner. Think about your specific requirements and choose the method that aligns best with your goals.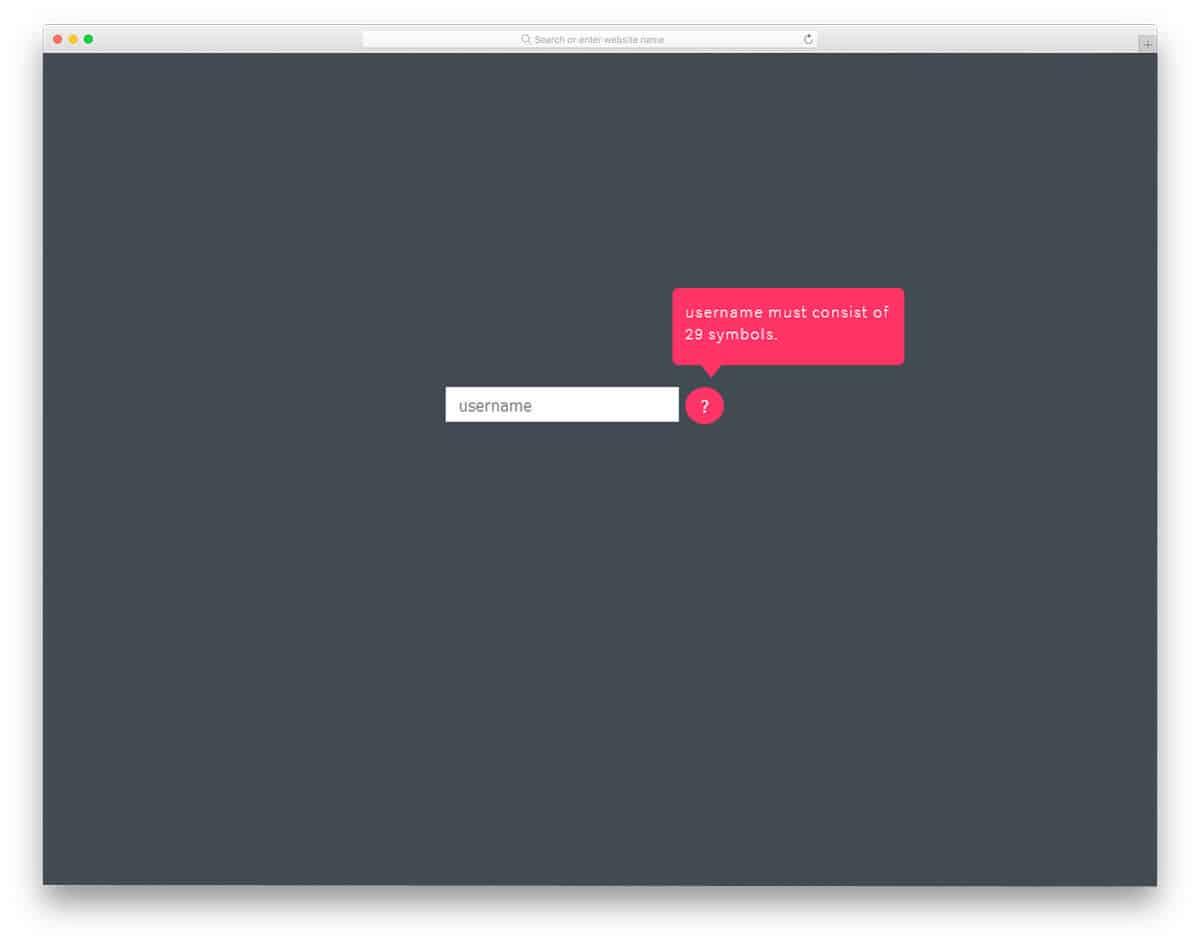
Mastering CSS for Advanced Tooltip Design
Advanced Tooltip Design Techniques
When it comes to enhancing user experience on your WordPress site, tooltips are an underrated gem. They offer vital information without cluttering the interface, and mastering CSS can elevate your tooltip design from basic to breathtaking. Here are some techniques you can implement:
- Custom Shapes: Why settle for a boxy tooltip? Use CSS clip-path to create unique shapes that match your site’s aesthetic.
- Transitions and Animations: Add a touch of flair with CSS animations. Consider using
transitionfor smooth appearances and disappearances. - Shadow Effects: Make your tooltips pop off the page with shadows. Use
box-shadowto create depth, making them more visually appealing.
Here’s an example of a tooltip styled with CSS:
.tooltip {
    position: relative;
    display: inline-block;
}
.tooltip .tooltiptext {
    visibility: hidden;
    width: 120px;
    background-color: black;
    color: #fff;
    text-align: center;
    border-radius: 5px;
    padding: 5px;
    position: absolute;
    z-index: 1;
    bottom: 125%; /* Adjust as needed */
    left: 50%;
    margin-left: -60px;
    opacity: 0;
    transition: opacity 0.5s;
}
.tooltip:hover .tooltiptext {
    visibility: visible;
    opacity: 1;
}
For a more structured approach, consider using a table to compare styles or features of different tooltip designs. Here’s a simple layout to help visualize your options:
| Feature | Basic Tooltip | Styled Tooltip | Animated Tooltip |
|---|---|---|---|
| Shape | Rectangle | Custom Shape | Rectangle with Animation |
| Shadow | No | Yes | Yes |
| Animation | No | No | Fade In/Out |
By exploring these CSS enhancements, you’ll not only improve the functionality of your tooltips but also ensure they align seamlessly with your website’s overall design. Remember, a well-designed tooltip can captivate your audience and provide clarity, enhancing their interaction with your content.
Troubleshooting Common Tooltip Issues
Tooltips can significantly enhance user experience on a WordPress site, but they aren’t without their quirks. If you’re encountering issues with your tooltips, it’s essential to troubleshoot effectively to ensure they function smoothly. Here are some common problems and solutions:
- CSS Conflicts: Often, tooltips may not display correctly due to conflicting CSS rules. Inspect your stylesheets to check if there are global styles affecting the tooltip visibility, such as
display: none;orvisibility: hidden;. - JavaScript Errors: JavaScript plays a crucial role in showing and hiding tooltips. Use your browser’s developer tools to identify any JavaScript errors that may be preventing tooltips from functioning as intended. Ensure that all scripts are loaded correctly and in the right order.
- Plugin Compatibility: If you’re using a tooltip plugin, conflicts with other plugins can cause issues. Deactivate all plugins except the tooltip one and see if the problem persists. Reactivate each plugin one at a time to pinpoint the conflict.
- Hover and Focus States: Check if the tooltip behavior relies on hover or focus states that might not be triggered due to user settings or accessibility features in browsers. Ensure your tooltips are accessible by also allowing them to appear on focus.
Sometimes, a simple CSS adjustment can make all the difference. Here’s a quick troubleshooting checklist for your tooltips:
| Issue | Solution |
|---|---|
| Tooltip not appearing | Check CSS and JavaScript errors. |
| Tooltip displaying incorrectly | Inspect for conflicting CSS rules. |
| Tooltips on mobile not working | Ensure compatibility with touch events. |
| Tooltips too slow to show | Adjust timing settings in the plugin or CSS. |
By following these steps, you can quickly identify and resolve tooltip-related issues. Remember, a little attention to detail goes a long way in ensuring your website remains user-friendly and engaging!
Enhancing User Experience with Strategic Tooltip Placement
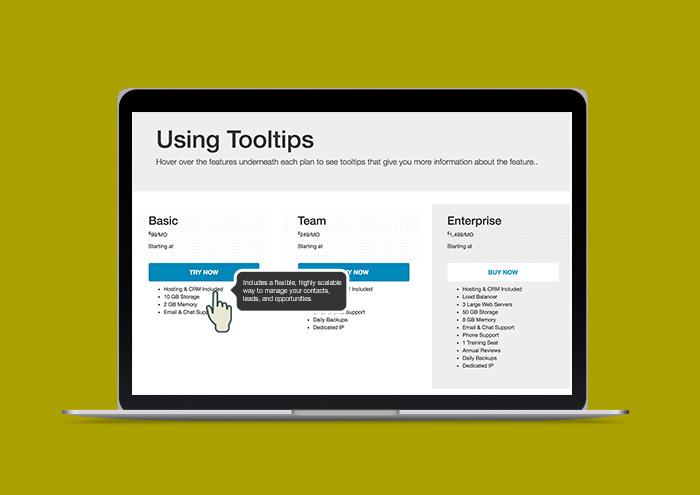
Strategic tooltip placement can significantly enhance the user experience on your WordPress site. By providing contextual information at the right moment, tooltips can help users navigate your content more effectively and reduce confusion. A well-placed tooltip serves as a friendly guide, illuminating complex terms or providing additional details without cluttering the interface.
When considering where to position your tooltips, think about the following:
- Proximity to Relevant Content: Tooltips should appear near the text or element they are meant to explain. This helps users quickly associate the tooltip information with its corresponding content.
- User Flow: Analyze how users typically interact with your site. Place tooltips where users are likely to have questions or need assistance, such as form fields, buttons, or key phrases.
- Timing and Duration: Consider displaying tooltips on hover for a limited time to capture attention without being intrusive. A tooltip that fades in and out can create a seamless experience.
Additionally, the design and style of your tooltips can play a crucial role in their effectiveness. Using CSS, you can ensure that your tooltips are visually appealing and consistent with your site’s theme. Here’s a simple CSS example for tooltip styling:
.tooltip {
    position: relative;
    display: inline-block;
    cursor: pointer;
}

.tooltip .tooltiptext {
    visibility: hidden;
    width: 120px;
    background-color: #555;
    color: #fff;
    text-align: center;
    border-radius: 6px;
    padding: 5px;
    position: absolute;
    z-index: 1;
    bottom: 125%; /* Position above the tooltip */
    left: 50%;
    margin-left: -60px;
    opacity: 0;
    transition: opacity 0.3s;
}

.tooltip:hover .tooltiptext {
    visibility: visible;
    opacity: 1;
}
To further illustrate effective tooltip use, consider the following comparisons:
| Placement Strategy | Example | User Experience |
|---|---|---|
| Mouse Hover | Hover over “Subscribe” | Instant feedback on benefits |
| On Focus | Tab through form fields | Guidance for completion |
| Click to Reveal | Info icon in the header | Access to detailed explanations |
By implementing these strategies, you’re not just adding tooltips; you’re crafting a more intuitive and user-friendly environment. A thoughtful approach to tooltip placement can lead to increased user engagement, higher satisfaction rates, and ultimately, improved conversion rates on your WordPress site. Remember, a well-informed user is a happy user!
Final Tips for Optimizing Your WordPress Tooltips
When it comes to enhancing user experience with tooltips on your WordPress site, fine-tuning their performance can make all the difference. Here are some final tips to ensure your tooltips are not only functional but also visually appealing and user-friendly.
Choose the Right Position: The placement of your tooltips can significantly affect how users interact with them. Consider using CSS to adjust the tooltip location based on screen size. For example:
.tooltip {
    position: relative;
}
.tooltip:hover .tooltip-text {
    visibility: visible;
    opacity: 1;
}
Maintain Readability: Always prioritize readability in your tooltips. Use clear, concise language and ensure the font is legible. Here are a few tips:
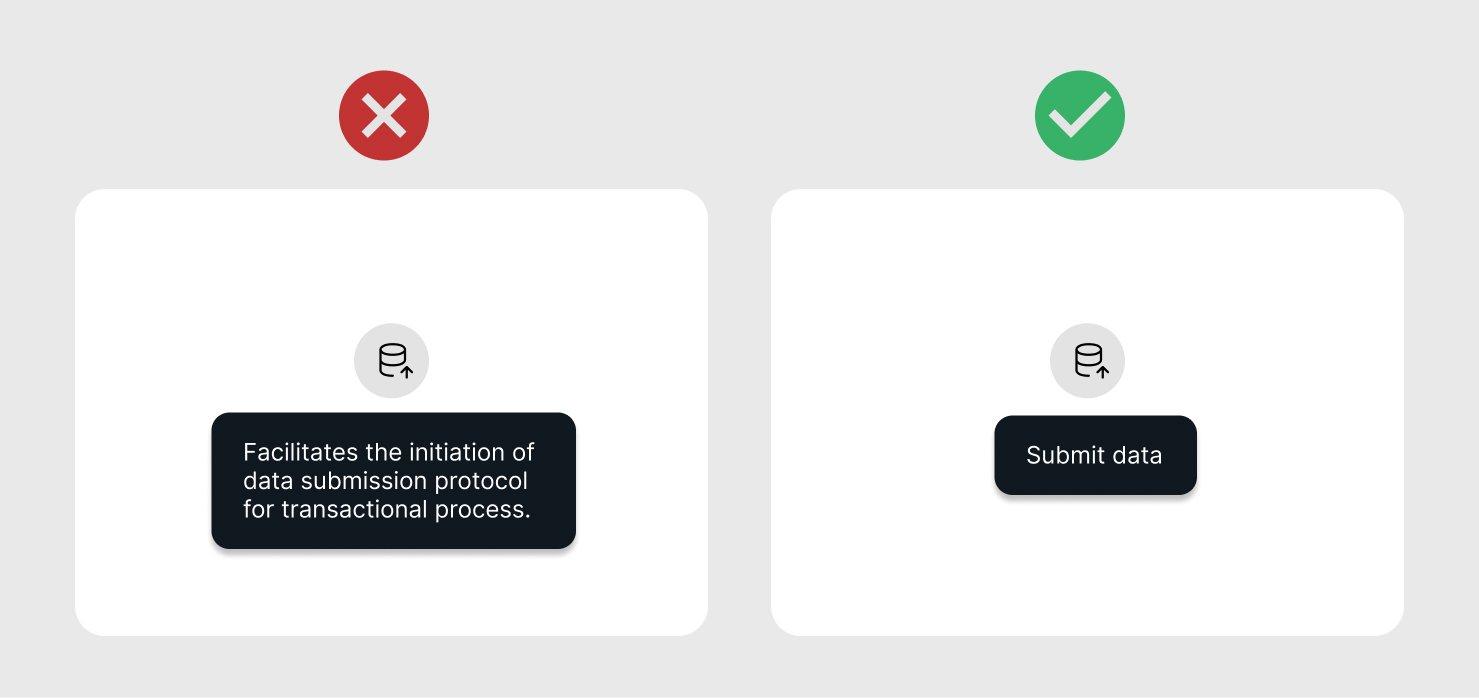
- Stick to 1-2 sentences.
- Use sans-serif fonts for clarity.
- Ensure sufficient contrast between text and background.
Customize Tooltip Styles: Tailor your tooltips to match your website’s branding. Adding some custom CSS can help achieve a cohesive look. Here’s a simple example to enhance the tooltip design:
.tooltip-text {
    background-color: #333;
    color: #fff;
    border-radius: 5px;
    padding: 10px;
    box-shadow: 0 0 10px rgba(0, 0, 0, 0.5);
}
Test for Mobile Compatibility: With a significant amount of web traffic coming from mobile devices, ensure your tooltips are functional on all screen sizes. Use media queries to adjust sizes and positions. For instance:
@media (max-width: 600px) {
    .tooltip-text {
        font-size: 12px;
        max-width: 90%;
    }
}
Utilize Accessibility Best Practices: Remember that not all users will hover over elements. Implementing ARIA attributes can enhance accessibility. Consider adding roles and properties to your tooltips, like this:
Hover me
    This is a tooltip text.
By applying these strategies, you can optimize your WordPress tooltips to not only deliver information effectively but also enhance your overall site usability. Happy customizing!
Frequently Asked Questions (FAQ)
Q&A: How to Add a WordPress Tooltip in 3 Ways: Free Plugin or CSS
Q1: What exactly is a tooltip, and why would I want to use one on my WordPress site?
A1: Great question! A tooltip is a small, informative box that appears when a user hovers over an element on your site, like a word or image. Tooltips can enhance user experience by providing additional context or explanations without cluttering your page. Imagine giving your readers extra info without taking up extra space—what’s not to love?
Q2: What are the three methods for adding tooltips to my WordPress site?
A2: You’ve got three solid options:
- Using a Free Plugin: There are plenty of user-friendly plugins like Tooltipy or WP Tooltips that can quickly add tooltips without any coding.
- Utilizing Shortcodes: Some plugins offer shortcodes that you can easily insert into your posts or pages.
- Custom CSS: If you’re feeling a bit more adventurous and have some coding know-how, you can create tooltips using CSS. It’s a great way to customize the look and functionality to match your site’s style!
Q3: Which method do you recommend for beginners?
A3: If you’re just starting out, I strongly recommend using a free plugin. They’re designed to be intuitive and require no coding skills. With just a few clicks, you can have beautiful tooltips ready to go! Plus, you can always explore the more advanced options later as you get comfortable.
Q4: Are there any specific plugins you would suggest?
A4: Absolutely! A couple of popular choices include WP Tooltips and Tooltipy. Both are highly rated, easy to set up, and offer various customization options. You might also check user reviews to find the best fit for your needs. Don’t forget to look for one that’s regularly updated to ensure compatibility with your WordPress version!
Q5: What if I want more control over the tooltip’s design?
A5: If customization is your priority, then diving into some CSS is the way to go! With CSS, you can tweak colors, fonts, sizes, and even animations. Just make sure you have a bit of experience with coding, as it can be a learning curve. But trust me, the results are worth it!
Q6: Can I use tooltips with any type of content?
A6: Definitely! Tooltips can be applied to words, phrases, images, and even buttons. This versatility makes them perfect for providing definitions, clarifying terms, or offering extra details without overwhelming your visitors with too much information all at once.
Q7: Is there any downside to using tooltips?
A7: While tooltips can enhance your site, it’s important not to overdo it. Too many tooltips can be distracting or annoying for users. Keep your tooltips relevant and concise, and ensure they don’t interfere with navigating your site. Balance is key!
Q8: How do I decide which method to use?
A8: Think about your comfort level with technology and your design needs. If you want something quick and easy, go for a plugin. If you’re ready to get hands-on and want a customized look, try the CSS route. Whatever you choose, just ensure it aligns with your site’s goals and your audience’s needs!
Q9: Any final tips for creating effective tooltips?
A9: Absolutely! Keep your tooltip text short and to the point, use clear language, and make sure it adds value to your content. Also, think about positioning—tooltips should be noticeable but not intrusive. Test them on different devices to ensure they look great everywhere. Happy tooltipping!
To Conclude
And there you have it! Adding tooltips to your WordPress site is easier than you might have thought, whether you choose the simplicity of a free plugin or the customization of CSS. Tooltips not only enhance user experience by providing additional context but also make your content more engaging and informative.
So, why not give it a try? Experiment with one of the three methods we’ve discussed, and watch as your visitors interact with your content in a whole new way. Remember, a well-informed visitor is a happy visitor!
If you found this article helpful, don’t forget to share it with your fellow WordPress enthusiasts. And if you have any questions or tips of your own, we’d love to hear from you in the comments below. Happy tooltipping!

