Unlocking New Adventures: How to Add Plugins to Your Minecraft Server Using Game Panel and FTP
Hey there, fellow Minecrafters! Are you looking to take your Minecraft server to the next level? Imagine the thrill of adding custom functionalities, enhancing gameplay, and creating a unique experience for you and your friends. The secret? Plugins! They’re like magical tools that can transform your server from a simple survival world into an epic realm filled with quests, challenges, and exciting new features.
In this article, we’ll walk you through the straightforward process of adding plugins to your Minecraft server using a Game Panel and FTP. Don’t worry if you’re not a tech wizard; we’ll keep things simple and easy to follow. By the end, you’ll be ready to customize your server and impress your players with a whole new level of fun. So, grab your pickaxe, and let’s dive in!
Understanding the Benefits of Plugins for Your Minecraft Server
When it comes to enhancing your Minecraft server, plugins are the secret sauce that turns a good server into a great one. They offer a myriad of functionalities that can elevate gameplay, making it more engaging for players. With the right plugins, you can customize your server to fit your vision, whether it’s adding new gameplay mechanics, improving server performance, or creating unique worlds for exploration.
One of the most significant advantages of using plugins is the increased control they grant you over your server’s environment. This flexibility means you can tailor the experience specifically for your community. Consider the following benefits:
- Enhanced Gameplay: Plugins allow you to add features like new items, commands, and game modes, keeping players intrigued and invested.
- Improved Security: Certain plugins can protect your server from malicious attacks and unauthorized access, ensuring a safe environment for your players.
- Performance Optimization: With plugins designed to manage resources and reduce lag, your server can run more smoothly, enhancing the overall player experience.
- Community Engagement: Many plugins include features for player interaction, such as voting systems, leaderboards, and event management, fostering a sense of community.
Moreover, plugins can significantly simplify server management. For example, you can implement administrative tools that help you moderate chat, manage player permissions, and even automate routine tasks. This ease of management allows you to focus more on creating content rather than handling technical issues. Here’s a quick comparison of popular plugin types:
| Plugin Type | Description | Example Plugins |
|---|---|---|
| Gameplay Enhancements | Add new features and game mechanics. | EssentialsX, MythicMobs |
| Security | Protect the server from threats. | LuckPerms, CoreProtect |
| Performance | Optimize server resources and reduce lag. | ClearLag, Paper |
| Community Tools | Enhance player interaction and engagement. | VotingPlugin, DiscordSRV |
the benefits of using plugins for your Minecraft server are vast and varied. They not only enhance the gameplay experience but also ensure a secure and efficient environment for everyone involved. So, as you embark on the journey of adding plugins to your server, remember that these tools are your allies in creating a memorable experience for your players.
Choosing the Right Game Panel for Your Minecraft Experience
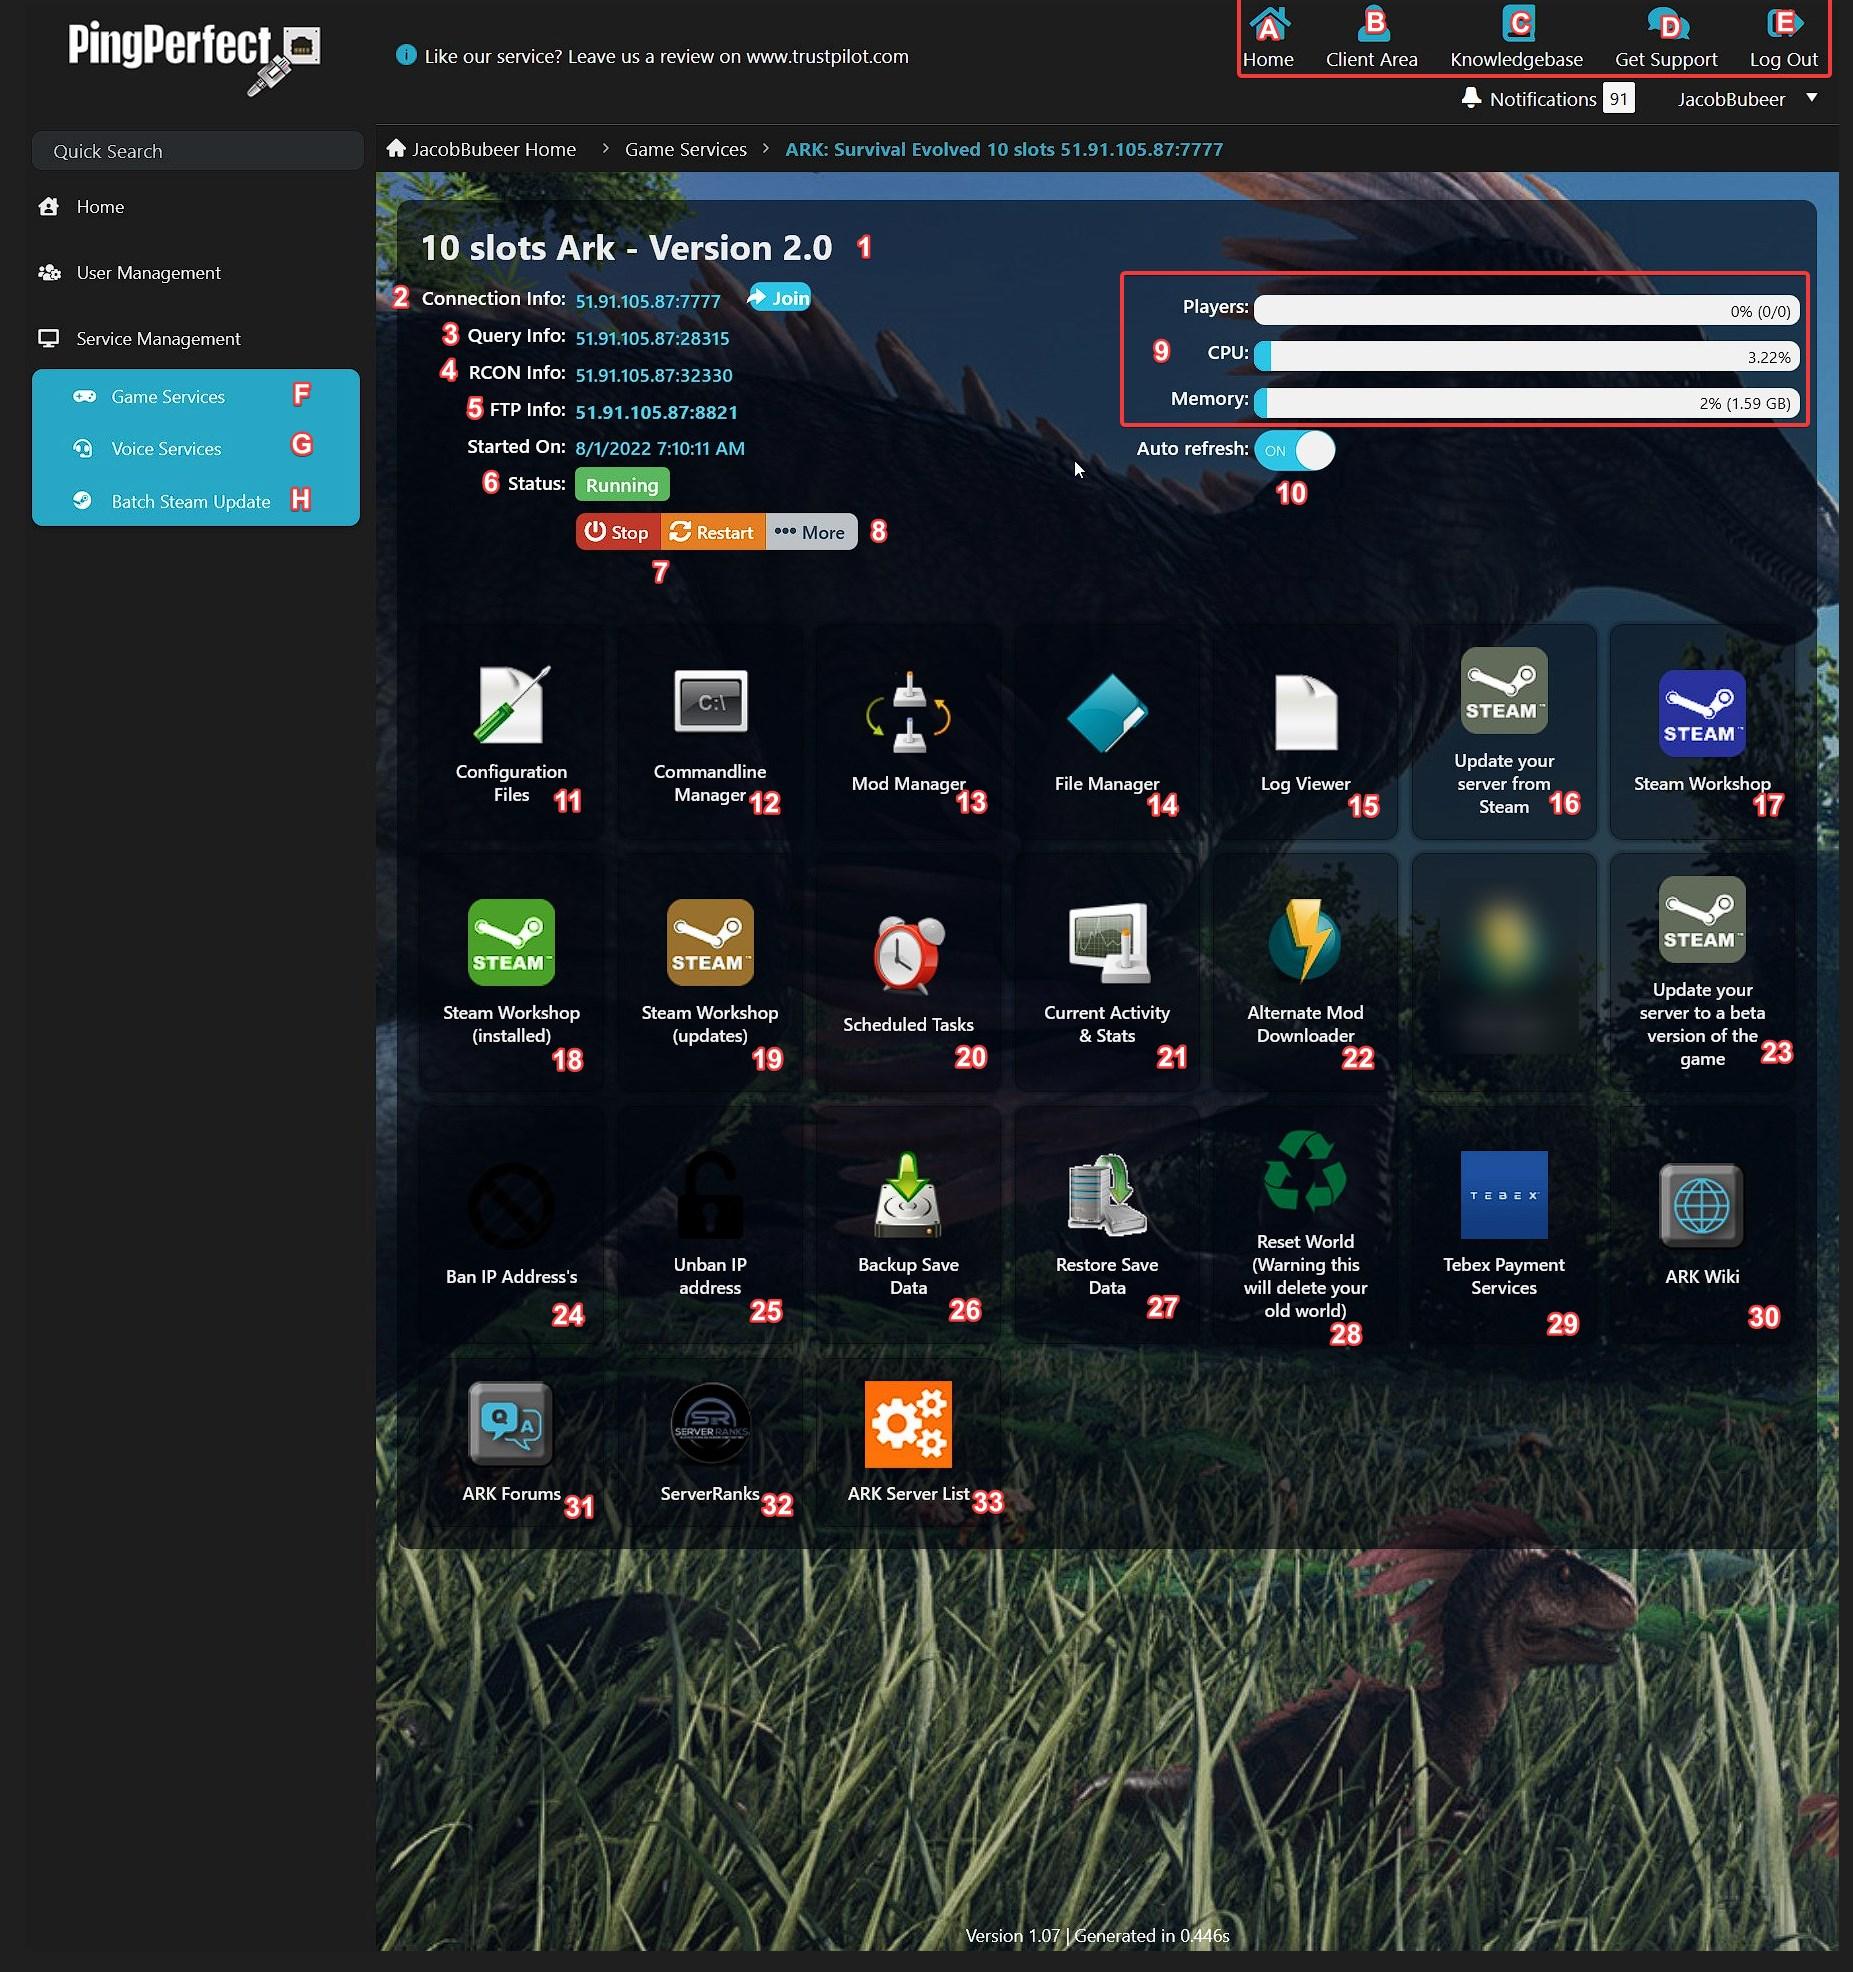
When it comes to enhancing your Minecraft experience, one of the most crucial decisions you’ll make is selecting the right game panel. A game panel serves as the control center for your Minecraft server, allowing you to manage plugins, configure settings, and monitor server performance with ease. With numerous options available, it’s essential to identify the features that will best suit your needs.
Here are some key factors to consider when choosing a game panel:
- User Interface: Look for a game panel with an intuitive layout that makes navigation simple. A user-friendly interface will save you time and reduce frustration.
- Plugin Compatibility: Ensure that the game panel supports the plugins you wish to install. Some panels come with built-in plugin management that simplifies the process.
- Performance Monitoring: A good game panel should allow you to monitor server performance metrics, such as CPU and RAM usage, to help you optimize your server settings.
- Community Support: Opt for a game panel that has a strong community presence. Forums, tutorials, and documentation can be invaluable when troubleshooting issues or seeking advice.
- Cost: Consider your budget. While some game panels are free, others come with a subscription fee. Weigh the features against the cost to ensure you get the best value for your money.
Another beneficial aspect to look for is the availability of additional features. Some game panels offer automated backups, DDoS protection, and multi-server management capabilities. These features not only enhance the stability and security of your server but also save you time and effort in the long run.
take advantage of trial periods or demo versions if available. Testing a game panel can give you a first-hand look at its functionality and help you decide if it meets your requirements. Remember, the right game panel can significantly elevate your Minecraft gameplay, making it a critical investment in your gaming journey.
Navigating Your Game Panel: A Step-by-Step Guide
When you’re ready to enhance your Minecraft server, adding plugins is one of the best ways to customize your gameplay experience. Let’s dive into how you can effortlessly add these plugins using your Game Panel and FTP. Follow these steps to enrich your server with exciting new features!
First, log in to your Game Panel. You’ll be greeted by a friendly dashboard that offers a variety of options. Look for the “File Manager” section; this is where all the magic happens. By navigating to this area, you can manage files and folders for your Minecraft server.
Once you’re in the File Manager, find the plugins folder. If you’ve just set up your server, this folder might be empty, but don’t worry! Adding plugins is simple. Here’s what you need to do:
- Download the desired plugin from a trusted site like SpigotMC or Bukkit.
- Make sure the plugin is compatible with your server version.
- Using an FTP client (like FileZilla), connect to your server using your credentials.
- Upload the downloaded plugin file (.jar) into the plugins folder.
After uploading the plugin, you need to restart your server for the plugin to take effect. This process is quite straightforward; just return to your Game Panel and look for the Restart option. Click it, and voila! Your new plugin is now part of your Minecraft world.
| Essential Steps | Description |
|---|---|
| Download Plugin | Find a compatible plugin for your server version. |
| Upload via FTP | Transfer the plugin file to the plugins folder. |
| Restart Server | Apply the changes and activate the plugin. |
Once your server is back online, check if the plugin is functioning as expected. You can do this by typing specific commands in the game or accessing any new features the plugin offers. Don’t hesitate to explore the settings or features that come with your new plugin to maximize your server’s potential!
Preparing Your Server for Plugin Installation
Before diving into the exciting world of plugin installations, it’s crucial to ensure your server is fully prepared to handle the new additions. A well-prepared server not only enhances performance but also minimizes the risk of errors during installation. Here’s how to get your server ready:
- Backup Your Server: Always start by creating a comprehensive backup of your server. This step ensures that you can restore your server to its original state in case something goes awry during the plugin installation.
- Update Your Server: Make sure your server software is up-to-date. An updated server will have the latest security patches and performance improvements, making it more compatible with new plugins.
- Check Plugin Compatibility: Research and verify that the plugins you wish to install are compatible with your server version. Incompatible plugins can lead to crashes or significant glitches.
Next, consider optimizing your server settings. Adjusting certain settings can improve performance when new plugins are added:
- Allocate Sufficient RAM: Ensure that your server has enough RAM allocated to handle the additional load. This is particularly important if you’re installing resource-intensive plugins.
- Adjust Server Properties: Review your server properties file to tweak settings like view distance and entity limits, which can help maintain performance with added plugins.
- Enable Logging: Turn on logging to track any issues that occur during and after the installation process. This enables you to troubleshoot quickly and efficiently.
create a dedicated folder for your plugins within the server directory. Organizing your plugins will make it easier to manage and update them in the future. Here’s a simple table to illustrate how you can structure your folders:
| Folder Name | Purpose |
|---|---|
| /plugins | Store all plugin files. |
| /plugins/backups | Keep backups of older plugin versions. |
| /plugins/updates | Download and save plugin updates here. |
Taking these preparatory steps will pave the way for a smooth and efficient plugin installation process. With your server in tip-top shape, you’re ready to enhance your Minecraft experience like never before!
Mastering FTP: Connecting to Your Minecraft Server
When it comes to enhancing your Minecraft server, connecting via FTP (File Transfer Protocol) is a game changer. This method allows you to easily manage files and add plugins directly to your server, creating a smoother experience for both you and your players. Getting started with FTP may seem daunting, but with the right steps, you’ll be a pro in no time!
First, you’ll need a reliable FTP client. Some popular options include:
- FileZilla – A free, open-source client that’s user-friendly.
- WinSCP – Great for Windows users looking for a straightforward interface.
- Cyberduck - A fantastic option for Mac users, known for its clean design.
Once you have your FTP client installed, gather your server’s FTP details. Typically, this includes:
- Host: Your server’s IP address or domain name.
- Username: The FTP username provided by your hosting service.
- Password: Secure password associated with your FTP account.
- Port: Usually, the default port is 21 for FTP.
With your client open and details ready, it’s time to connect. Enter your FTP credentials into the client, and hit the connect button. If everything is correct, you should see your server’s files populate in the client interface. This is your gateway to managing all of the server’s content!
As you navigate through the directories, look for the plugins folder. This is where you’ll upload any new plugins you wish to install. Simply drag and drop the .jar files of your desired plugins into this folder. After the upload, restart your server from the game panel to activate the plugins. It’s that simple!
mastering FTP opens up a world of possibilities for your Minecraft server. With just a few clicks, you can enhance gameplay, improve functionality, and keep your players engaged. So grab your FTP client, connect to your server, and unleash a new level of creativity!
Finding the Best Plugins to Enhance Gameplay
When it comes to enhancing your Minecraft experience, the right plugins can make all the difference. With a plethora of options available, finding the best plugins to suit your gameplay needs can feel overwhelming. Fortunately, there are a few key considerations to keep in mind that will help you narrow down your choices effectively.
First and foremost, you should identify what aspects of gameplay you want to enhance. Whether it’s improving the economy, enhancing player interactions, or adding new mechanics, focusing on your specific goals will guide your plugin selection process. Here are some popular categories of plugins you might want to explore:
- Gameplay Enhancements: Plugins that add new features or modify existing ones.
- Quality of Life: Tools that improve server management and player experience.
- Customization: Plugins that allow you to tweak game settings and player abilities.
- Community Building: Tools designed to foster collaboration and interaction among players.
Next, consider the compatibility of your chosen plugins with your server version. Always check the plugin’s documentation and community reviews to ensure it works seamlessly with your existing setup. Many developers update their plugins regularly, so keeping an eye on your server’s version will help you avoid conflicts. It’s also wise to look for plugins that are well-documented and actively maintained, which can save you a lot of headaches in the long run.
Furthermore, testing is crucial. Set up a staging environment where you can experiment with different plugins without affecting your live server. This allows you to evaluate how they work together and how they impact gameplay. You can use a simple table to keep track of plugins you’ve tested, along with their effects on gameplay and any issues encountered:
| Plugin Name | Category | Impact on Gameplay | Issues Encountered |
|---|---|---|---|
| AuctionHouse | Economy | Enhances trading experience | Minor lag during peak times |
| EssentialsX | Quality of Life | Improves player commands | No issues |
| MythicMobs | Customization | Offers unique mob creation | Requires learning curve |
Lastly, don’t forget to engage with the Minecraft community! Forums, Discord channels, and social media groups can provide valuable insights and recommendations. Other players can share their experiences with various plugins, helping you make informed decisions. With the right plugins in place, you’ll be well on your way to creating a more vibrant and engaging Minecraft server experience.
Uploading Plugins via FTP: Tips for Success
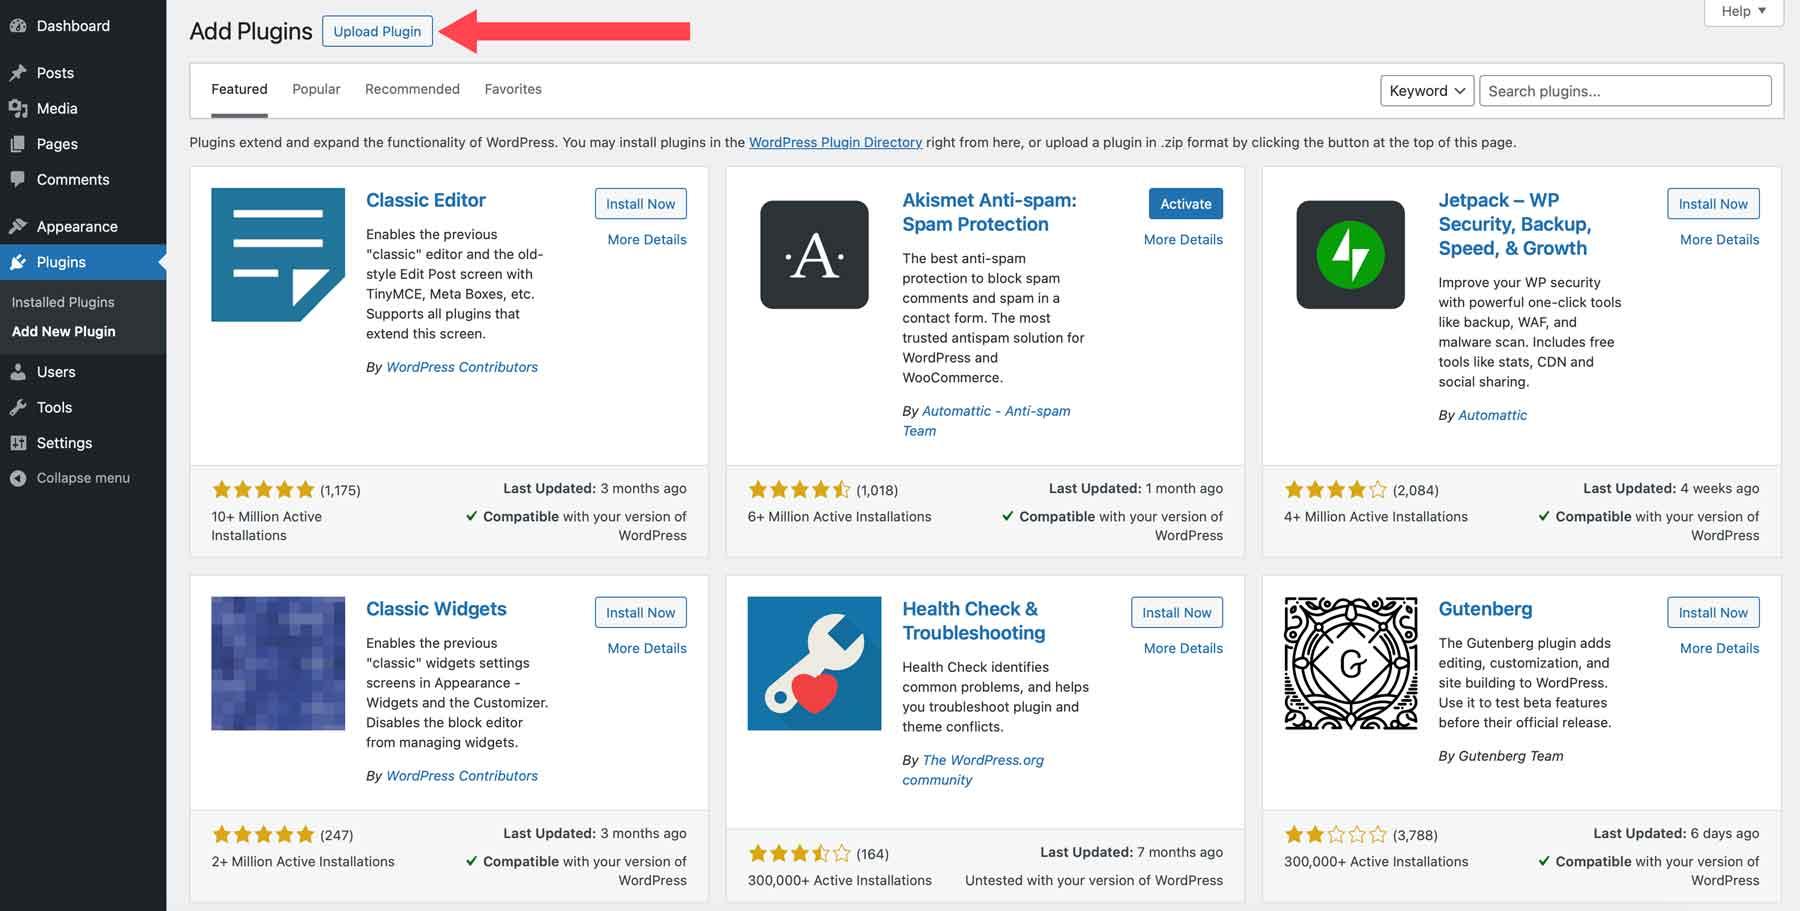
Uploading plugins to your Minecraft server via FTP can be a straightforward process, but there are some key strategies that can ensure everything goes smoothly. Here are some helpful tips to keep your plugin installation hassle-free and efficient:
- Choose the Right FTP Client: Before diving into uploads, pick an FTP client that suits your needs. Popular options like FileZilla or WinSCP are user-friendly and offer robust features for managing files on your server.
- Connect with Precision: Ensure that you have the correct FTP credentials at hand. This typically includes the server address, username, and password. Double-checking these details can save you time and frustration during the connection process.
- Navigate with Care: Once connected, navigate to the appropriate directory for your plugins. Generally, this will be located in the
/pluginsfolder. Avoid uploading plugins to the wrong directory, as this can lead to issues down the line.
After you’ve uploaded the plugin files, it’s crucial to verify their integrity and compatibility with your server version. Some plugins may require specific settings or dependencies:
- Check Compatibility: Always confirm that the plugins are compatible with your server version. Most plugin developers provide this information on their download page or documentation.
- Read the Documentation: Many plugins come with installation and configuration documentation. Take a moment to read through these instructions to ensure you set everything up correctly.
Lastly, don’t forget about server performance. Some plugins can be resource-intensive, affecting your gameplay experience. Here’s a quick reference table to help you assess the impact of popular plugins:
| Plugin Name | Performance Impact |
|---|---|
| EssentialsX | Low |
| WorldEdit | Medium |
| MCMMO | Medium |
| LuckPerms | Low |
By following these tips and being mindful of your server’s capabilities, you can enhance your gaming experience with new plugins. Take your time, enjoy the process, and watch your Minecraft server thrive!
Activating and Configuring Your Plugins in Game Panel
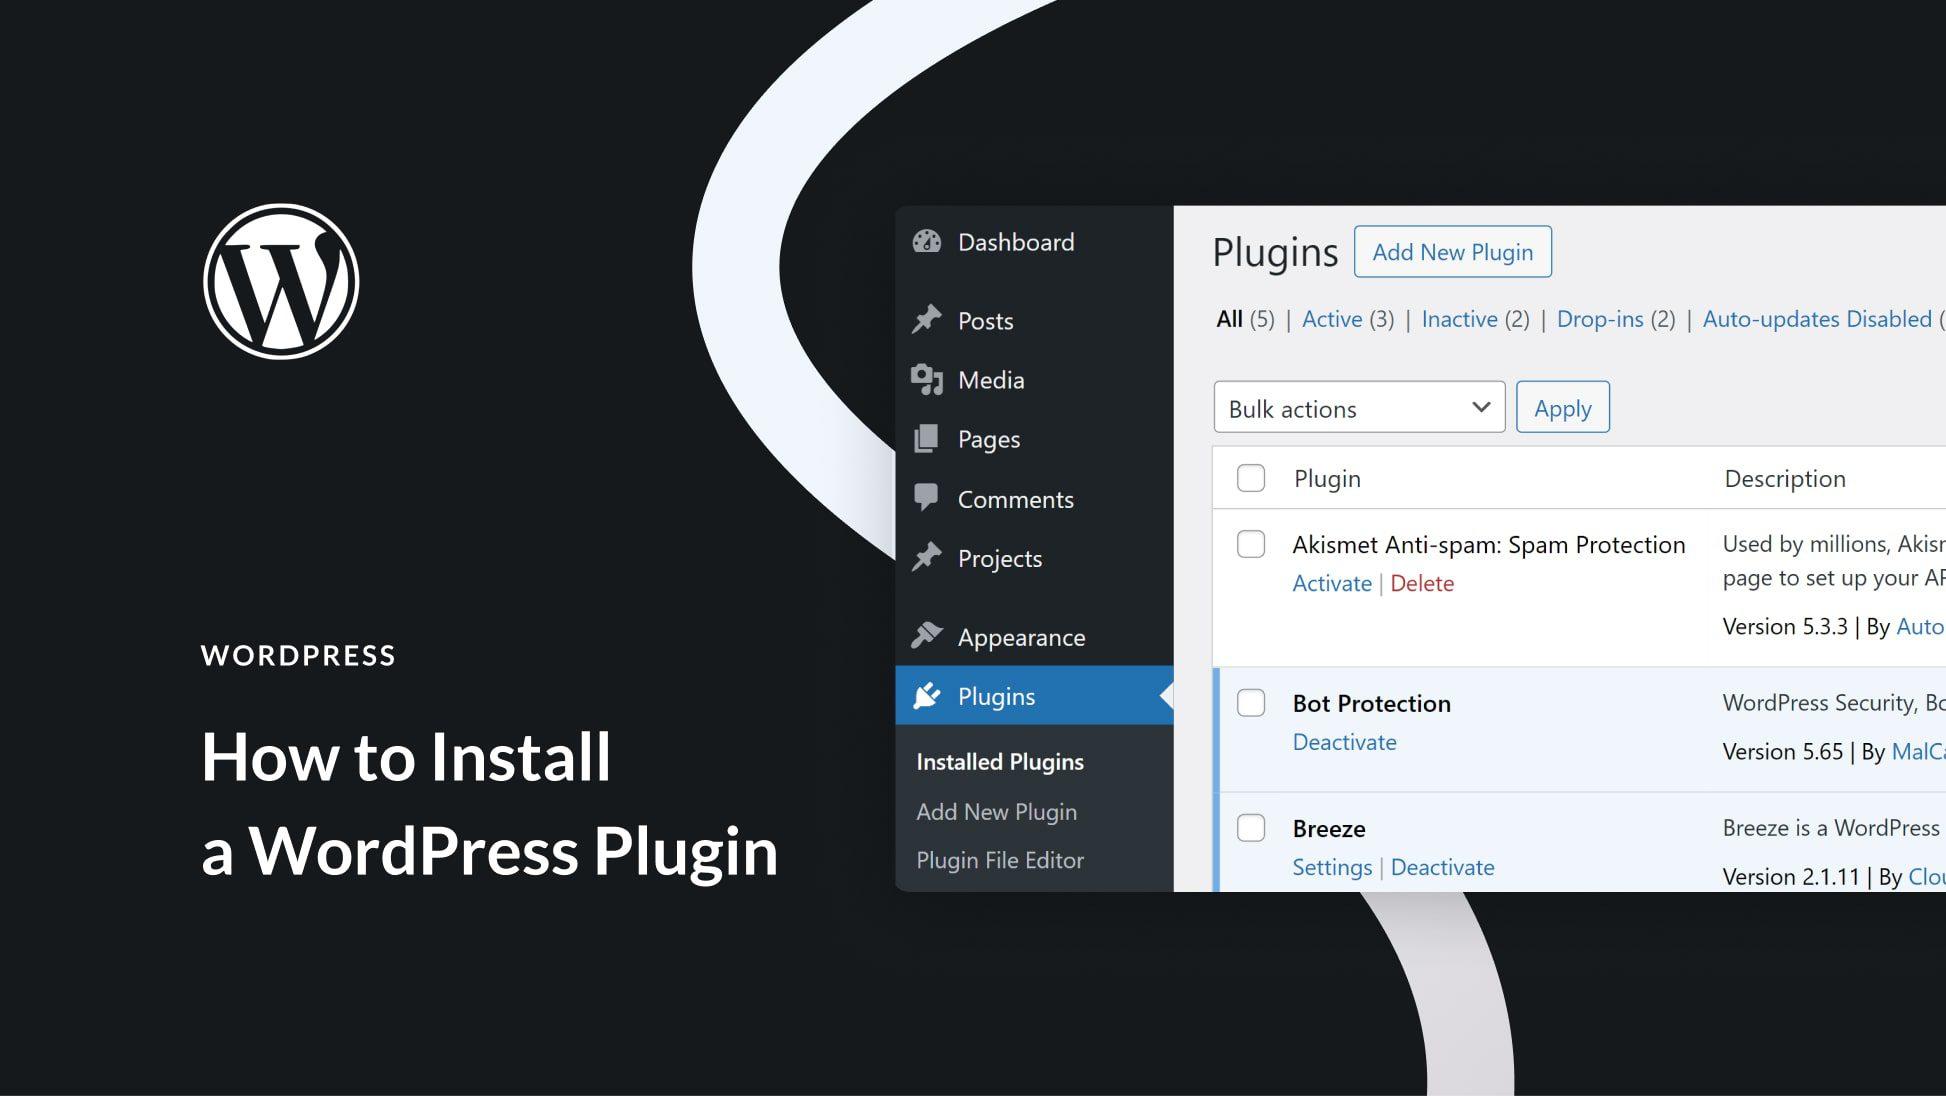
Once you’ve uploaded your desired plugins to the Minecraft server via FTP, activating and configuring them through the Game Panel is your next step. This process enhances your server’s performance and adds exciting features for your players. Here’s how to get started:
First, navigate to the Game Panel of your server. You’ll want to find the “Plugins” section. Here, you can see all the plugins that you’ve uploaded. If you don’t see your plugins listed, double-check your FTP upload to ensure they’re in the correct folder, usually named “plugins” within your server’s directory.
To activate a plugin, simply click on the Activate button next to its name. Some plugins might require additional configuration settings to fully function. To configure your plugins, look for the Settings or Configure option. This will typically open a new interface where you can adjust various settings tailored to your gameplay needs. Common options include:
- Permissions: Set user permissions for different player ranks.
- Gameplay Mechanics: Adjust features such as game modes or item drops.
- Visual Settings: Customize the appearance or notifications of the plugin.
After making your changes, don’t forget to save your settings. It’s a good practice to restart your server to ensure all configurations are applied correctly. During the restart, keep an eye out for any error messages that might indicate a problem with the plugin or its compatibility with other plugins.
To further assist you, here’s a simple table summarizing some popular plugins and their primary functions:
| Plugin Name | Main Functionality |
|---|---|
| EssentialsX | Provides core administrative tools and commands. |
| LuckPerms | Advanced permissions management and control. |
| WorldEdit | Effortless building and editing of worlds. |
| Vault | Economy management for server currencies. |
activating and configuring your plugins through the Game Panel is a straightforward task that can significantly enhance your Minecraft server’s functionality. By following these steps, not only do you customize your gaming experience, but you also create a more engaging environment for your players. So dive into those settings and watch your server come to life!
Troubleshooting Common Plugin Issues
Plugin issues can be a real headache for server administrators and players alike, but fear not! Many common problems have straightforward solutions. Here are some troubleshooting tips to help you get your plugins running smoothly.
First, always ensure that your plugins are compatible with your server’s Minecraft version. An outdated or mismatched plugin can lead to errors or crashes. To check compatibility:
- Visit the plugin’s official page.
- Read the latest updates or changelogs.
- Review user comments for any reported issues.
If you’ve verified compatibility but are still facing issues, the next step is to examine the server logs. These logs provide invaluable insight into what might be going wrong. Here’s how you can check:
- Access your Game Panel and navigate to the server logs section.
- Look for any error messages or warnings that could indicate plugin conflicts.
- Utilize the search function to find specific plugin names or errors.
Another common issue arises from plugin conflicts. If your server is running multiple plugins, one may inadvertently interfere with another. To troubleshoot this, you can:
- Temporarily disable all plugins, then enable them one by one.
- Observe if any specific plugin causes issues when activated.
- Check for updates or alternative plugins that offer similar functionality without conflicts.
Lastly, ensure you have the correct permissions set up. Sometimes, plugins don’t work as expected if the user permissions are misconfigured. Review your permissions by:
| Action | Permission Node |
|---|---|
| Accessing plugin features | pluginname.use |
| Admin commands | pluginname.admin |
| Viewing help commands | pluginname.help |
By systematically checking these areas, you can often resolve the most common plugin issues and keep your Minecraft server running smoothly. Don’t forget, the community forums are also a great resource for additional support and tips!
Keeping Your Plugins Updated for Optimal Performance
When managing a Minecraft server, ensuring that your plugins are updated is crucial for maintaining performance and stability. Outdated plugins can lead to compatibility issues, security vulnerabilities, and can even cause crashes or corruptions. By keeping your plugins fresh, you enhance not only the gameplay experience but also the overall health of your server.
Regularly checking for updates can save you from potential headaches down the line. Many plugin developers offer updates that introduce new features, enhance performance, or patch security flaws. Make it a habit to:
- Monitor developer websites or forums for announcements regarding updates.
- Utilize your game panel, which often includes an update feature for installed plugins.
- Subscribe to newsletters or follow social media accounts related to your most important plugins.
In addition to checking for updates, performing routine checks on your plugin configurations can be beneficial. Sometimes, plugins become outdated due to conflicts with other plugins or even with the server version itself. It’s essential to:
- Test new updates in a staging environment before applying them to your live server.
- Review plugin settings after an update to ensure everything is configured correctly.
- Keep a backup of your server and plugin data before making significant changes.
When managing updates, consider creating a schedule for plugin maintenance. This helps in keeping everything organized and prevents any last-minute rush during critical gameplay moments. An effective schedule may look something like this:
| Day | Task |
|---|---|
| Monday | Check for plugin updates |
| Wednesday | Test updates in staging |
| Friday | Apply updates to live server |
By implementing these practices, you ensure that your Minecraft server runs smoothly, providing a superior experience for players. Keeping your plugins updated is not just a task—it’s a commitment to enhancing your server’s performance and reliability.
Frequently Asked Questions (FAQ)
Q&A: How to Add Plugins to a Minecraft Server Using Game Panel and FTP
Q: What’s the first step I should take to add plugins to my Minecraft server?
A: Great question! The very first step is to make sure you have a Minecraft server set up and running. You can do this through various hosting services that offer a Game Panel. Once you have that ready, you’re all set to dive into the exciting world of plugins!
Q: What is a Game Panel, and why do I need it?
A: A Game Panel is like your command center for managing your Minecraft server. It provides an easy-to-use interface to control settings, upload files, and manage your server without delving too deep into complicated commands. It’s essential because it simplifies the process of adding plugins significantly, making it less daunting for both newbies and seasoned players.
Q: So, how do I find plugins to add?
A: Finding plugins is super easy! Websites like SpigotMC or Bukkit offer a treasure trove of plugins created by the community. Just browse through the categories, read the descriptions, and pick the ones that fit your server’s needs. Remember, choosing quality plugins can greatly enhance your server’s experience!
Q: How do I upload plugins using the Game Panel?
A: Once you’ve downloaded your desired plugins (they usually come as .jar files), head to your Game Panel. Look for the “File Manager” or “Plugins” section. You can usually drag and drop your .jar files right there. After uploading, don’t forget to restart your server for the changes to take effect!
Q: What’s this FTP thing everyone keeps talking about?
A: FTP, or File Transfer Protocol, is a method for transferring files between your computer and your server. It’s especially useful if you have multiple plugins to upload or if you prefer managing your files more directly. It might sound technical, but once you set it up, it becomes a breeze!
Q: How do I use FTP to add plugins to my server?
A: You’ll need an FTP client, like FileZilla or Cyberduck. First, you’ll connect to your server using the credentials provided by your hosting service. Once you’re in, navigate to the ‘plugins’ folder and upload your .jar files there. Just like with the Game Panel, remember to restart your server afterward to activate the plugins!
Q: Is there anything else I should keep in mind when adding plugins?
A: Absolutely! Always check if the plugins you want are compatible with your server version. It’s a bummer when a plugin doesn’t work because it’s outdated or not designed for the version you’re using. Also, keep an eye on server performance; some plugins can be resource-heavy.
Q: Can I add multiple plugins at once?
A: Yes, you can! Just make sure to upload all your desired plugins at the same time. However, it’s a good practice to add them one by one and test your server after each to see how it performs. This way, if something goes wrong, you’ll know exactly which plugin caused the issue.
Q: What if I encounter issues after adding a plugin?
A: Don’t panic! Start by checking your server logs for any error messages related to the plugin. You can often find the logs in your Game Panel. If you see something that doesn’t make sense, try removing the plugin and restarting the server. If issues persist, consult the plugin’s documentation or community forums for troubleshooting tips.
Q: Any final tips for a successful plugin experience?
A: Definitely! Always keep your plugins updated to the latest versions to benefit from new features and security patches. And don’t forget to back up your server regularly, especially before adding new plugins. This way, you can always revert back to a stable version if something goes awry. Enjoy enhancing your Minecraft server experience with those plugins!
—
By following these steps, you’ll be well on your way to creating an engaging and dynamic Minecraft server that players will love! Happy crafting!
Key Takeaways
And there you have it! Adding plugins to your Minecraft server using a game panel and FTP is not just manageable; it’s an exciting way to enhance your gameplay experience. Whether you’re looking to boost your server’s performance, introduce new features, or create fun mini-games, the right plugins can make all the difference.
Remember, the Minecraft community thrives on creativity and collaboration. So don’t hesitate to experiment with different plugins and see what fits your vision best. And if you ever run into any hiccups, the support forums and communities are just a click away – you’re never alone in this journey!
Now that you’re equipped with the tools and knowledge to elevate your server, why not dive in and start exploring all the amazing possibilities? Your players are waiting, and your next big adventure is just around the corner. Happy gaming, and may your blocks be ever in your favor!

