Are you ready to take your Minecraft experience to the next level? Whether you’re diving into a new world with friends or creating your very own server, understanding how to change spawn protection can make all the difference. Imagine being able to customize your gameplay, ensuring that only the right players can build, break, or roam freely around your spawn area. In this article, we’re going to walk you through the ins and outs of adjusting spawn protection settings in Minecraft. You’ll learn how to create a safe haven for your adventures—without the hassles of unwanted interruptions! So, grab your pickaxe and let’s get started on unleashing the full potential of your Minecraft realm!
Understanding Minecraft Spawn Protection Basics
Spawn protection in Minecraft is an essential feature designed to create a safe zone for players when they first enter the game. This protection prevents other players from damaging blocks or interacting with items within a specified radius of the spawn point. However, there are times when you might want to adjust this setting to fit the needs of your server or gameplay style.
To change the spawn protection radius, you will need to access your server’s configuration files. Here’s how you can do this:
- Locate the server.properties file: This file is typically found in the root directory of your Minecraft server.
- Edit the spawn-protection parameter: Open the file with a text editor and find the line that reads
spawn-protection=16. The default value is usually 16 blocks. - Change the value: Adjust the number to your desired radius. For instance, setting it to
0will disable spawn protection entirely, while increasing the number will enlarge the protected area. - Save your changes: After editing the file, save it and restart your server for the changes to take effect.
It’s important to consider the implications of changing spawn protection. A larger radius can enhance security for new players, preventing griefing and ensuring a fair start. However, it may also limit interaction with the environment around spawn, which can lead to feelings of isolation or frustration. Aim for a balance that keeps new players safe while still allowing them to engage with the world around them.
Additionally, if you’re running a multiplayer server, you might want to implement certain plugins that can give you more control over spawn protection settings. Many of these plugins allow for more tailored configurations, such as enabling protection only for specific players or groups, which can foster a more inclusive community.
adjusting spawn protection in Minecraft is a straightforward process that can significantly impact your gameplay experience. By taking the time to customize this feature, you can ensure that both new and experienced players enjoy their time in your Minecraft world.
Reasons to Change Your Spawn Protection Settings
Spawn protection settings are crucial for any Minecraft server, impacting both gameplay and player experience. Here are some compelling reasons to consider adjusting these settings:
- Enhance Player Experience: By fine-tuning spawn protection, you can create a more welcoming environment for new players. A well-protected spawn area prevents griefing and ensures that newcomers can gather resources and learn the game mechanics without immediate threat.
- Encourage Community Engagement: When players feel secure at spawn, they are more likely to interact with one another, fostering a sense of community. This can lead to increased participation in server events and collaborative projects, enriching the overall server experience.
- Minimize Griefing: Adjusting spawn protection limits the potential for malicious activities. By extending the protection radius, you instill a sense of safety among players, allowing them to build and explore without constant fear of destruction.
- Promote Fair Play: A balanced spawn protection setting can level the playing field for all players. It ensures that everyone has an equal opportunity to thrive and prevents veteran players from overpowering newcomers right at the start.
Moreover, it’s important to consider the scale of your server. If you’re running a larger server with many players, a more extensive spawn protection area can help manage chaos effectively. Below is a simple table outlining different server types and recommended spawn protection settings:
| Server Type | Recommended Spawn Protection (blocks) |
|---|---|
| Small Community (1-50 players) | 16 |
| Medium Community (51-150 players) | 24 |
| Large Community (151+ players) | 32 |
Ultimately, adjusting spawn protection settings is not just about safeguarding players; it’s about building a thriving, engaging environment where creativity can flourish. Don’t overlook the importance of these settings; they can make a significant difference in how players perceive and interact with your server.

How to Locate Your Servers Configuration Files
Locating your server’s configuration files is a crucial step in adjusting settings like spawn protection for your Minecraft server. These files contain important parameters that dictate how the server functions, making it essential to know where to find them.
Your configuration files are typically stored in the server directory, which is the folder where you’ve installed Minecraft. Here’s a quick guide to help you locate them:
- Java Edition: Navigate to your server’s root directory. Look for files like
server.propertiesandops.jsonwhich are the main configuration files. - Bedrock Edition: For Bedrock servers, the
server.propertiesfile can be found in the same directory. This is where you’ll make the necessary changes. - Third-party Hosting: If you’re using a hosting service, you may find your configuration files in a dedicated control panel. Look for options labeled “File Manager” or “Configuration”.
Once you’ve located the configuration files, you can open them using any text editor. Make sure to create a backup before making any changes. It’s generally a good practice to keep a copy of the original file in case you need to restore it later.
To edit spawn protection, find the entry in server.properties labeled spawn-protection. Simply change the value next to it to your desired radius. Here is a quick example:
| Setting | Value |
|---|---|
| spawn-protection | 16 |
After making your changes, save the file and restart your server for the new settings to take effect. That’s all it takes to adjust your spawn protection settings and enhance your gameplay experience!
Step-by-Step Guide to Adjusting Spawn Protection
Adjusting spawn protection in Minecraft can significantly enhance your gameplay experience, whether you’re running a private server or just want to customize your world. Fortunately, it’s a straightforward process that allows you to control the radius around the spawn point where players cannot build or break blocks. This is particularly useful for preventing griefing or unwanted changes in the initial area of your realm.
To start, you’ll need access to your server’s configuration files. Follow these simple steps:
- Open server.properties: Locate the server.properties file in your server directory. This file contains various settings for your server.
- Find spawn-protection: Look for the line that specifies
spawn-protection=16. The default value is typically set to 16 blocks. - Adjust the value: Change the number to your desired radius. For example, setting it to 0 will disable spawn protection entirely, while increasing it will expand the protected area.
- Save your changes: After making your adjustments, be sure to save the file and restart your server for the changes to take effect.
Here’s a quick reference table to help you understand how different values affect spawn protection:
| Value | Protected Area Radius | Description |
|---|---|---|
| 0 | None | No spawn protection; players can build and break blocks immediately. |
| 8 | 8 blocks | Limited protection; suitable for small community servers. |
| 16 | 16 blocks | Default setting; provides a moderate buffer against griefing. |
| 32 | 32 blocks | Increased protection; ideal for larger servers with more players. |
After implementing your desired settings, it’s essential to communicate these changes to your players. Let them know about any new rules regarding building near the spawn area. This communication will help maintain a friendly environment and ensure everyone understands the boundaries in place.
Adjusting the spawn protection not only improves security but also enhances the overall player experience. Embrace these changes, and watch your community flourish as players enjoy their time in a well-protected environment!
Testing Your New Spawn Protection Settings
Once you’ve configured your spawn protection settings in Minecraft, it’s crucial to put them to the test. After all, you want to ensure that players who join your server are greeted with a safe and secure environment, especially if you have a mix of experienced players and newcomers. Here’s how to effectively verify that your settings are working as intended.
Start by inviting a few trusted friends or fellow players to join your server. Make sure they’re aware of the new settings, so they can help you assess the effectiveness of the spawn protection. It’s best to have a mix of player types: some who might test the boundaries and others who are simply there to observe. This way, you’ll get a fuller picture of how the protections hold up.
- Test Griefing: Ask your testers to try and break or place blocks within the protected area. This will help you see if the spawn protection is functioning correctly.
- Check for PVP: If your settings allow for player versus player combat, have players engage each other to see if any restrictions are enforced in the spawn zone.
- Structure Building: Encourage players to build structures around the spawn area to determine if they can place blocks freely within the protected space.
If you notice that players can still interact with blocks or each other inappropriately, revisit your settings. Sometimes, a simple restart of the server after applying new configurations may resolve lingering issues. Additionally, ensure that the server is running the correct version of Minecraft where these settings are applicable, as updates can sometimes affect functionality.
Don’t forget to keep an eye on any server logs that track player actions during your testing phase. This data can provide insights into what adjustments need to be made. If necessary, you might even set up a feedback session with your testers after they’ve explored the new settings. Their experiences and observations can be invaluable for refining your spawn protection.
Ultimately, a well-configured spawn protection not only enhances the gameplay experience but also fosters a welcoming community. By diligently testing your settings, you’re taking a significant step towards creating a fun and secure environment for all players. Remember, a little extra effort in the testing phase goes a long way in building a thriving Minecraft server.
Common Issues and Troubleshooting Tips
Modifying spawn protection in Minecraft can sometimes lead to unexpected issues. Here are some common problems players might face along with handy troubleshooting tips to resolve them.
Loss of Spawn Protection Settings: If you’ve changed the spawn protection value but it hasn’t taken effect, make sure you are editing the correct configuration file. Check the server.properties file in your server directory. If you’ve modified it and the setting hasn’t updated, try restarting your server. This ensures all configurations are loaded correctly.
Spawn Protection Not Working: If players can still build or destroy blocks in the spawn area despite having set spawn protection, you may be encountering a few potential issues:
- Ensure that the spawn protection value is set to a positive integer.
- Check for plugins that may override your server settings.
- Verify that your server is running the correct version of Minecraft compatible with the spawn protection feature.
Conflicts with WorldGuard or Other Plugins: If you are using plugins like WorldGuard, they can conflict with spawn protection settings, leading to bizarre behaviors. Here’s what you can do:
- Disable WorldGuard temporarily to see if that resolves the issue.
- Ensure that the flags for your regions do not interfere with the spawn protection.
- Consult the plugin documentation for any specific spawn protection configurations.
Incorrect Spawn Area Detection: Sometimes, players might find that the spawn protection isn’t covering the intended area. This can happen if there are discrepancies in where the game registers the spawn point. To address this:
- Run the command
/setworldspawnin the desired location to specify your spawn point accurately. - Double-check the coordinates in the server.properties file to ensure they match your intended spawn area.
In case none of these troubleshooting steps resolve your issue, it may be beneficial to consult the official Minecraft forums or communities for additional insight. Engaging with fellow players can provide fresh perspectives and solutions that you may not have considered.
Best Practices for Managing Spawn Protection
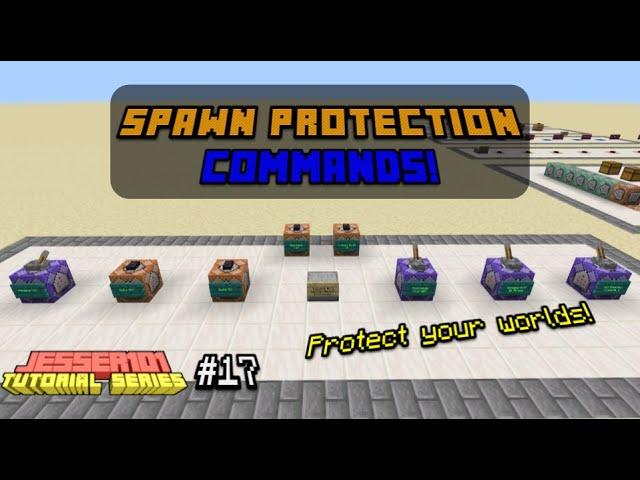
Managing spawn protection effectively is crucial for any Minecraft server owner who wants to maintain a balanced and enjoyable gaming experience. Here are some best practices to keep in mind:
- Define Clear Boundaries: Establishing a clear radius around the spawn area can help prevent griefing and ensure new players can settle in without facing immediate threats. A radius of 16-32 blocks is generally effective.
- Regularly Review Settings: As your server evolves, so too should your spawn protection settings. Schedule regular reviews to adjust the radius based on player behavior and community feedback.
- Encourage Community Input: Create a channel for players to voice their concerns or suggestions regarding spawn protection. This not only helps you gather valuable insights but also fosters a sense of community.
Utilizing plugins can significantly enhance your control over spawn protection. Consider the following options:
| Plugin Name | Features |
|---|---|
| WorldGuard | Customizable protection areas, flags for specific interactions |
| GriefPrevention | Claim system for players, easy to use |
| EssentialsX | Basic protection commands, user-friendly |
Lastly, communicate openly with your players. Transparency about the rules and the reasons behind your spawn protection policies helps build trust within your community. Consider creating a dedicated information board near the spawn point that outlines:
- The purpose of spawn protection
- Rules related to protected areas
- How players can report issues or suggest improvements
By implementing these strategies, you can create an engaging and safe environment for new players while still maintaining the excitement and challenge of Minecraft for seasoned veterans.
Enhancing Player Experience with Custom Spawn Areas
Custom spawn areas can significantly enhance the player experience in Minecraft, making the game more engaging and inviting. By adjusting the spawn protection settings, you can create a unique environment that fosters creativity and interaction among players. Here are some effective strategies to transform your spawn area into a vibrant hub:
- Design with Aesthetics in Mind: Make the spawn area visually appealing with custom-built structures, pathways, and landscaping. Utilize a mix of materials to create an inviting atmosphere.
- Integrate Functional Features: Include crafting stations, storage chests, and enchantment tables to provide players with immediate resources and tools. This makes the spawn area not just a starting point but also a resource hub.
- Create Community Spaces: Design areas for players to gather, such as communal fire pits, seating arrangements, or event spaces. This encourages social interaction and collaboration.
Another essential aspect is to ensure that the spawn area is safe and well-protected. Adjusting the spawn protection radius can help control player interactions and prevent griefing, thus maintaining the integrity of your creative space. Consider the following protective measures:
| Protection Type | Purpose |
|---|---|
| Spawn Protection Radius | Prevents players from breaking or placing blocks within a specified radius of the spawn point, ensuring a safe starting environment. |
| Game Rules Adjustments | Modify rules around PVP and block interactions to tailor the experience to your server’s theme. |
Lastly, consider incorporating interactive elements within the spawn area. This could include mini-games, quests, or guided tours that not only entertain but also educate new players about the server’s unique features. By making the spawn area a place of discovery, you can captivate players right from the moment they enter your world.
a thoughtfully designed spawn area goes beyond mere aesthetics. By focusing on functionality, safety, and engagement, you can elevate the player experience and create a welcoming environment that encourages exploration and community-building. Use spawn protection wisely to maintain balance and ensure that every player feels valued from the very start of their adventure.
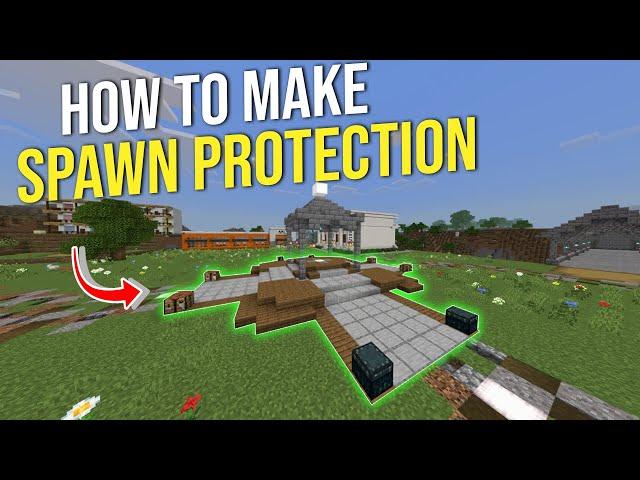
Final Thoughts on Spawn Protection Adjustments
Adjusting spawn protection in Minecraft is a vital consideration for server administrators and players alike. It plays a significant role in enhancing gameplay by ensuring that players can enjoy a safe and secure environment upon their arrival in the game world. Here are some key points to ponder when making these adjustments:
- Player Safety: One of the primary reasons for spawn protection is to safeguard new players from immediate threats. By allowing a designated area where players are immune to damage, you foster a welcoming atmosphere for newcomers.
- Building Freedom: Adjusting spawn protection can help define areas where players can construct and claim their territories without the fear of being griefed. This can empower players to invest time and creativity into building their dream structures.
- Community Balance: It’s crucial to find a balance in spawn protection settings. Too much protection can hinder experienced players, causing frustration, while too little can lead to chaos in the spawn area. Striking the right balance promotes a healthy community.
When implementing changes, consider the specific needs of your server. Here’s a simple table to help you visualize the benefits of different spawn protection settings:
| Spawn Protection Radius | Benefits | Potential Drawbacks |
|---|---|---|
| 10 Blocks | Strong safety net for new players | Experienced players may feel restricted |
| 20 Blocks | Good balance for community building | Some griefing may still occur |
| 30 Blocks | Encourages exploration and risk-taking | New players may struggle against existing threats |
Ultimately, the goal of adjusting spawn protection is to enhance the overall experience for everyone involved. By carefully considering the settings and their implications, you can foster a vibrant community where players feel both protected and encouraged to interact with each other. Remember to gather feedback from your players regularly, as their experiences can provide invaluable insights into the effectiveness of your spawn protection adjustments.
Frequently Asked Questions (FAQ)
Q&A: How to Change Minecraft Spawn Protection
Q: What is spawn protection in Minecraft?
A: Great question! Spawn protection is a safety feature in Minecraft that prevents players from building or breaking blocks within a specified radius of the spawn point. It’s mainly designed to keep new players safe from griefers and to protect important structures from accidental damage.
Q: Why would I want to change the spawn protection?
A: There are several reasons! You might want to expand or reduce the protected area based on your server’s needs. For instance, if you’re running a community server and find that the default protection is too restrictive, adjusting it can foster more creativity and collaboration among players. Plus, it helps to tailor the game experience to your specific community!
Q: How do I change the spawn protection settings?
A: Changing spawn protection is easier than you might think! If you’re running a server, all you need to do is modify your server.properties file. Here’s how:
- Shut down your server to avoid any issues.
- Locate the server.properties file in your server directory.
- Open it with a text editor.
- Find the line that says
spawn-protection=XX(where XX is the radius). - Change the number to your desired radius. For example, setting it to
spawn-protection=0 will disable it entirely! - Save the file and restart your server. Voilà, you’re all set!
Q: Is there a way to customize spawn protection for different players?
A: Absolutely! If you’re using plugins like EssentialsX or permissions management plugins, you can set specific permissions for different players or groups. This allows you to have some players build in spawn areas while keeping others restricted. It’s a great way to balance protection and creativity!
Q: Will changing the spawn protection affect the gameplay experience?
A: It definitely can! Expanding the protection area can give new players a safer space to gather and learn, while reducing it might encourage more interaction and competition. It’s all about what you want your server’s vibe to be. If you’re aiming for a friendly community, keeping some level of protection is wise. But if you’re fostering a more competitive environment, reducing it could spice things up!
Q: Any tips for managing spawn protection effectively?
A: Sure! Here are a few tips:
- Communicate with your players: Let them know about the changes and gather feedback.
- Monitor interactions: Keep an eye on how players are using the space. If you notice abuse or conflicts, be ready to adjust settings again.
- Encourage creativity: Host events or competitions that utilize the spawn area. This can help players feel more engaged and invested in your server.
Q: I’m still not sure if I should change it. Any final thoughts?
A: Ultimately, it’s about enhancing your players’ experience! Think about what will best serve your community’s needs. Changing spawn protection can open doors to new possibilities in your Minecraft world—don’t hesitate to give it a shot! After all, Minecraft is all about creativity, collaboration, and fun.
To Conclude
And there you have it! Changing your Minecraft spawn protection is a straightforward process that can significantly enhance your gameplay experience. Whether you’re running a bustling server or diving into a solo adventure, adjusting the spawn protection settings can help create the perfect environment for creativity and exploration.
Don’t hesitate to experiment with different settings to find what works best for you and your fellow players. After all, Minecraft is all about building your world just the way you like it. So gather your friends, tweak those settings, and let the adventures unfold!
If you found this guide helpful, share it with your fellow Minecrafters and spread the knowledge. And if you have any questions or success stories, drop a comment below! Happy crafting, and may your spawn point be ever in your favor!

