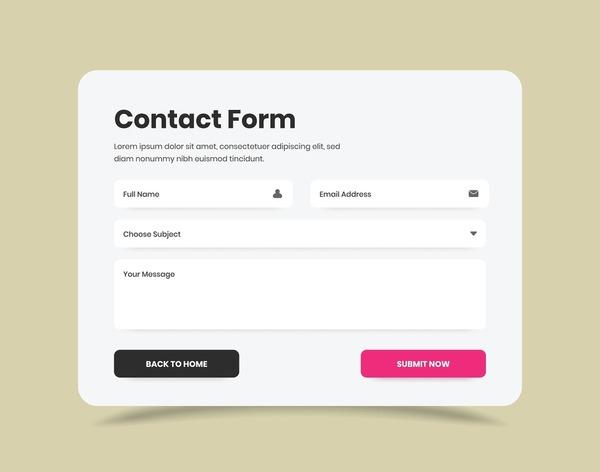
Are you looking to enhance your WordPress website by making it easier for visitors to get in touch with you? If so, adding a contact form is one of the best moves you can make! Not only does it streamline communication, but it also boosts your site’s professionalism and user experience. Imagine your visitors being able to reach out with questions, feedback, or inquiries—all without the hassle of sending an email. Sounds great, right?
In this step-by-step guide, we’ll walk you through the simple process of adding a contact form to your WordPress site. Whether you’re a seasoned pro or a complete novice, you’ll find our tips and tricks easy to follow. By the end of this article, you’ll be equipped with the knowledge to create a seamless way for your audience to connect with you. So, let’s dive in and transform your website into a communication hub!
Understanding the Importance of a Contact Form for Your Website
When it comes to creating a successful website, having a contact form is not just an afterthought; it’s a crucial element that enhances user experience. A well-designed contact form provides a direct line of communication between you and your website visitors. This interaction can lead to increased engagement and potential conversion opportunities. By allowing visitors to reach out easily, you’re showing that you value their input and are open to communication.
Here are some key reasons why a contact form is essential:
- Simple Communication: A contact form simplifies the process of getting in touch. Visitors can quickly fill out their information without having to navigate away from the page.
- Improved User Experience: The convenience of a contact form enhances the overall user experience, making your website more user-friendly.
- Data Collection: Collecting information through a contact form allows you to gather valuable data about your audience, which can inform your marketing strategies.
- Spam Protection: Unlike displaying an email address, a contact form can help minimize spam through CAPTCHA and other validation methods.
Furthermore, a contact form can be tailored to suit your specific business needs. You can include fields that are relevant to your services, such as:
| Field Type | Description |
|---|---|
| Name | Collect the visitor’s full name for personalization. |
| Obtain the visitor’s email for follow-up communication. | |
| Message | Allow visitors to provide details or questions they have. |
| Service Needed | Let users specify what services they’re interested in. |
In addition to these functional aspects, a contact form can also convey professionalism. A modern, well-branded form reflects positively on your business, reinforcing trust with your audience. By investing a little time and effort into creating an effective contact form, you can set the stage for stronger relationships with your customers.
Ultimately, don’t underestimate the power of a contact form. It acts as the bridge connecting you to your audience, driving conversations, feedback, and new business opportunities. So, as you embark on setting up your WordPress site, remember that a seamless contact form is one of the most strategic tools in your digital arsenal.
Choosing the Right Plugin for Your Contact Form
When it comes to enhancing your website’s communication capabilities, selecting the appropriate plugin for your contact form can make all the difference. With a myriad of options available, it’s essential to consider a few key factors to ensure you choose a plugin that meets your needs.
First and foremost, think about usability. A user-friendly interface will not only make it easier for you to set up the form but will also enhance the experience for your visitors. Look for plugins that offer drag-and-drop functionality, allowing you to create forms effortlessly without any coding knowledge.
Next, consider the range of features. Different plugins come with various functionalities, so it’s important to identify what you need. Here are some features to look for:
- Customizable form fields
- Spam protection mechanisms
- Email notification settings
- Integration with third-party services (like Mailchimp)
Another critical aspect is compatibility with your existing theme and plugins. A well-integrated contact form plugin will not only look good on your site but will also function seamlessly with other tools you’re using. Be sure to check user reviews and support forums to assess its compatibility and reliability.
look into pricing and support options. While many plugins offer free versions with essential features, premium versions often provide advanced capabilities and dedicated support. If you anticipate needing help, consider investing in a plugin that offers robust customer support.
| Plugin Name | Free Version | Premium Features |
|---|---|---|
| Contact Form 7 | Yes | Limited |
| WPForms | Yes | Form templates, payment integration |
| Gravity Forms | No | Advanced fields, multi-page forms |
Installing and Activating Your Contact Form Plugin
Getting started with your contact form plugin is straightforward, and you’ll be up and running in no time. First, navigate to your WordPress dashboard and head over to the Plugins section. From there, click on Add New to explore the vast array of contact form plugins available.
When searching for a plugin, consider options like WPForms, Contact Form 7, or Ninja Forms. Each of these plugins offers unique features and ease of use. Here’s a quick overview of what each plugin provides:
| Plugin | Features | Best For |
|---|---|---|
| WPForms | Drag & Drop Builder, Pre-built Templates | Beginners |
| Contact Form 7 | Flexible, Free, Customizable | Developers |
| Ninja Forms | User-friendly, Integrations, Extensions | Business Sites |
Once you’ve chosen your ideal plugin, click the Install Now button, followed by Activate. This action will enable the plugin and add a new menu item to your dashboard, typically under the Forms section.
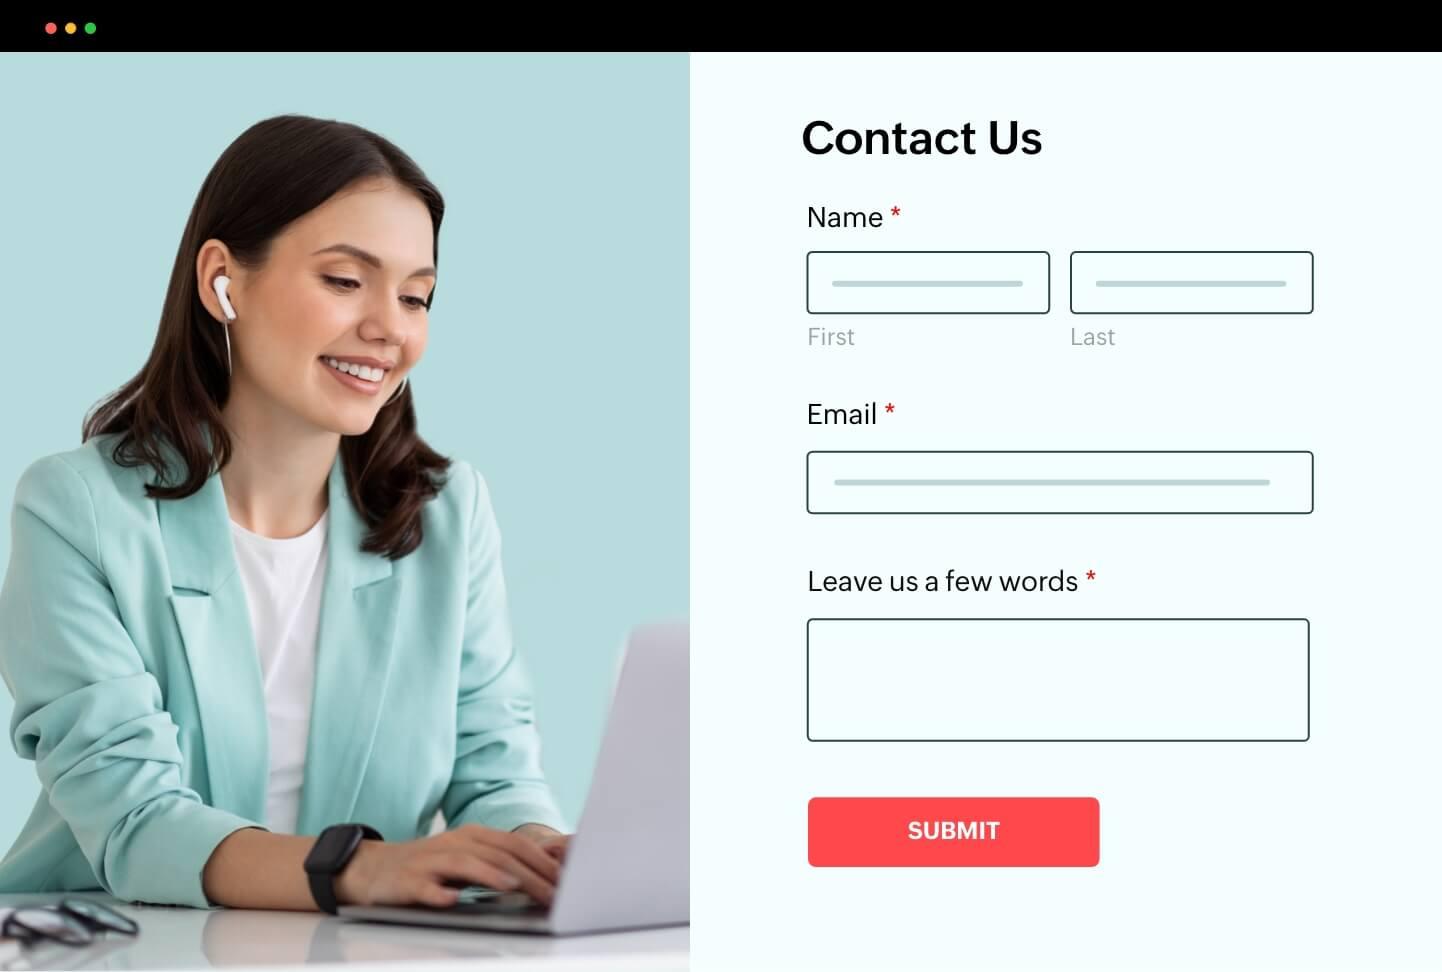
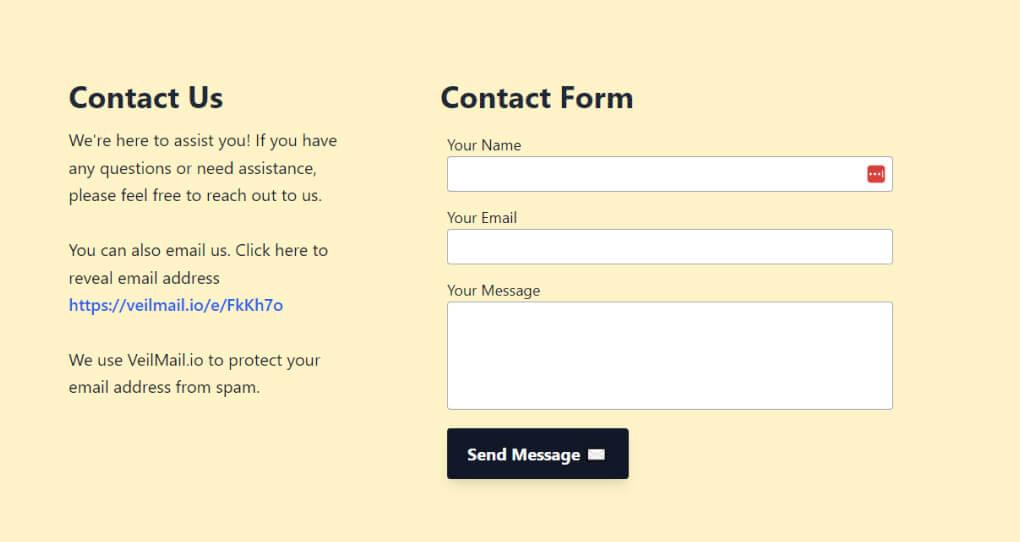
After activation, you’ll want to configure your form settings. Click on the new menu option and either create a new form or modify an existing one. Customize it to suit your needs by adding fields such as Name, Email, and Message. Most plugins provide an intuitive interface where you can easily drag and drop fields into your form.
Don’t forget to set up the email notifications so you can receive submissions directly to your inbox. This can usually be done within the plugin’s settings. With everything configured, your contact form is now ready to go live!

Customizing Your Contact Form Fields for Maximum Engagement
Customizing your contact form fields can significantly enhance user interaction, making it easier for visitors to connect with you. A well-thought-out form not only captures essential information but also encourages users to engage more deeply with your brand. Here are some tips to help you maximize engagement through effective field customization:
- Prioritize Essential Fields: Keep your form short and sweet. Ask for only the necessary information to reduce friction. Typically, name, email, and message fields suffice for initial contact.
- Use Placeholder Text: Placeholder text within fields can guide users on what to input. For example, instead of just a label saying “Email,” consider using “[email protected]” as a placeholder.
- Incorporate Conditional Logic: If your contact form plugin supports it, conditional logic can create a dynamic experience. For instance, if a user selects “Support,” additional fields can appear, asking for specifics about their issue.
Adding custom fields tailored to your audience can further enhance engagement. Consider including:
| Field Type | Purpose |
|---|---|
| Dropdown Menu | Let users choose their inquiry type (e.g., product support, general questions). |
| Check Boxes | Allow users to select multiple interests, providing insights into what they care about. |
| File Upload | Enable users to attach documents or images if relevant to their inquiry. |
Don’t forget the importance of visual appeal. Use consistent styles and colors that match your brand throughout the form to create a cohesive experience. A well-designed form attracts attention and encourages users to fill it out. Additionally, consider adding a clear call-to-action button, like “Get in Touch” or ”Submit Your Query,” which can make the submission process feel more inviting.
Lastly, always test your forms on various devices and browsers. A form that looks great on a desktop might not be as user-friendly on mobile. Ensuring a smooth experience across all platforms will help maintain engagement and encourage users to reach out.
Integrating Your Contact Form with Email Notifications
Once you’ve set up your contact form on your WordPress site, the next crucial step is integrating it with email notifications. This ensures that every inquiry, feedback, or message sent through your form gets delivered straight to your inbox, allowing you to respond promptly. Here’s how to set this up effectively.
First, navigate to the settings of your chosen contact form plugin. Most popular plugins, such as Contact Form 7, WPForms, or Ninja Forms, include a dedicated section for email notifications. In this section, you’ll need to specify the following:
- Recipient Email Address: This is the email where you want to receive the notifications. Ensure it’s an address you frequently check.
- Subject Line: Craft a clear and concise subject line that helps you quickly identify the nature of the inquiry, like ”New Contact Form Submission.”
- Message Body: Customize the message body to include essential details such as the sender’s name, email address, and the message they submitted.
Here’s a quick example of how to format your email content:
| Field | Placeholder |
|---|---|
| Name: | [your-name] |
| Email: | [your-email] |
| Message: | [your-message] |
After configuring these settings, it’s essential to test your contact form to ensure everything works flawlessly. Send a test submission and check that the email lands in your inbox without any delay or issues. If you don’t see the notification, double-check the email settings, including the spam folder, and ensure your web host allows outgoing emails.
Lastly, consider enabling notifications for multiple recipients if you work within a team. This way, important messages don’t get overlooked, and everyone can stay in the loop. By , you’ll enhance your communication with visitors and ensure you never miss an opportunity to connect.
Styling Your Contact Form to Match Your Website’s Aesthetic
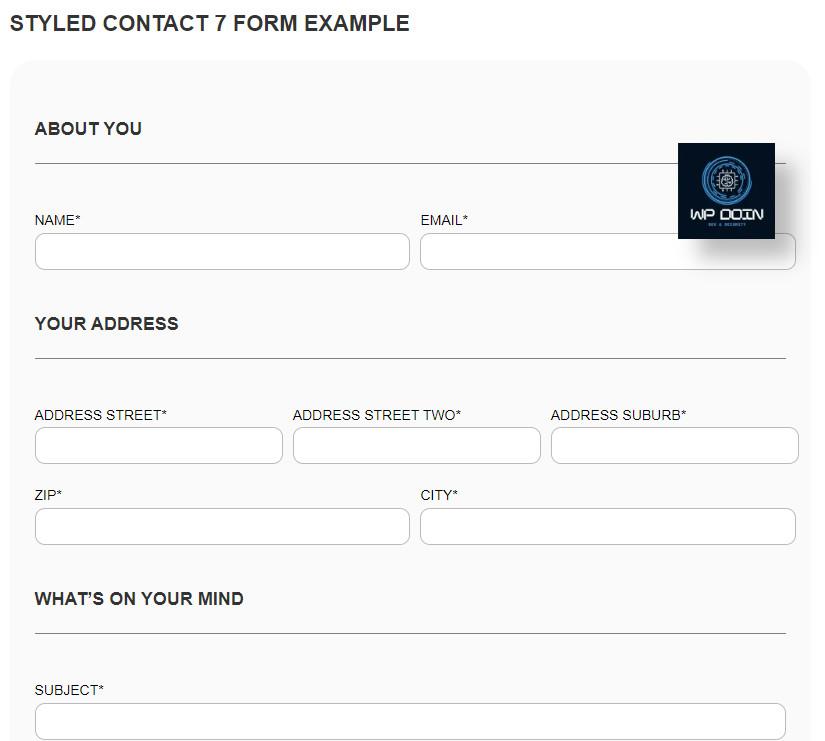
When you’re setting up your contact form, it’s essential to ensure it blends seamlessly with your website’s design. A well-styled contact form not only enhances the user experience but also instills trust, encouraging visitors to reach out. Here are some effective strategies for achieving a cohesive look:
- Color Palette: Use colors that match your website’s theme. If your site has a primary color, consider using it for the form’s background or buttons. This creates a consistent look and feel.
- Font Consistency: Choose fonts that are already in use on your site. This doesn’t just apply to the form’s header but also to input fields and labels. Consistency in typography strengthens your brand’s identity.
- Input Field Styling: Rounded corners and subtle shadows can make your form fields appear more inviting. Use CSS to adjust padding and margins, ensuring there’s enough space for users to interact comfortably.
Adding some custom CSS can transform a basic contact form into a stylish element of your website. For instance, consider the following example:
/* Contact Form Style */
.contact-form {
    background-color: #f7f7f7; /* Light gray background */
    border: 1px solid #ddd; /* Light border */
    border-radius: 10px; /* Rounded edges */
    padding: 20px; /* Spacing around the content */
}

.contact-form input[type="text"],
.contact-form input[type="email"],
.contact-form textarea {
    border: 1px solid #ccc; /* Input field border */
    border-radius: 5px; /* Rounded input fields */
    padding: 10px; /* Inner spacing */
    margin-bottom: 15px; /* Spacing between fields */
    width: 100%; /* Full width to match the form */
}
Don’t forget to incorporate your brand’s logo or some visual elements that resonate with your overall aesthetic. You might want to include a header above the form that invites users to reach out, styled similarly to your website’s headings. For example:
| Header | Style |
|---|---|
| Contact Us | Font Size: 24px, Color: #333 |
| We’d love to hear from you! | Font Size: 16px, Color: #555 |
make sure the submit button stands out! Use a contrasting color to draw attention, and consider adding a hover effect to enhance interaction. A button styled like this is not just functional; it’s an integral part of your design strategy, making it inviting for users to click.
Testing Your Contact Form to Ensure Everything Works Perfectly
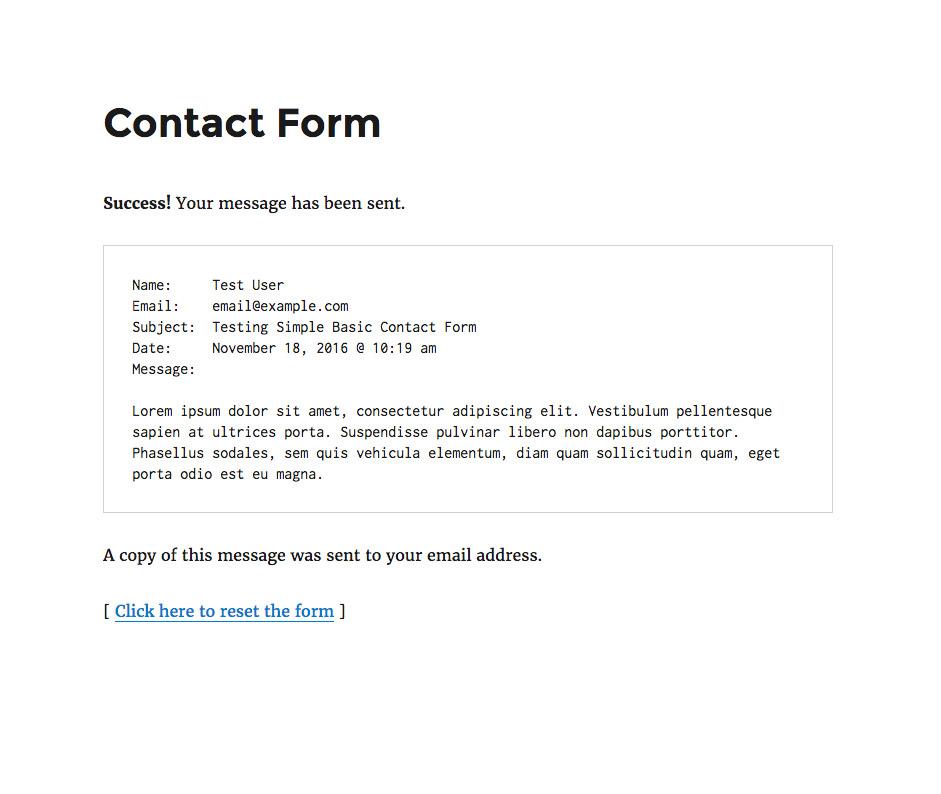
Once you’ve added your contact form to your WordPress site, it’s crucial to test it thoroughly to ensure that everything functions flawlessly. After all, a contact form is often the first point of interaction for potential clients or customers. A malfunctioning form can lead to missed opportunities, so let’s make sure everything is set up correctly.
Start by filling out the form as a user would. Make sure to include:
- Your name
- Email address
- Message content
After submitting, check for any error messages. If the form displays errors, consider these points:
- Are all required fields marked clearly?
- Does the form validate the email address correctly?
- Are there any captcha or spam protection features functioning as intended?
Next, confirm that the form submission is reaching your inbox. Set up a temporary email address if necessary, and send multiple test messages to observe if they are delivered promptly. Keep an eye on:
- Subject line — Does it clearly indicate the form submission?
- Content — Is all the information you entered displayed correctly?
- Format — Is it easy to read and understand?
If you’re using a plugin that allows for confirmation messages, ensure that users receive an acknowledgment after submitting their inquiries. This can significantly enhance user experience. You can set up a simple table to check your setup:
| Test Element | Status |
|---|---|
| Form Submission | ✅ Successful |
| Email Notification | ✅ Received |
| Confirmation Message | ✅ Displayed |
| Spam Filter Check | ✅ Passed |
remember to test the form across different devices and browsers. Mobile responsiveness is vital, as many users will access your site via smartphones or tablets. Ensure that the form looks good and operates smoothly, regardless of the platform. By taking these steps, you’ll ensure your contact form not only works perfectly but also offers a great user experience.
Troubleshooting Common Issues with Contact Forms
When it comes to contact forms in WordPress, even the simplest setup can sometimes lead to issues that may frustrate both site owners and users alike. Here are some common problems you might encounter, along with tips to help you resolve them quickly.
Form Submissions Not Coming Through
This is perhaps the most significant concern for any website owner. If you’re not receiving messages, consider these potential culprits:
- Spam Filters: Check your spam or junk folder; sometimes, legitimate messages end up there.
- Email Configuration: Ensure that your website’s email settings are correctly configured. You may need to use SMTP plugins for reliable email delivery.
- Plugin Conflicts: Disable other plugins temporarily to identify any conflicts that might prevent form submissions.
Form Not Displaying Correctly
If your contact form isn’t showing up as it should, several factors could be at play:
- Theme Compatibility: Some themes may not support certain plugins. Testing with a default WordPress theme can help identify the issue.
- JavaScript Errors: Check your browser’s console for errors that could prevent the form from loading. Resolving these can restore functionality.
- Shortcode Issues: Ensure that you’re using the correct shortcode for your contact form in the page or post editor.
Users Unable to Submit the Form
If visitors report being unable to submit their messages, consider the following:
- Missing Required Fields: Double-check that all required fields are clearly marked and functional.
- Validation Errors: Ensure the validation rules set for fields do not confuse users. Simplifying these can enhance user experience.
- Browser Compatibility: Test the form in different browsers and devices to pinpoint compatibility issues.
If you’re still stumped, you might find it helpful to consult the documentation for your specific contact form plugin. Often, they provide FAQs and support forums where you can find additional troubleshooting tips tailored to common issues.
Enhancing Your Contact Form with Advanced Features
Once you’ve set up your basic contact form, it’s time to elevate its functionality with some advanced features. These enhancements not only improve user experience but also streamline the way you manage incoming inquiries. Here’s how you can take your contact form to the next level:
- Conditional Logic: This feature allows you to show or hide fields based on user selections. For example, if a user selects “Support” as their inquiry type, additional fields related to technical issues can appear. This keeps your form clean and relevant.
- File Uploads: Enable users to attach files, which can be crucial for support requests or applications. Whether it’s screenshots, documents, or images, permitting file uploads can significantly enhance the context of inquiries.
- Spam Protection: Implementing CAPTCHA or honeypot techniques can drastically reduce spam submissions. These tools ensure that your inbox remains focused on genuine inquiries.
Integrating these features can be done smoothly through various WordPress plugins that offer user-friendly interfaces. For instance, plugins like WPForms and Gravity Forms provide drag-and-drop functionality for setting up conditional logic and file uploads effortlessly.
To give you a clearer picture of what features to implement, here’s a simple table outlining some common enhancements and their benefits:
| Feature | Description | Benefit |
|---|---|---|
| Conditional Logic | Fields that appear based on previous answers | Improves form relevance and user experience |
| File Uploads | Allows users to attach documents or images | Provides context and details for inquiries |
| Spam Protection | Helps prevent unwanted submissions | Keeps your inbox organized and efficient |
Additionally, consider adding email notifications for yourself and users. This feature ensures that you receive immediate alerts for new submissions while also confirming to users that their message has been received. Customizable success messages can further enhance user satisfaction by providing instant feedback after submission.
By leveraging these advanced features, you can create a more engaging and efficient contact form that meets the needs of your visitors while simplifying your communication process.

Keeping Your Contact Form Secure from Spam and Bots
When it comes to utilizing a contact form on your WordPress site, ensuring its security from spam and bots is crucial. Not only does spam clutter your inbox, but it can also compromise the integrity of your site. By implementing a few effective strategies, you can significantly reduce unwanted submissions and enhance the overall user experience.
One of the simplest methods to safeguard your contact form is by using CAPTCHA. This tool requires users to complete a challenge that is easy for humans but difficult for bots. There are various types of CAPTCHA available, such as:
- Google reCAPTCHA: This is a popular choice that integrates seamlessly into most WordPress forms.
- Honeypot Technique: This method adds a hidden field to your form that genuine users won’t fill out, while bots will.
- Math Questions: Simple arithmetic problems can deter less sophisticated bots.
Additionally, implementing a spam filter can provide an extra layer of protection. Many WordPress plugins offer built-in spam filtering options that analyze submissions and flag those that appear suspicious. Here’s a quick comparison of popular spam filter plugins:
| Plugin | Features | Ease of Use |
|---|---|---|
| Akismet | Automatic spam detection | Very Easy |
| Antispam Bee | Real-time spam checking | Easy |
| WP SpamShield | Multi-layer protection | Moderate |
Another effective strategy is to limit form submissions by using time-based restrictions or setting a maximum number of submissions per IP address. This discourages bots from bombarding your site with submissions in a short period. You can also consider enabling email verification, where users must confirm their identity before their submission is processed.
Lastly, ensure you keep your WordPress installation, themes, and plugins updated. Security vulnerabilities in outdated software can be exploited by malicious entities to bypass your defenses. By staying proactive with updates and monitoring your submissions regularly, you can maintain a clean and secure contact form environment.
Frequently Asked Questions (FAQ)
Q&A: How to Add a Contact Form in WordPress (Step by Step Guide)
Q1: Why should I add a contact form to my WordPress site?
A: Great question! A contact form is essential for any website looking to connect with its audience. It provides a simple and professional way for visitors to reach out to you—whether to ask questions, request information, or give feedback. Plus, it helps you manage inquiries more efficiently than traditional email since you can customize the form fields according to your needs.
Q2: Is it complicated to add a contact form to my WordPress site?
A: Not at all! In fact, adding a contact form to your WordPress site can be done in just a few simple steps. Even if you’re not tech-savvy, there are user-friendly plugins available that make the process straightforward and hassle-free. Trust me, you’ll be surprised at how easy it is!
Q3: What plugins do you recommend for creating a contact form?
A: There are several excellent plugins you can choose from! Two of the most popular are Contact Form 7 and WPForms. Contact Form 7 is great for those who want a simple, no-frills solution, while WPForms offers a drag-and-drop interface for more customization. Both are user-friendly and reliable!
Q4: Can I customize my contact form?
A: Absolutely! That’s one of the best features of using a plugin. You can customize everything—from the fields (like name, email, and message) to the design and layout. Most plugins allow you to change colors, fonts, and even add your logo. This is your chance to make the form distinctly yours and keep it in line with your brand!
Q5: What if I want to add additional features, like file uploads or CAPTCHA?
A: No problem! Many of the popular contact form plugins, like WPForms, offer add-ons and premium versions that include features like file uploads, CAPTCHA for spam protection, and even integration with services like Mailchimp or PayPal. This flexibility allows you to tailor your contact form to meet your specific needs!
Q6: How do I ensure that the messages I receive from my contact form are secure?
A: Security is crucial, and most reputable plugins take this seriously. Look for features like spam protection options (like honeypot or CAPTCHA) and SSL certificate support, which encrypts user data. Always keep your plugins updated to ensure any security vulnerabilities are patched quickly.
Q7: What happens to the messages sent through the contact form?
A: Once someone fills out your contact form and hits submit, the information is typically emailed directly to you or stored in your WordPress dashboard, depending on the plugin settings. You can easily manage and respond to inquiries right from your preferred email or within your WordPress admin area.
Q8: Any tips for optimizing my contact form for better responses?
A: Definitely! Keep your form short and to the point—ask only for essential information to avoid overwhelming your visitors. Use clear labels and instructions, and consider adding a friendly thank-you message after submission. Lastly, don’t forget to test your form to ensure everything works smoothly before going live!
Q9: How long will it take to set up a contact form?
A: If you follow our step-by-step guide, you can have your contact form up and running in less than 30 minutes! Once you get the hang of it, you can easily replicate the process for any future forms you may need.
Q10: I’m ready to get started! Where can I find your step-by-step guide?
A: Fantastic! You’re on your way to enhancing your website’s communication. Just check out our full article on “How to Add a Contact Form in WordPress (Step by Step Guide)” for all the details. Happy form building!
—
Feel free to adapt or modify any part of this Q&A to best fit your article’s style and audience!
To Conclude
And there you have it! Adding a contact form to your WordPress site isn’t just a technical task—it’s a vital step toward building a strong connection with your audience. Whether you’re a seasoned blogger, a small business owner, or just getting started, having a reliable way for visitors to reach you can make all the difference.
Remember, a well-placed contact form not only makes it easy for your audience to get in touch, but it also boosts your credibility and professionalism. Plus, it helps you gather valuable feedback, inquiries, and potential leads that can take your website to the next level.
So why wait? Dive in and start implementing your contact form today! With the simple steps we’ve outlined, you’re already well on your way to enhancing user experience and fostering interaction. If you have any questions or need further assistance, don’t hesitate to reach out. Happy WordPress-ing, and here’s to making those connections!

