Are you ready to supercharge your WordPress site but unsure where to start? Look no further! Installing a WordPress plugin might sound technical or intimidating, but it’s actually a breeze—especially when you have the right guidance. Plugins are like magic wands for your website, adding new features and functionality with just a few clicks. Whether you want to enhance your site’s SEO, improve security, or add stunning galleries, there’s a plugin out there to help you achieve your goals. In this beginner’s guide, we’ll walk you through the simple steps to install a WordPress plugin, making your site not only more powerful but also more enjoyable for your visitors. So, let’s roll up our sleeves and dive in! Your WordPress journey is about to get a whole lot more exciting!
Understanding the Basics of WordPress Plugins
When it comes to enhancing your WordPress site, plugins are your best friends. These powerful tools allow you to extend the functionality of your website without needing to write a single line of code. Whether you want to optimize your site’s SEO, improve its security, or add stunning galleries, there’s likely a plugin that fits the bill. The beauty of plugins lies in their diversity and adaptability to meet a wide range of needs.
Here’s a glance at some essential types of plugins you might consider:
- SEO Plugins: Optimize your content and improve your search engine rankings.
- Security Plugins: Protect your website from malicious attacks and vulnerabilities.
- Performance Plugins: Speed up your site and enhance user experience.
- Backup Plugins: Ensure your data is safe and easily recoverable.
- Social Media Plugins: Connect your site with various social media platforms to engage a larger audience.
Installing a plugin is typically a straightforward process, but understanding how they work can help you make informed choices. After all, not all plugins are created equal. It’s important to keep in mind factors such as updates, compatibility, and user ratings before deciding which ones to install. This way, you can avoid potential conflicts and ensure a smoother experience for both you and your visitors.
You might wonder how to find the right plugin for your needs. One effective method is to explore the official WordPress Plugin Directory. Here, you can search for plugins based on keywords, categories, or tags. Additionally, paying attention to the number of active installations and reviews can give you insight into the plugin’s reliability and performance.
| Plugin Type | Examples |
|---|---|
| SEO | Yoast SEO, All in One SEO Pack |
| Security | Wordfence, Sucuri Security |
| Performance | WP Super Cache, W3 Total Cache |
| Backup | UpdraftPlus, BackupBuddy |
| Social Media | Social Warfare, AddToAny |
Remember, the right plugins can greatly improve your site’s functionality and user experience. So take the time to research and choose wisely—you’ll be rewarded with a powerful, engaging website that meets your goals and serves your audience effectively.
Choosing the Right Plugin for Your Needs
When it comes to enhancing your WordPress site, choosing the right plugin can make all the difference. With thousands of options available, it’s essential to focus on your specific needs to ensure you select a plugin that will add value to your site without causing unnecessary complications.
Start by identifying the core functionality you require. Are you looking to improve SEO, add e-commerce capabilities, or enhance site security? List down your primary goals, and then search for plugins that align with those objectives. Here are some common categories to consider:
- SEO Plugins: Optimize your content and improve visibility on search engines.
- E-commerce Plugins: Transform your site into a fully functional online store.
- Security Plugins: Protect your site from malware and unauthorized access.
- Performance Plugins: Speed up your site and improve user experience.
Once you have a shortlist of plugins, it’s crucial to evaluate their reputation and reviews. Look for plugins with high ratings and positive feedback from users. A plugin that is frequently updated and has an active support community is usually a good sign of reliability. Checking these factors can save you from potential headaches in the future.
| Plugin Name | Rating | Last Updated |
|---|---|---|
| Yoast SEO | 4.9/5 | 1 week ago |
| WooCommerce | 4.8/5 | 2 weeks ago |
| Wordfence Security | 4.7/5 | 3 days ago |
Another factor to consider is the compatibility of the plugin with your current theme and other plugins. Sometimes, a fantastic plugin can conflict with existing elements on your site, leading to various issues. Look for documentation or forums to verify that the plugin is compatible with your WordPress version and setup.
don’t overlook the ease of use. A plugin that is complicated to set up and manage can deter you from maximizing its full potential. Seek out plugins that offer user-friendly interfaces and comprehensive documentation, making it easier to navigate through settings and features. This approach not only saves you time but also enhances your overall website experience.
Navigating the WordPress Dashboard for Plugin Installation
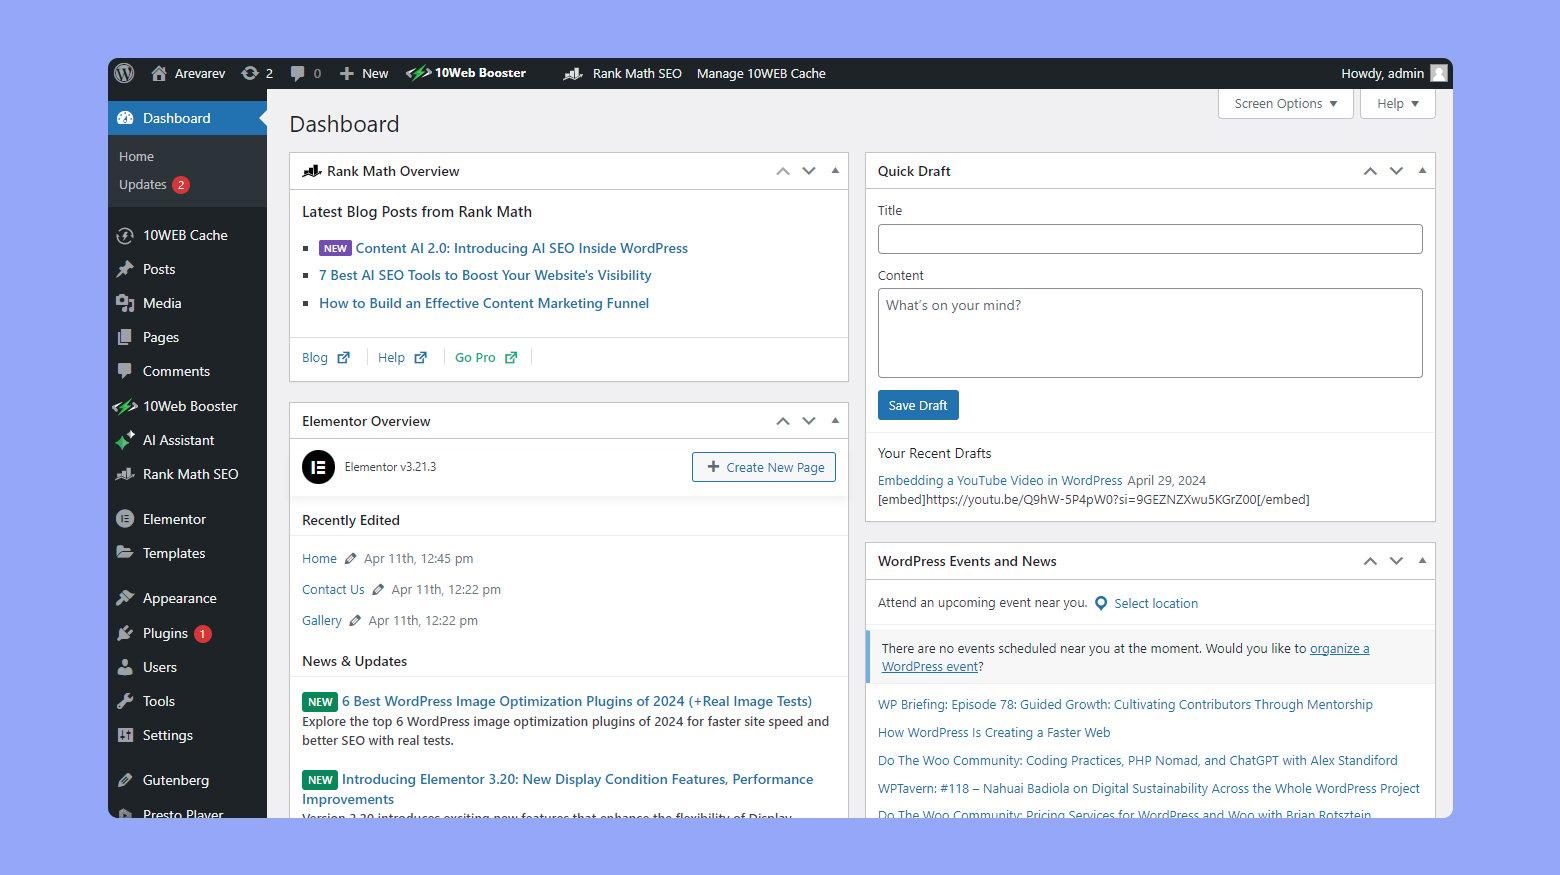
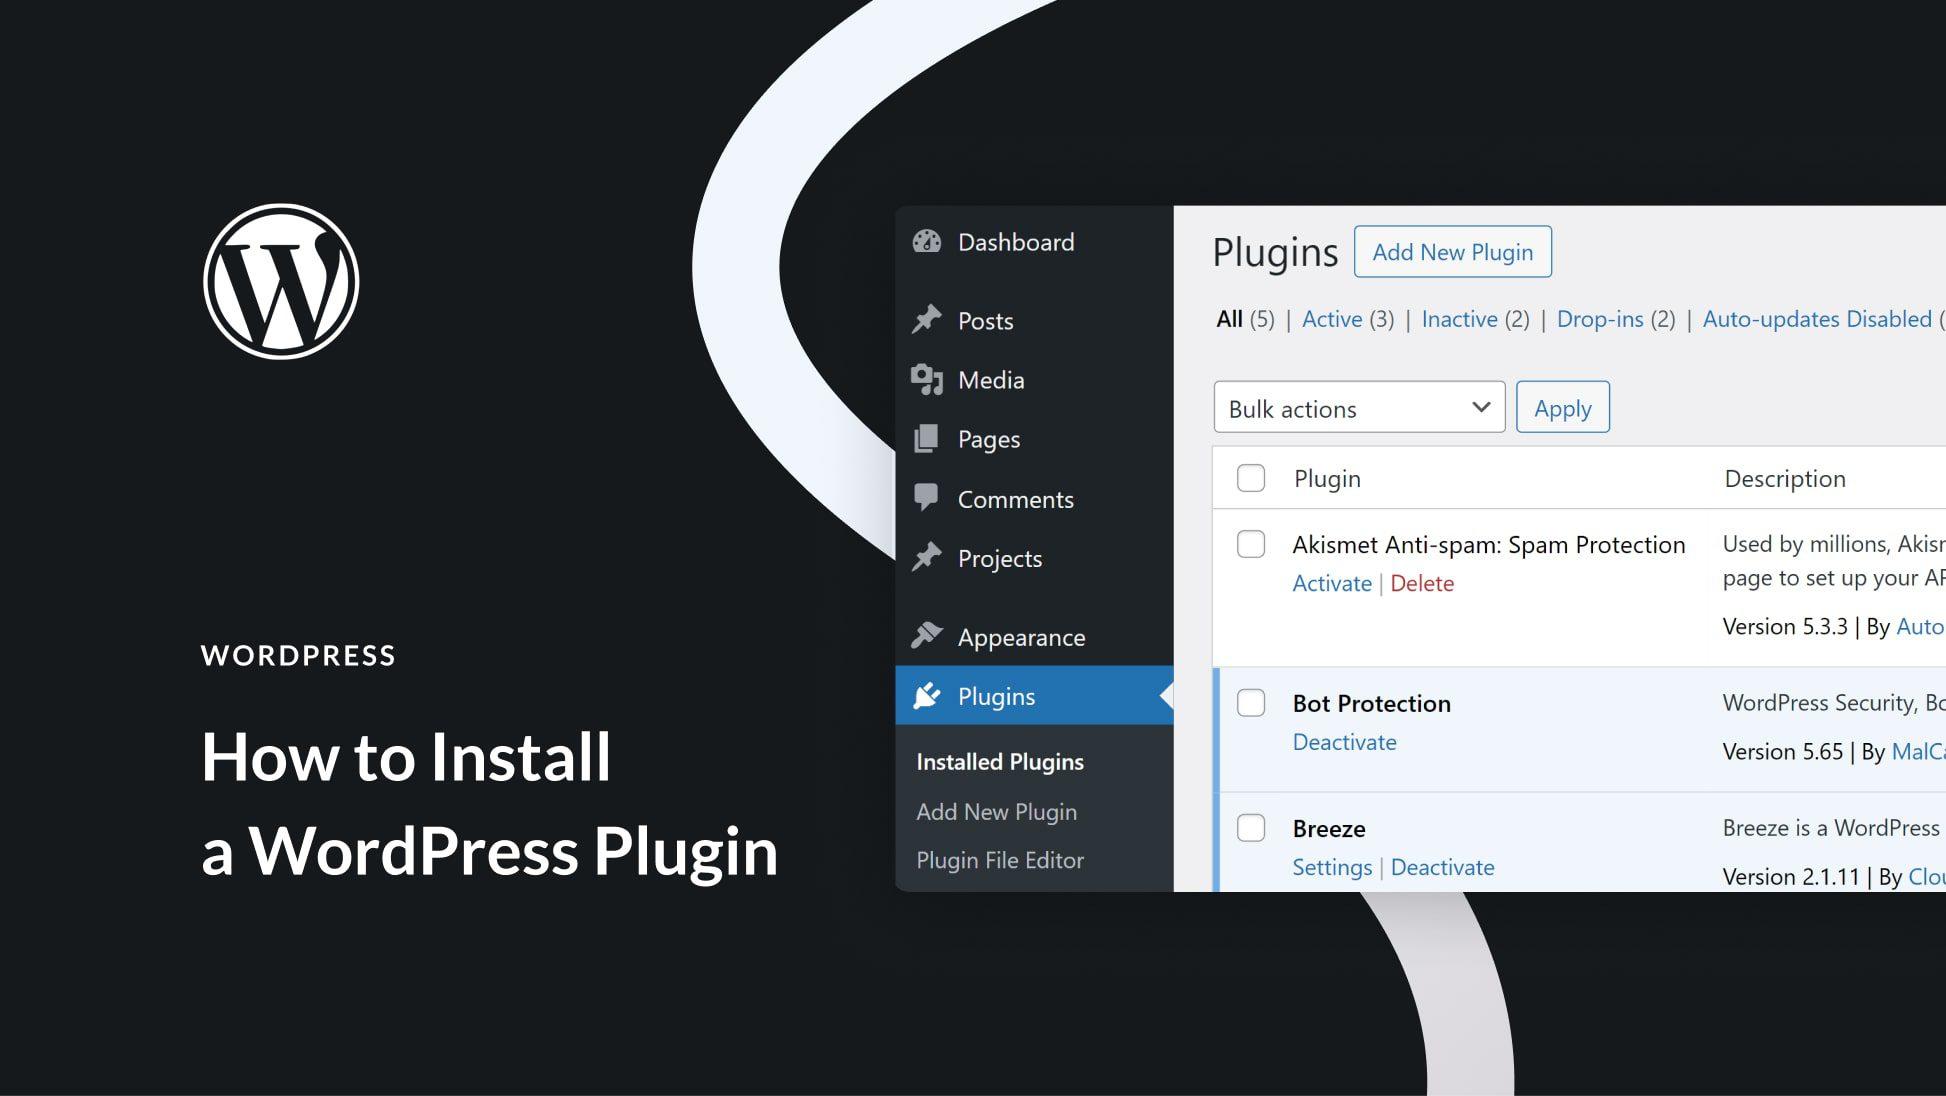
Once you’re logged into your WordPress admin area, you’re greeted by the vibrant dashboard that serves as the command center for your site. To get started with plugin installation, navigate to the Plugins section on the left-hand menu. This is where the magic begins!
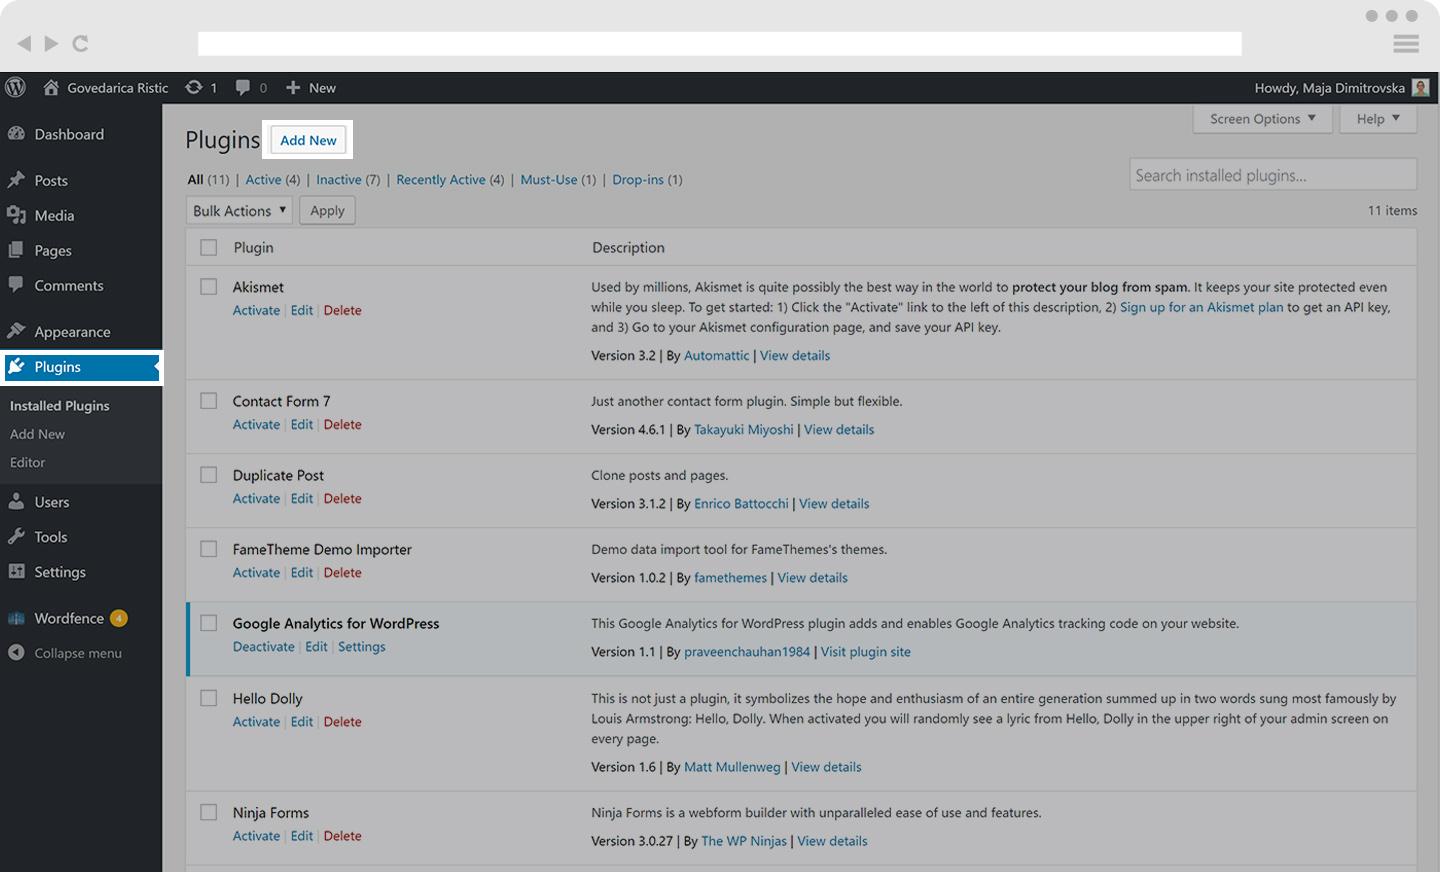
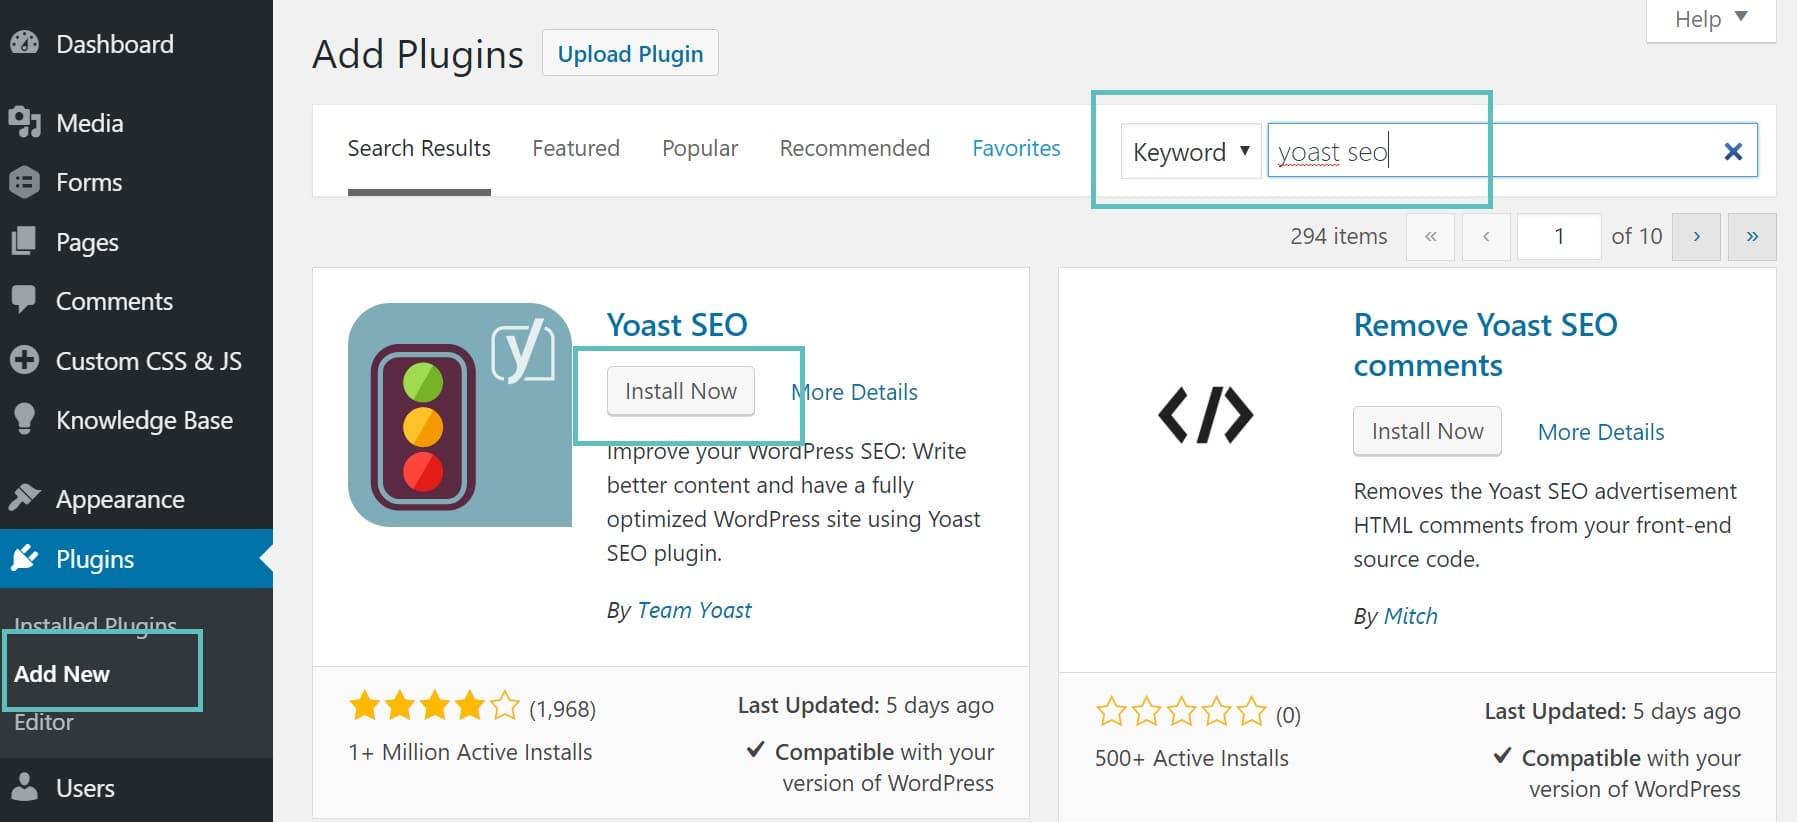
In the Plugins section, you will find two main tabs: Installed Plugins and Add New. The Installed Plugins tab displays all the plugins currently active on your site, giving you a quick overview of what’s working behind the scenes. If you want to tweak or deactivate any existing plugins, this is the place to do it. But let’s focus on adding new plugins; simply click on the Add New button to explore a world of possibilities!
Upon entering the Add New interface, you’re greeted with a search bar where you can look for specific plugins or browse through popular, recommended, and favorite plugins. This is where you can unleash your creativity! For example, if you need a contact form, just type “contact form” in the search bar, and voila—you’ll see various options at your fingertips.
When you find a plugin that piques your interest, you can take a closer look by clicking on the Details link. This will provide you with a description, ratings, and a list of features. Don’t forget to check the last updated date and compatibility with your version of WordPress to ensure everything runs smoothly!
Once you’ve made your choice, click the Install Now button. The plugin will be downloaded and installed automatically. After installation, the button changes to Activate. Click it, and your new plugin is ready to work its wonders on your site!
| Plugin Name | Functionality | Rating |
|---|---|---|
| Contact Form 7 | Easy-to-use contact forms | 4.5/5 |
| Yoast SEO | SEO optimization | 4.9/5 |
| WooCommerce | eCommerce functionality | 4.8/5 |
And there you have it! Navigating the dashboard to install plugins is straightforward and empowering. Take some time to explore and experiment; each plugin adds its unique spin to your site’s functionality and performance, helping you create a truly personalized online presence.
Step-by-Step Guide to Installing Plugins Manually
Installing plugins manually can seem intimidating at first, but with a little guidance, you’ll find it’s a straightforward process. Whether you’re troubleshooting an issue with automatic updates or simply prefer to have direct control over the installation, knowing how to install plugins manually is a valuable skill for any WordPress user.
To begin, you’ll need to download the plugin file. Most plugins are available in a .zip format from the WordPress Plugin Repository or third-party websites. Here’s how to do it:
- Navigate to the plugin’s page on the WordPress Plugin Repository.
- Click the “Download” button to save the .zip file to your computer.
- Make sure to choose a reputable source to avoid security risks.
Once you have the .zip file, the next step is to upload it to your WordPress dashboard:
- Log in to your WordPress admin panel.
- Go to Plugins > Add New.
- Click on the Upload Plugin button at the top of the page.
- Select the .zip file you downloaded and click Install Now.
After the installation process is complete, you’ll see a success message. From there, you can activate the plugin immediately or navigate to the Plugins section later to activate it. Here’s a simple checklist for what to do next:
| Action | Description |
|---|---|
| Activate Plugin | Head to the Plugins menu and click Activate. |
| Configure Settings | Check if the plugin has settings to configure, usually found under the Settings menu. |
| Check for Updates | Ensure your plugin is up to date by checking the Installed Plugins section. |
By following these steps, you’ll not only enhance your site’s functionality but also gain confidence in managing your WordPress plugins. Remember, manual installation can give you more control and ensures that you’re only adding the features you need without the hassle of automatic updates.
Exploring the One-Click Installation Process
One-click installation has revolutionized the way we add functionality to our WordPress sites, making it incredibly easy for users of all skill levels. This streamlined process eliminates the traditional complexities of plugin installation, allowing you to enhance your site with just a few clicks. Whether you’re looking to boost SEO, add social sharing features, or improve site security, the one-click installation process is your gateway to effortless enhancements.
To utilize this feature, simply navigate to the Plugins section in your WordPress dashboard. From there, you can either browse the Plugin Repository or search for a specific plugin using the search bar. Once you’ve found the plugin that meets your needs, click on the Install Now button. WordPress will handle the heavy lifting, managing the download and installation for you.
After installation, you will see an option to Activate the plugin. This step is crucial as it makes the plugin functional on your site. Some plugins may also require additional configuration before they can operate effectively. Luckily, most plugins come with clear instructions to guide you through any necessary settings.
Here’s a quick overview of the advantages of one-click installation:
- User-Friendly: Ideal for beginners who may not be familiar with FTP or code.
- Time-Saving: Reduces the time and effort needed to enhance your site.
- Automatic Updates: Many plugins offer automatic updates, ensuring your site remains secure and up to date.
If you ever encounter issues during the installation process, don’t worry! Most plugins have dedicated support documentation and active user communities where you can find solutions. Moreover, keeping your plugins updated is essential for maintaining your website’s performance and security.
| Plugin Category | Examples | Purpose |
|---|---|---|
| SEO | Yoast SEO, All in One SEO | Improve search engine visibility |
| Security | Wordfence, Sucuri | Protect your website from threats |
| Performance | WP Super Cache, W3 Total Cache | Enhance site speed and performance |
Activating and Configuring Your Newly Installed Plugin
After successfully installing your new plugin, the next crucial step is to activate and configure it to suit your website’s needs. Activating a plugin in WordPress is a straightforward process, but the configuration may vary depending on the plugin’s functionality. Here’s how to get your plugin up and running:
To activate your newly installed plugin, follow these simple steps:
- Navigate to the Plugins section in your WordPress dashboard.
- Locate the plugin you just installed in the list of available plugins.
- Click on the Activate link below the plugin name.
Once activated, you will often see a new menu item appear in your dashboard, allowing you to access the plugin’s settings. Some plugins may also redirect you to a configuration page immediately after activation.
Now, let’s talk about configuring your plugin. Most plugins come with their own set of options that you can customize according to your preferences. Here are some steps you might follow:
- Find the plugin’s settings page, which is usually located in the sidebar menu.
- Review the options available—these could include adjusting functionalities, appearance settings, or specific features.
- Make the necessary changes, ensuring they align with your website’s goals.
- Don’t forget to save your changes by clicking the Save Changes button at the bottom of the settings page.
Some plugins even offer detailed documentation or help sections that guide you through the configuration process. It’s worth taking a few moments to check these resources, as they can provide valuable insights into maximizing the plugin’s potential.
| Plugin Type | Common Configuration Options |
|---|---|
| SEO Plugins | Meta Tags, Sitemap Settings, Social Media Integration |
| Security Plugins | Firewall Settings, Malware Scans, Login Protection |
| Performance Plugins | Cache Settings, Minification Options, CDN Integration |
Don’t hesitate to explore the settings thoroughly! Each plugin is designed to enhance your site’s functionality, so adjusting the settings to fit your specific needs can make a significant difference in overall performance. Happy configuring!
Troubleshooting Common Plugin Installation Issues
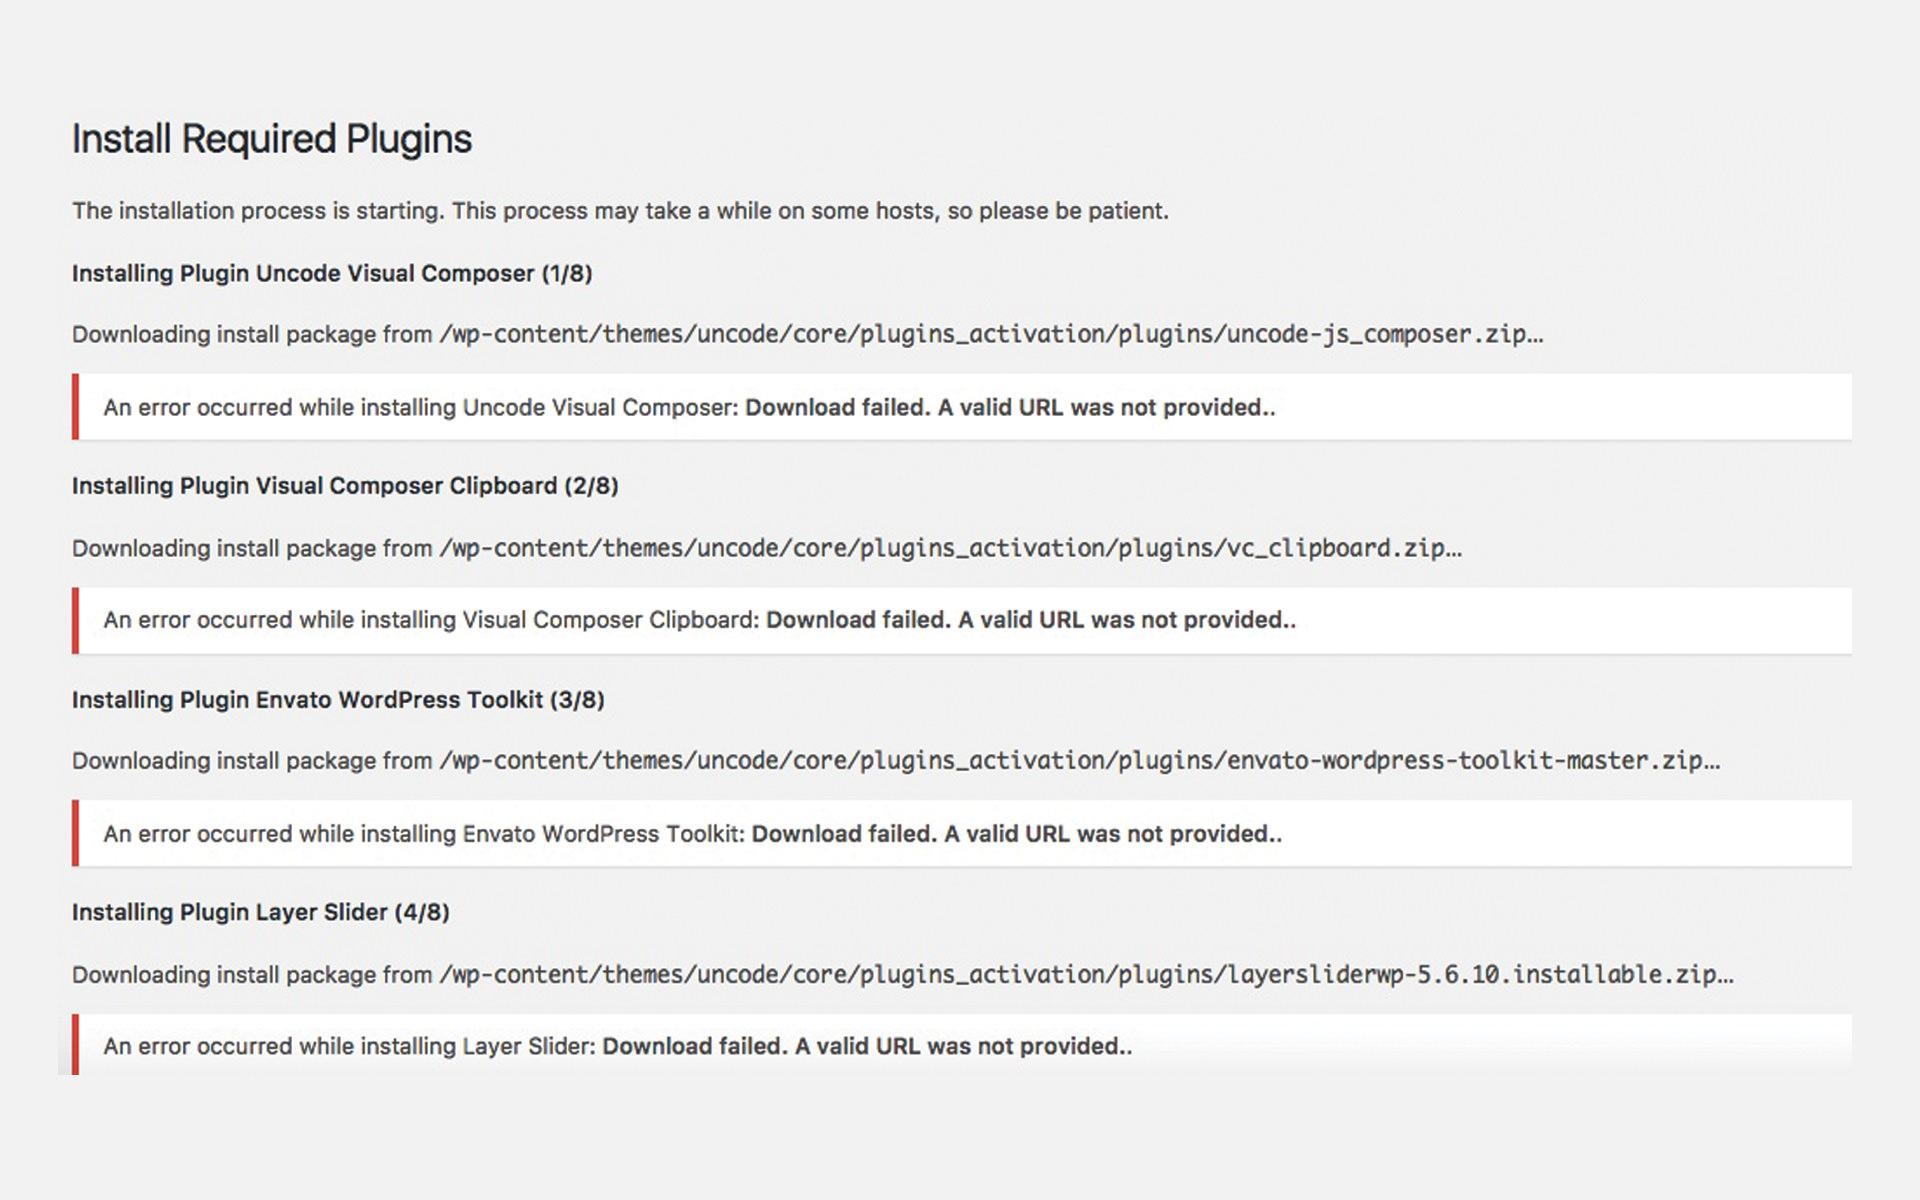
Encountering problems while installing a plugin can be frustrating, but don’t worry! Many common issues have straightforward solutions. Here’s a breakdown of some typical hurdles and how to overcome them.
1. Compatibility Issues: One of the main reasons a plugin installation fails is incompatibility with your current version of WordPress. Always check the plugin’s requirements before installation. If you find that your version is outdated, consider:
- Updating WordPress to the latest version.
- Searching for an alternative plugin with better compatibility.
2. Memory Limit Exceeded: Sometimes, you might encounter a “memory limit exceeded” error. This typically occurs when your hosting environment doesn’t allocate enough memory for plugin operations. To resolve this, you can:
- Increase the memory limit by editing the
wp-config.phpfile: - Add the line:
define('WP_MEMORY_LIMIT', '256M');
3. File Permissions: Incorrect file permissions can prevent plugins from being uploaded or activated. Ensure the file permissions for your WordPress directories are correctly set. Here’s a quick reference:
| Folder/File | Recommended Permission |
|---|---|
| Folders | 755 |
| Files | 644 |
4. Conflicts with Other Plugins: Occasionally, installing a new plugin can create conflicts with existing plugins. If you suspect this is the case:
- Temporarily deactivate all other plugins and try installing the new one again.
- Re-activate plugins one by one to identify the conflicting plugin.
5. Server Configuration: Sometimes, the server itself can be the issue. If you continue to experience problems:
- Check your server settings with your hosting provider.
- Ensure that your server supports the required PHP version for the plugin.
By following these troubleshooting steps, you can tackle most common plugin installation issues effectively. Remember that persistence is key, and with a bit of patience, you’ll get that plugin up and running in no time!
Keeping Your Plugins Updated for Optimal Performance
Regularly updating your plugins is crucial for ensuring your WordPress site runs smoothly. Outdated plugins can lead to security vulnerabilities, compatibility issues, and performance slowdowns. When you keep your plugins up to date, you’re not only enhancing your site’s functionality but also protecting it from potential threats. Here are several compelling reasons to stay on top of your plugin updates:
- Enhanced Security: Many updates include security patches that fix vulnerabilities. Failing to update can leave your site open to attacks.
- Performance Improvements: Developers often optimize their code in updates. New versions can make your site faster and more efficient.
- Compatibility: As WordPress core updates roll out, older plugins might not function correctly. Keeping them updated ensures smooth operation.
- New Features: Updates can come with exciting new features that enhance your site’s functionality and user experience.
To make it easier for you to manage your plugin updates, consider creating a maintenance schedule. This schedule can include:
| Task | Frequency | Notes |
|---|---|---|
| Check for plugin updates | Weekly | Review all installed plugins. |
| Backup site | Before updates | Always back up your site before making changes. |
| Test updates on staging | As needed | Ensure compatibility before going live. |
| Review plugin performance | Monthly | Remove any slow or redundant plugins. |
Don’t forget that you can enable automatic updates for your plugins in your WordPress settings. This feature ensures that your plugins are always up to date without manual intervention. However, it’s important to monitor updates regularly, as sometimes new versions can introduce unexpected issues. Keeping an eye on your site after updates is essential to catch any problems early on.
if a plugin is no longer maintained by its developer, it might be time to look for alternatives. Unmaintained plugins can become a liability, leading to potential security risks or conflicts with newer versions of WordPress. By keeping your plugins updated and replacing outdated ones, you’ll maintain a healthy and efficient website that provides an excellent experience for your visitors.

Maximizing Your Site’s Potential with the Best Plugins
When it comes to enhancing your WordPress site, choosing the right plugins can make all the difference. These powerful tools can help you streamline processes, improve user experience, and even boost your site’s search engine rankings. But with thousands of plugins available, how do you know which ones will truly maximize your site’s potential?
First and foremost, identify your site’s specific needs. Do you want to enhance SEO, improve performance, or add functionality? Consider the following categories of plugins that can elevate your website:
- SEO Plugins: Tools like Yoast SEO and All in One SEO Pack can help you optimize your content for search engines.
- Performance Plugins: Caching solutions such as WP Super Cache or W3 Total Cache can significantly speed up your site.
- Security Plugins: Protect your site with options like Wordfence or Sucuri Security to prevent unauthorized access.
- Design Plugins: Page builder plugins such as Elementor and Beaver Builder make creating stunning layouts easy.
Next, consider the quality of the plugins you choose. Not all plugins are created equal, and the wrong one can lead to site performance issues or conflicts with other tools. Look for plugins that are:
- Regularly updated
- Compatible with your version of WordPress
- Highly rated and have good user reviews
- Backed by a reliable support team
It’s also a good idea to limit the number of plugins you install. While it might be tempting to add every tool that catches your eye, too many plugins can slow down your site and create security vulnerabilities. Aim for a balance between functionality and performance.
stay engaged with the WordPress community to discover new and trending plugins. Reading blogs, participating in forums, or joining social media groups can keep you informed about innovative plugins that could enhance your site even more. Remember, the right plugins are essential to unlocking your site’s full potential!
Tips for Managing and Deactivating Plugins Effectively
Managing your WordPress plugins effectively is crucial for maintaining site performance and security. Here are some practical tips to help you stay on top of your plugins:
- Regularly Review Installed Plugins: Set a schedule to review your plugins every few months. Look for plugins that are outdated, unused, or no longer supported by their developers. This will help you keep your site lean and fast.
- Prioritize Security: Always keep your plugins updated to the latest versions. Outdated plugins can be a major security risk. Enable automatic updates where possible, but also check for updates regularly.
- Test Before Activating: If you’re considering adding a new plugin, test it out on a staging site first. This allows you to evaluate its impact on your site’s performance and check for any potential conflicts with existing plugins.
When it comes to deactivating plugins, follow these steps to do so effectively:
- Backup Your Site: Before deactivating any plugin, ensure you have a complete backup of your site. This way, you can easily restore it if something goes wrong.
- Deactivate One at a Time: If you’re troubleshooting issues, deactivate plugins one at a time. This will help you identify which plugin might be causing problems without affecting your entire site.
- Consider Alternative Solutions: If a plugin isn’t performing well or is outdated, consider searching for alternative plugins that provide similar functionality but with better support and features.
Here’s a quick reference table to help you decide whether to keep or deactivate a plugin:
| Criteria | Keep Plugin | Deactivate Plugin |
|---|---|---|
| Frequency of Updates | Regular updates | No updates for 6+ months |
| User Reviews | Positive feedback | Consistent negative feedback |
| Site Performance | No impact on speed | Significant slowdown |
By following these tips, you can ensure your WordPress site remains efficient and secure while enhancing its overall functionality. Remember, less can often be more when it comes to plugins!
Frequently Asked Questions (FAQ)
Q&A: How to Install a WordPress Plugin? (Beginner’s Guide)
Q: What is a WordPress plugin?
A: Great question! A WordPress plugin is like an app for your website. It adds extra features and functionality—from contact forms and SEO tools to social media integration. Think of it as a way to customize your WordPress site without needing to code!
Q: Why should I install a plugin?
A: Plugins can drastically enhance your website’s performance and usability. Whether you want to improve your site’s speed, add security layers, or create beautiful galleries, there’s likely a plugin that fits your needs. Essentially, they help you get more out of your website without requiring advanced technical skills.
Q: How do I find the right plugin for my needs?
A: Start by identifying what you want to achieve with your website. Do you need better SEO? Look for an SEO plugin like Yoast or Rank Math. Need a way for visitors to contact you? Try Contact Form 7. The WordPress Plugin Directory is a fantastic resource. Just search for keywords related to your needs, and you’ll find a ton of options!
Q: What’s the first step to install a WordPress plugin?
A: First, you need to log into your WordPress dashboard. Once you’re in, navigate to the “Plugins” section on the left sidebar. Click on “Add New,” and you’ll be taken to a page where you can browse or search for plugins.
Q: Can you walk me through the installation process?
A: Absolutely! Here’s a quick rundown:
- Search for the Plugin: Type the name or functionality you’re looking for in the search bar.
- Install the Plugin: Once you find the plugin you want, click the “Install Now” button.
- Activate the Plugin: After installation, you’ll see an “Activate” button. Click it to enable the plugin on your site.
And voila! You’ve installed your first plugin!
Q: Are there any tips for selecting a good plugin?
A: Definitely! Look for plugins with high ratings and positive reviews. Check how frequently they are updated—this is crucial for security and compatibility. Also, consider whether the plugin has good documentation and support, which can be invaluable if you run into issues.
Q: Do I need to worry about the number of plugins I install?
A: Yes, it’s wise to be cautious. While plugins can add great functionality, having too many can slow down your site and create security vulnerabilities. Aim for quality over quantity. Regularly review and deactivate any plugins you’re not using.
Q: What if I run into problems after installing a plugin?
A: Don’t panic! If you experience issues, you can easily deactivate the plugin by going back to the Plugins section and clicking “Deactivate.” If the problem persists, consider reaching out to the plugin’s support team or checking online forums for solutions. Most of the time, you’re not alone in facing an issue!
Q: Is there anything else I should remember when using plugins?
A: Always keep your plugins updated. Developers often release updates to improve functionality and security. Also, regularly back up your website before installing new plugins, just in case something goes awry. It’s a simple precaution that can save you a lot of headaches!
Q: I’m excited to get started! Any last words of encouragement?
A: Go for it! Installing and using plugins can transform your WordPress site and make it truly your own. Remember, it’s a learning process, and you’ll get better with practice. Embrace the journey, experiment a little, and soon you’ll feel like a WordPress pro!
Conclusion: Installing a WordPress plugin is not just a technical task; it’s a step towards creating a more dynamic, engaging, and functional website. So dive in and start exploring the endless possibilities!
Key Takeaways
And there you have it! Installing a WordPress plugin is not just a task reserved for tech wizards or seasoned developers; it’s something you can easily master, even if you’re just starting out. With the steps we’ve covered, you now have the tools to enhance your website’s functionality and unlock its true potential.
Remember, each plugin is like a new tool in your toolkit—whether it’s for improving SEO, boosting site speed, or adding social media buttons, there’s a plugin out there ready to help you achieve your goals. So don’t hesitate! Dive into the WordPress repository, explore the options, and start experimenting with plugins that can elevate your site.
If you run into any hiccups along the way, don’t worry. The WordPress community is vibrant and supportive, filled with resources to help you troubleshoot and learn. So roll up your sleeves, get your hands dirty, and make your WordPress site truly yours.
Happy blogging, and may your plugin journey be filled with creativity and success! If you found this guide helpful, share it with fellow WordPress beginners and help spread the knowledge. After all, we’re all in this together!


